How to launch Ghost CMS on AWS EC2 with HTTPS connection support in 15 minutes

The configuration that was used requires minimal additional infrastructure and little support efforts.
Domain Registration
Go to AWS Console. Open Route53. Choose Registered Domains from the side menu. Press Register Domain button:
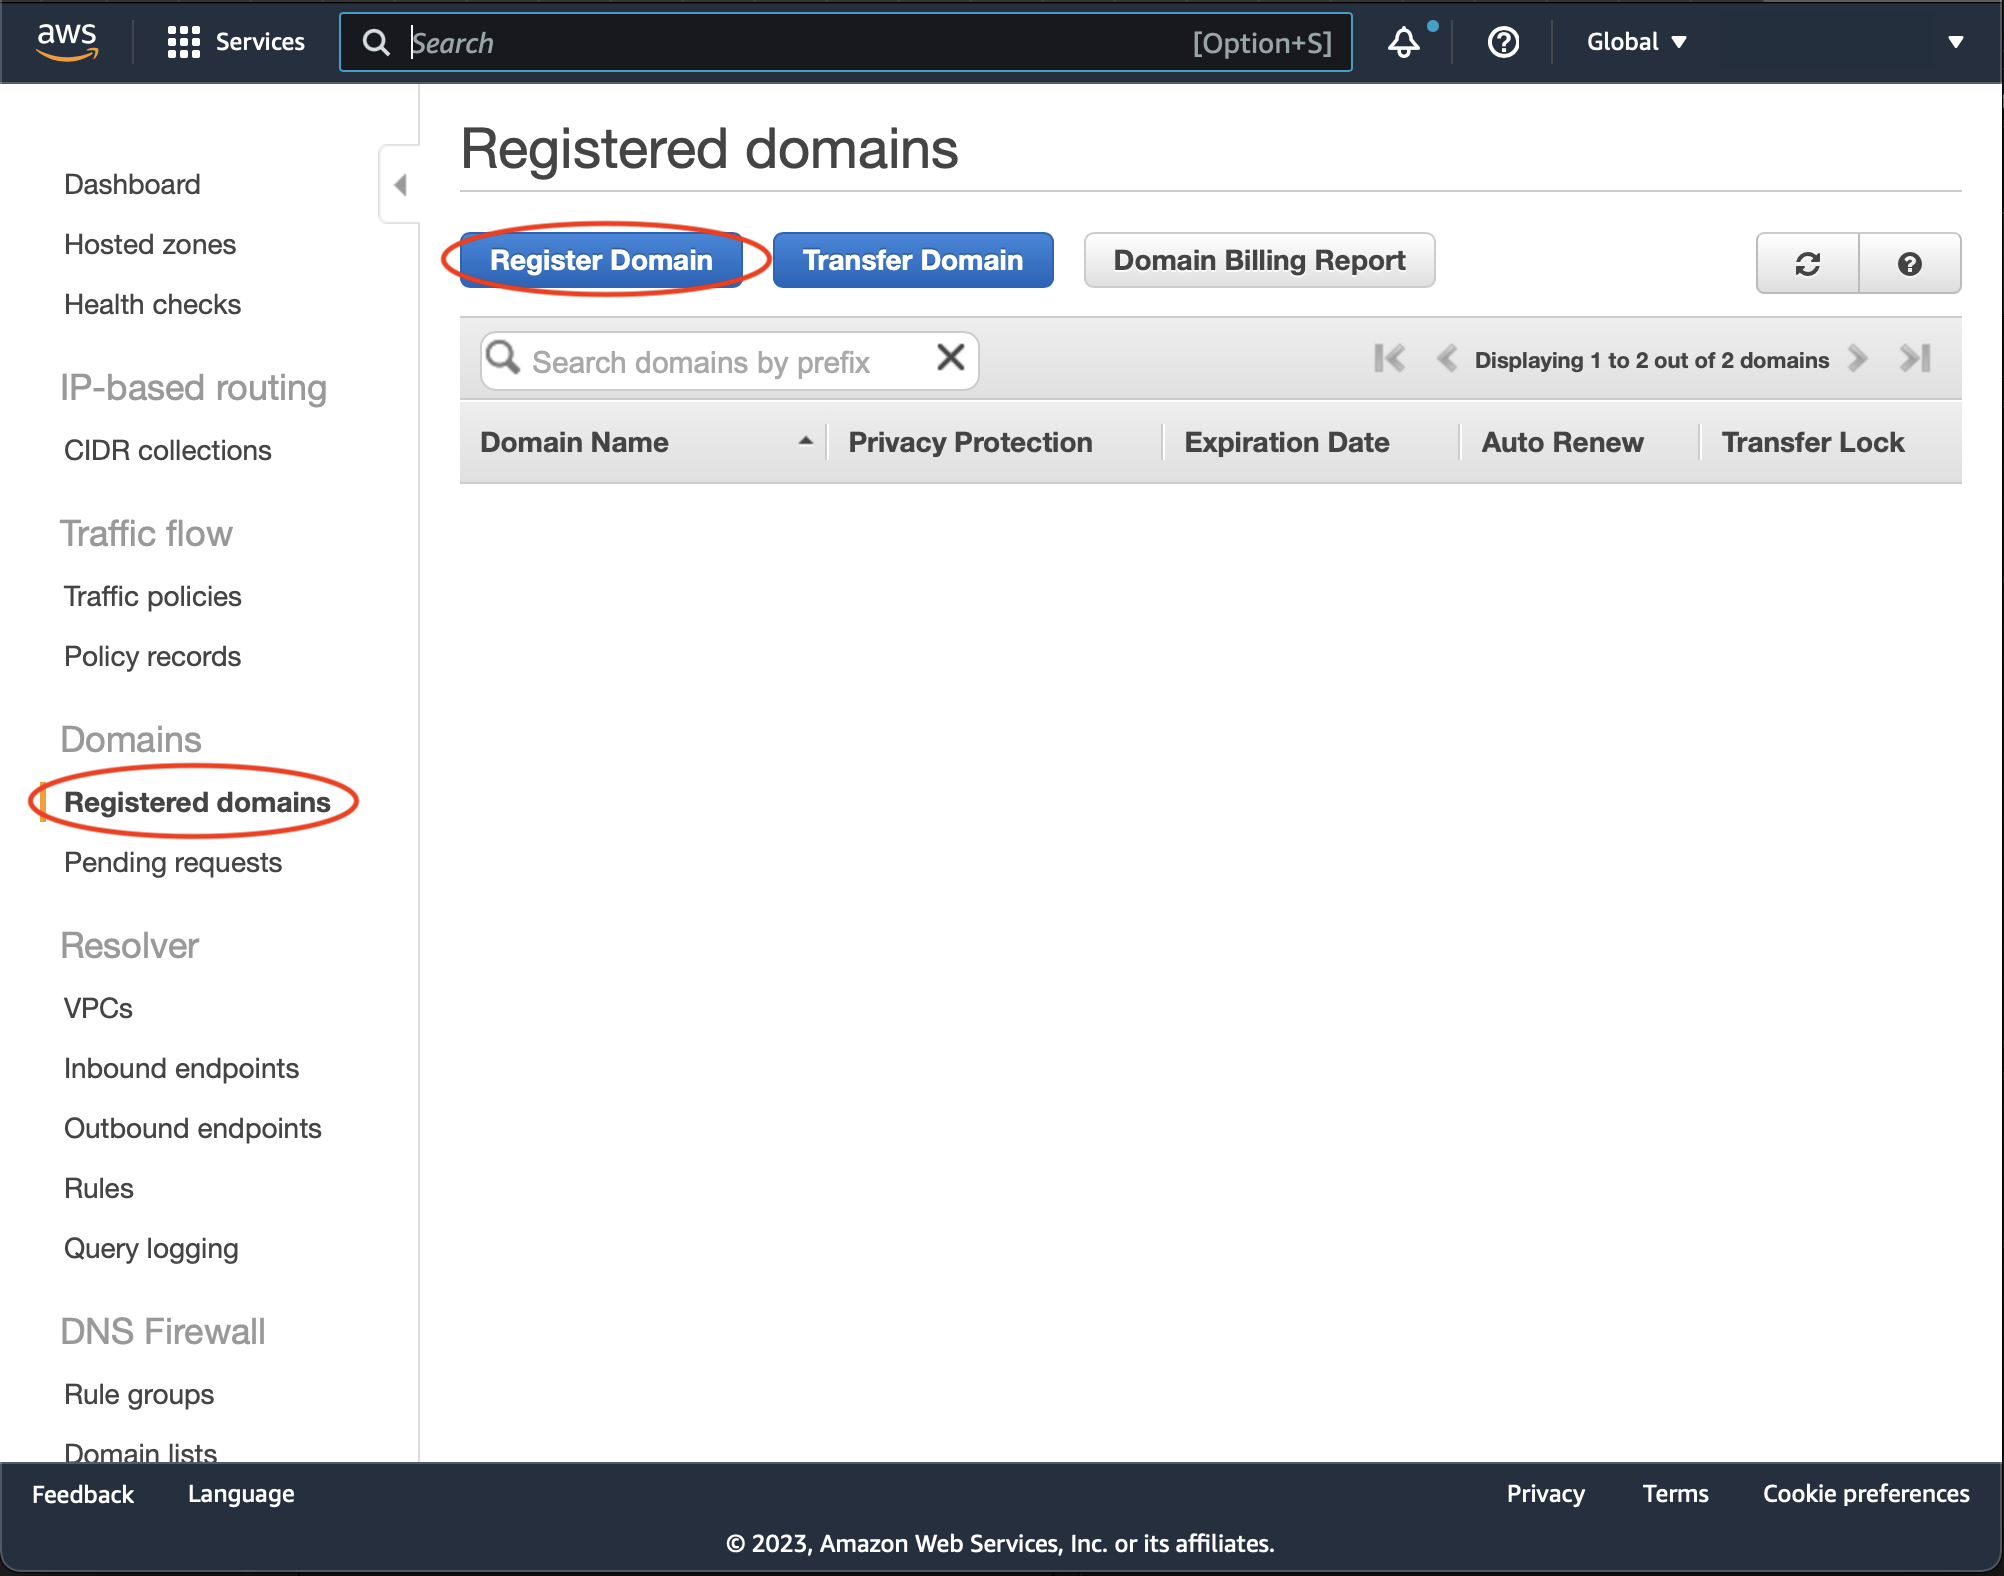
Follow the steps to complete the registration.
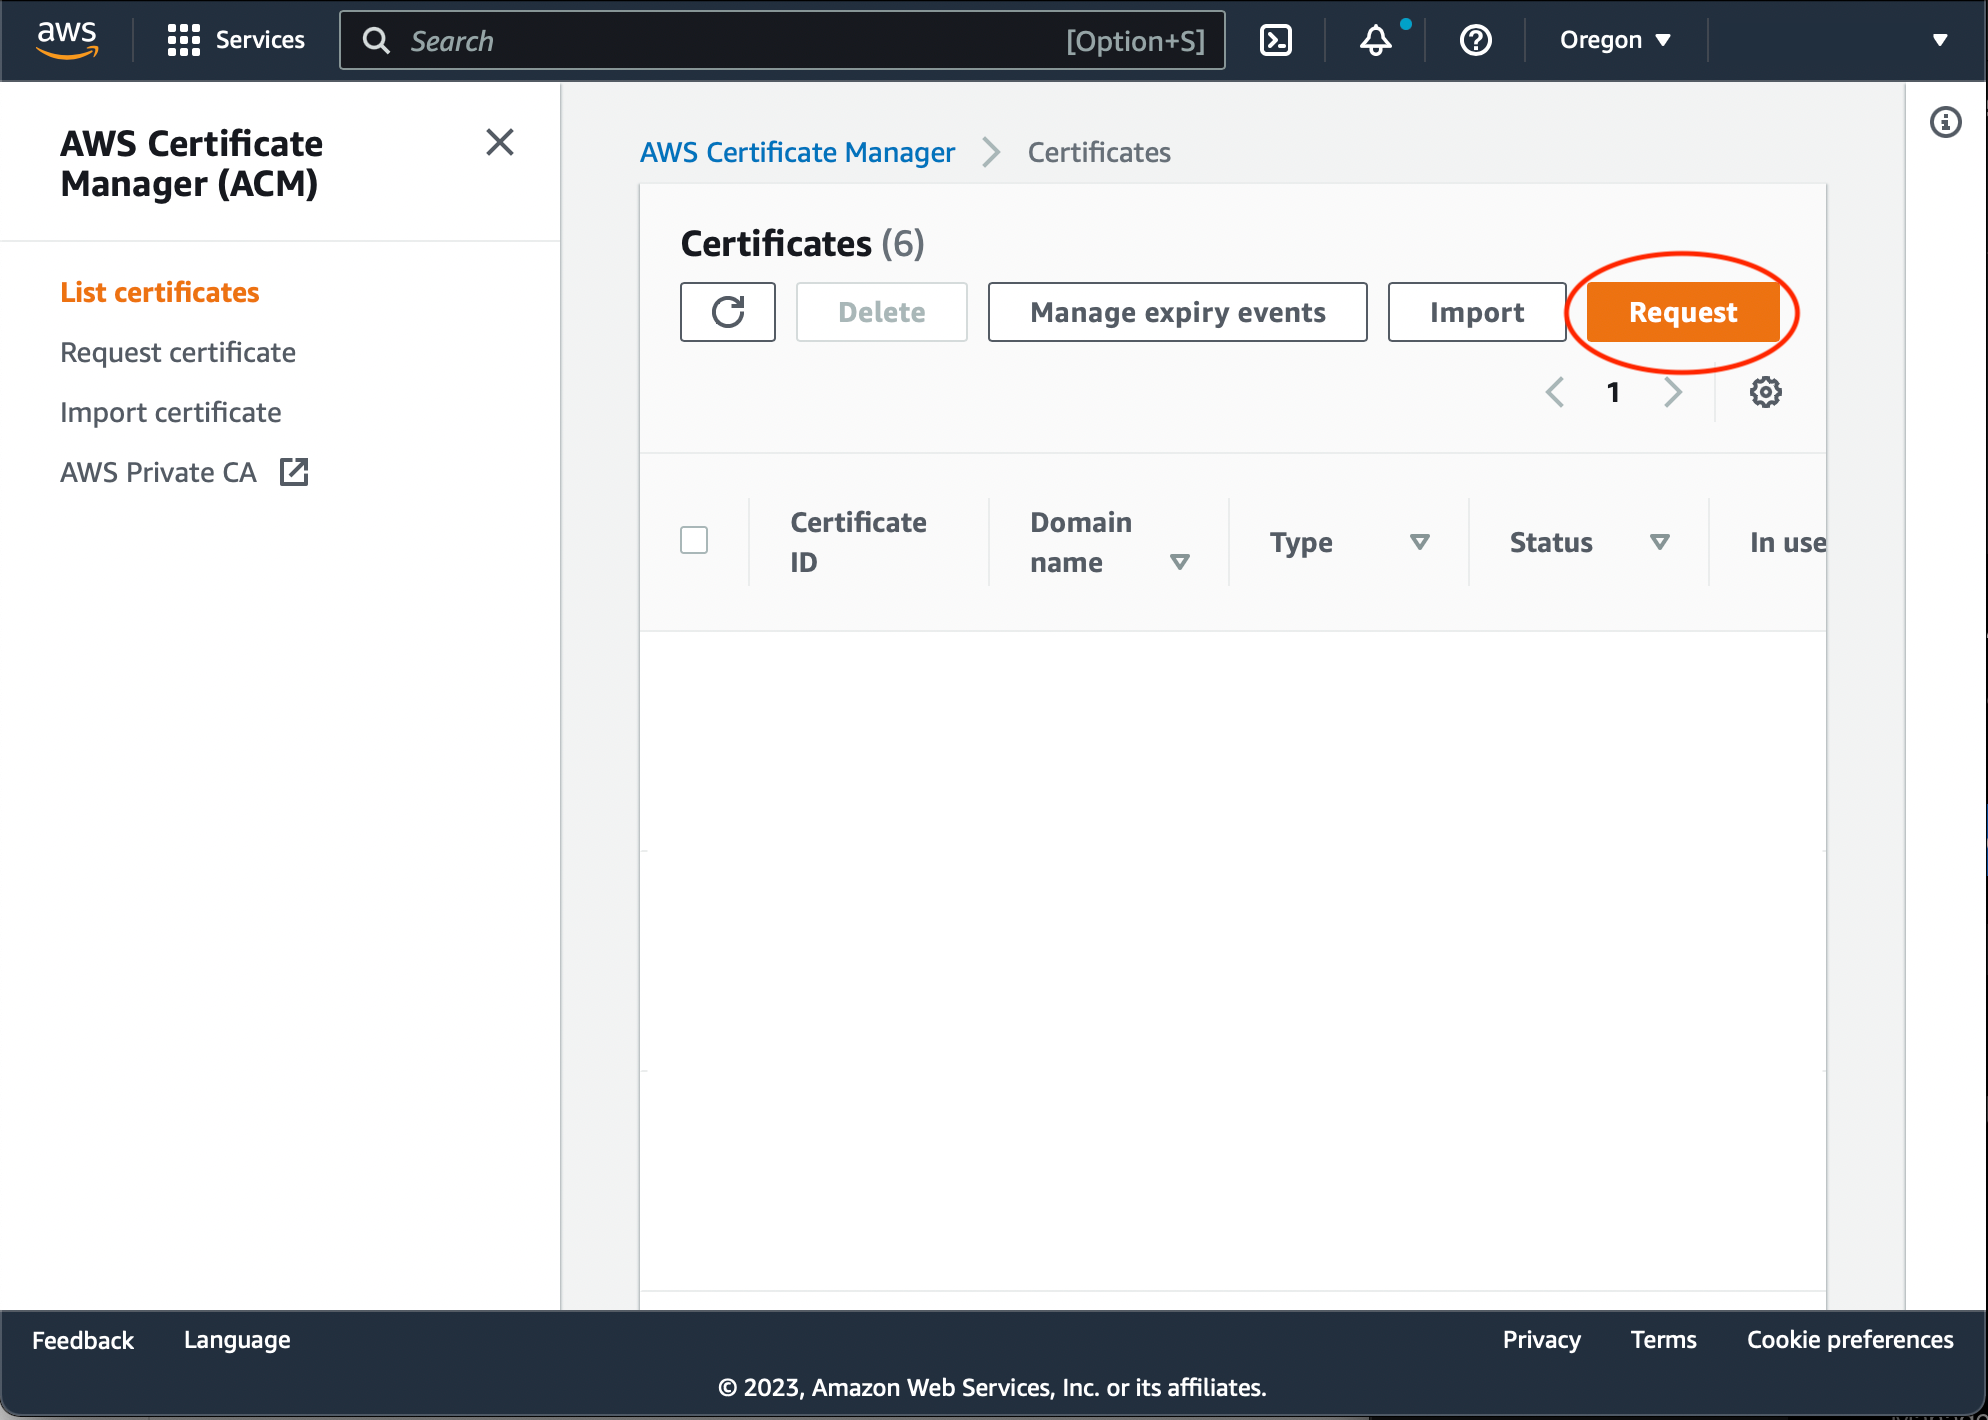
Issue TLS Certificate
Go to AWS Certificate Manager. Press Request button
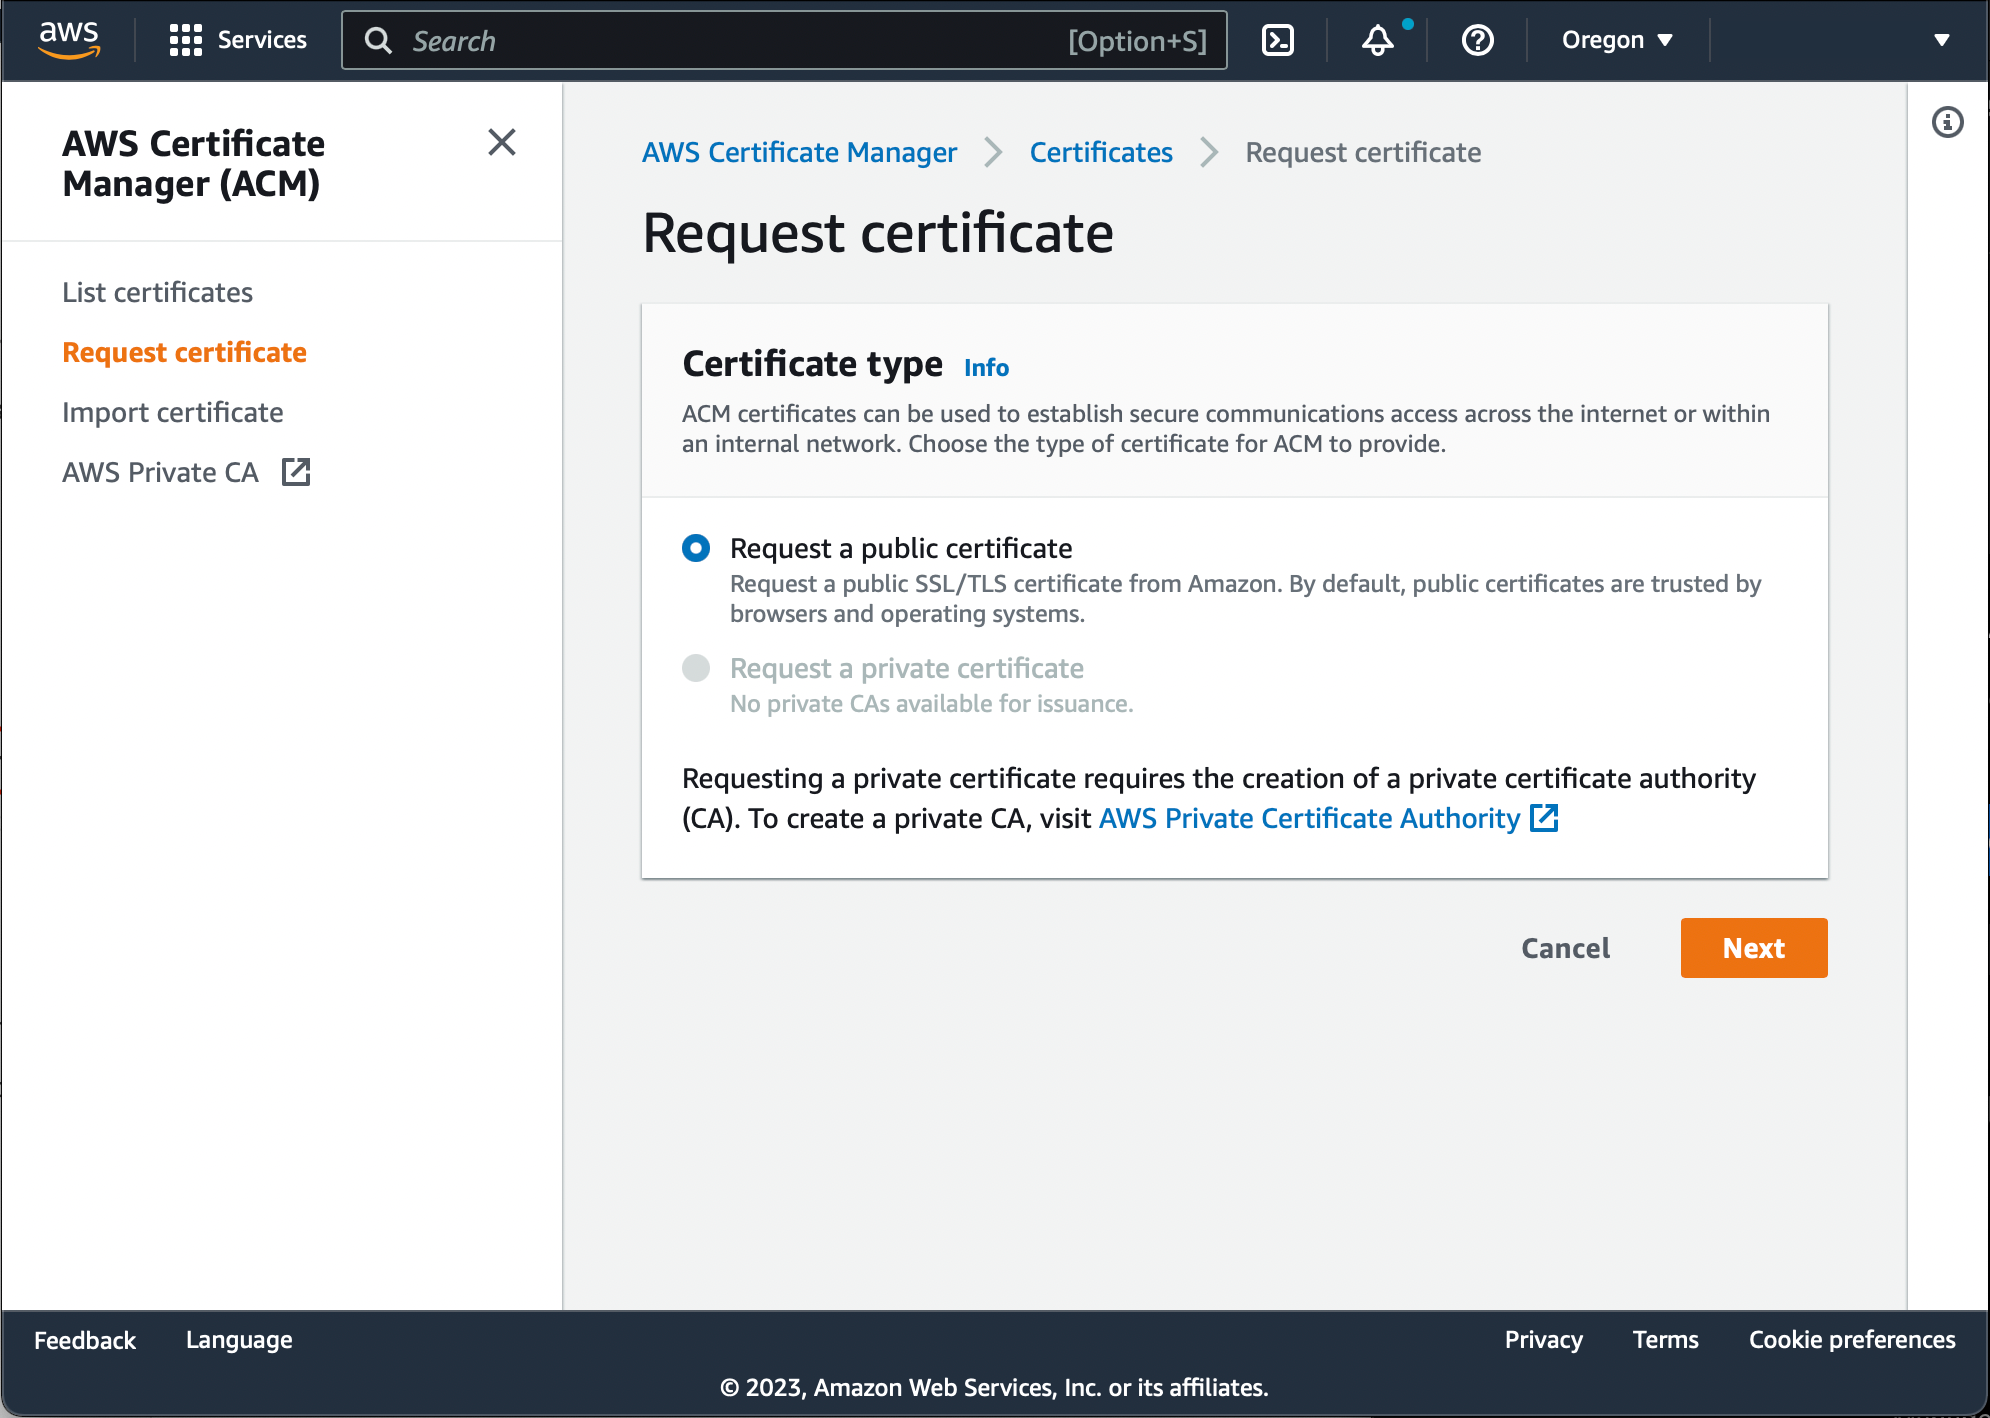
Make sure the 'Request a public certificate' option is selected and press Next:
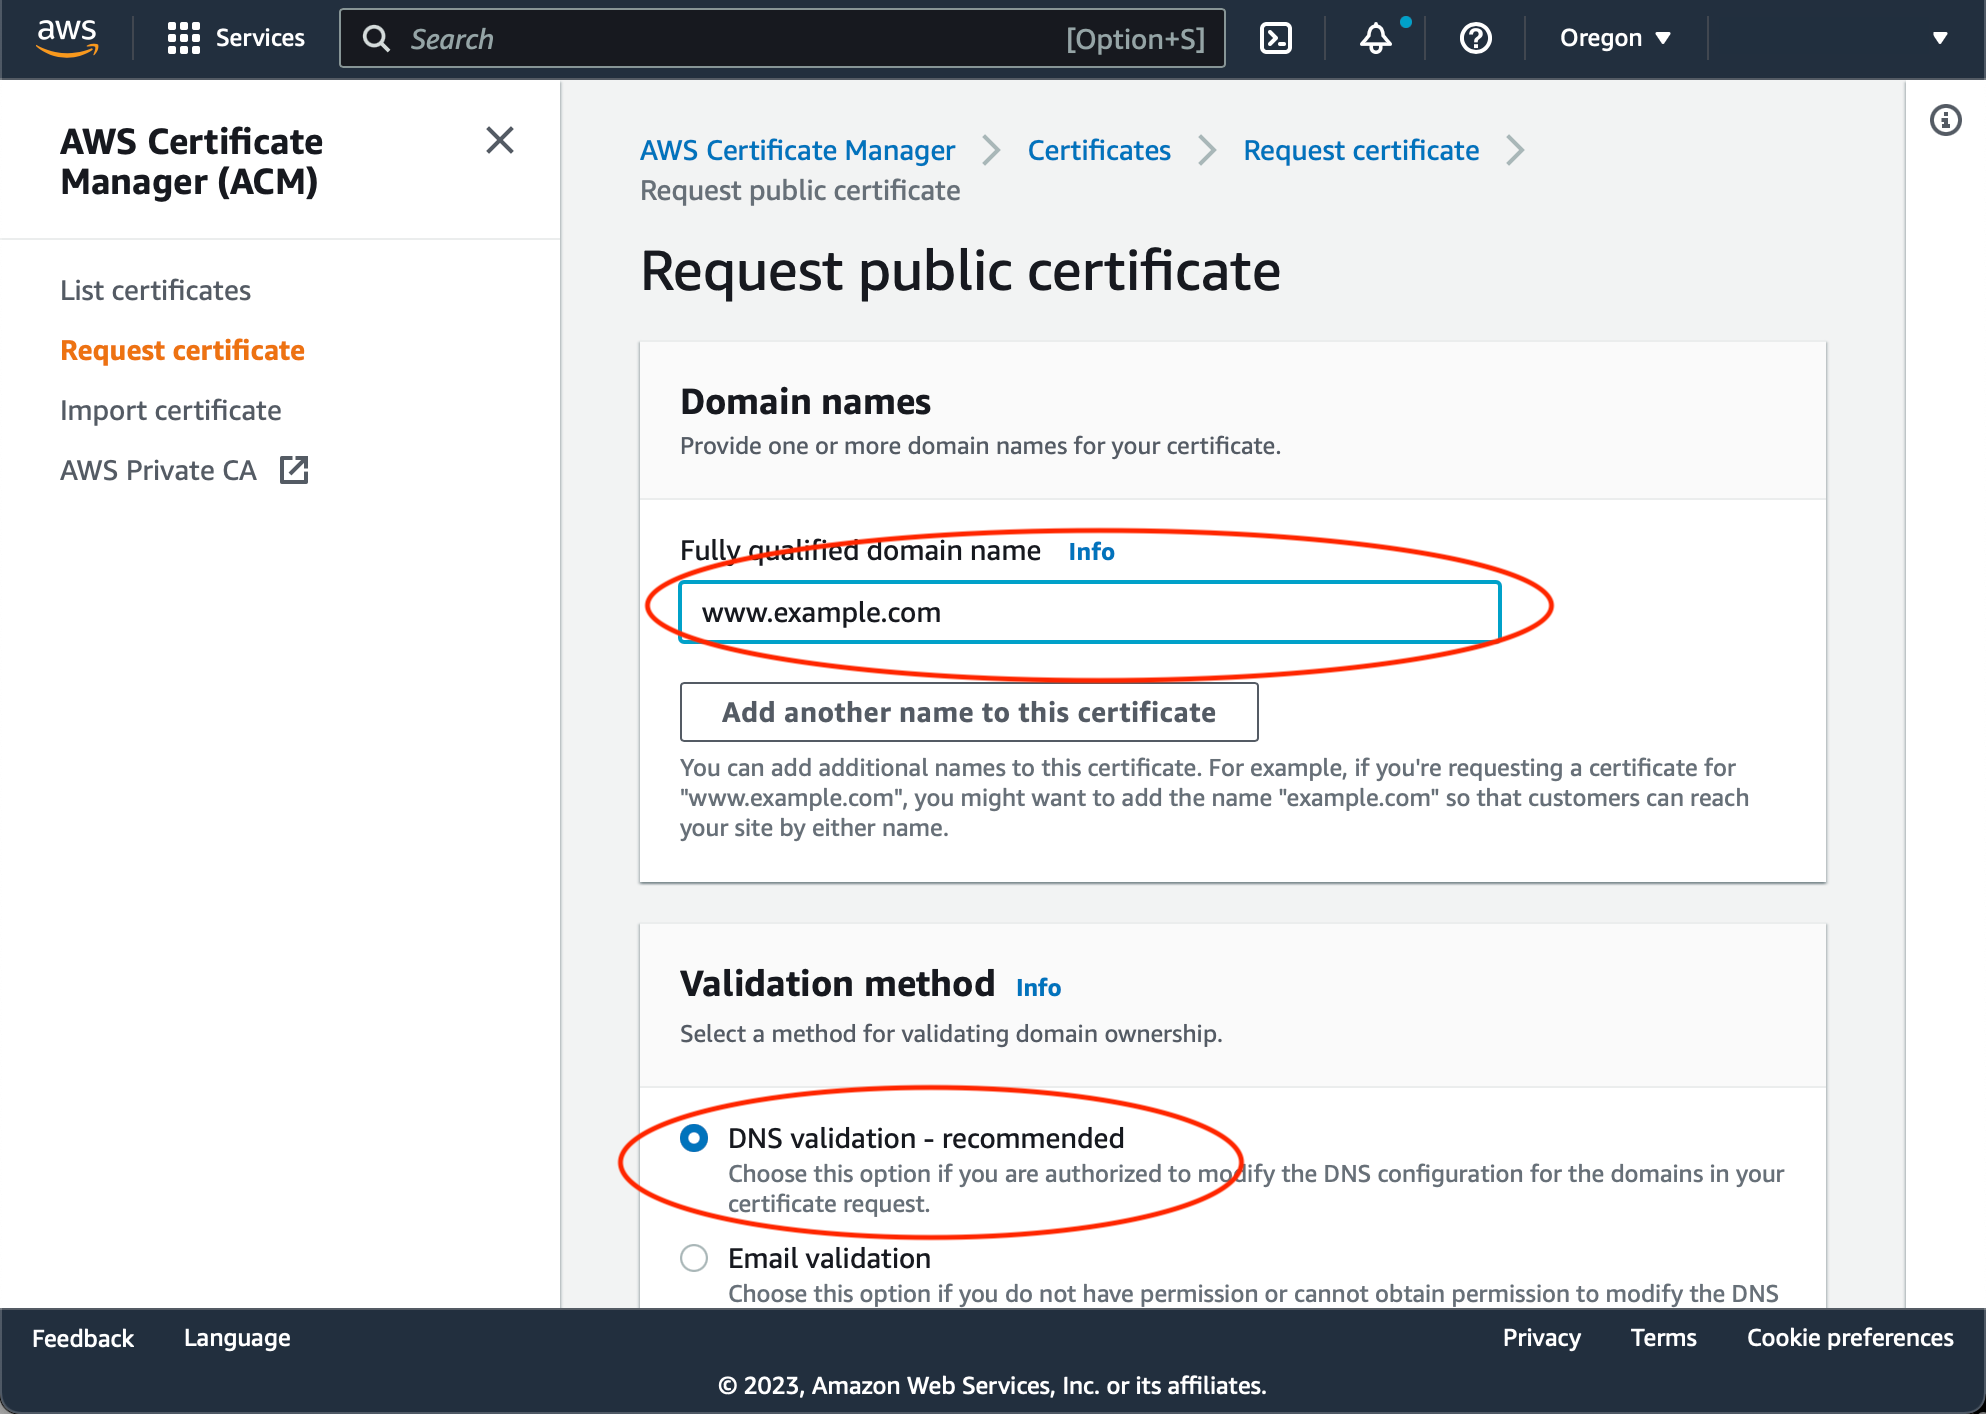
Specify the domain name the certificate is being issued for (must match your website domain name), and choose the DNS validation method, then press 'Request':
The certificate will appear in the Certificate Manager certificates list. Open the certificate details, and click 'Create Route53 records':
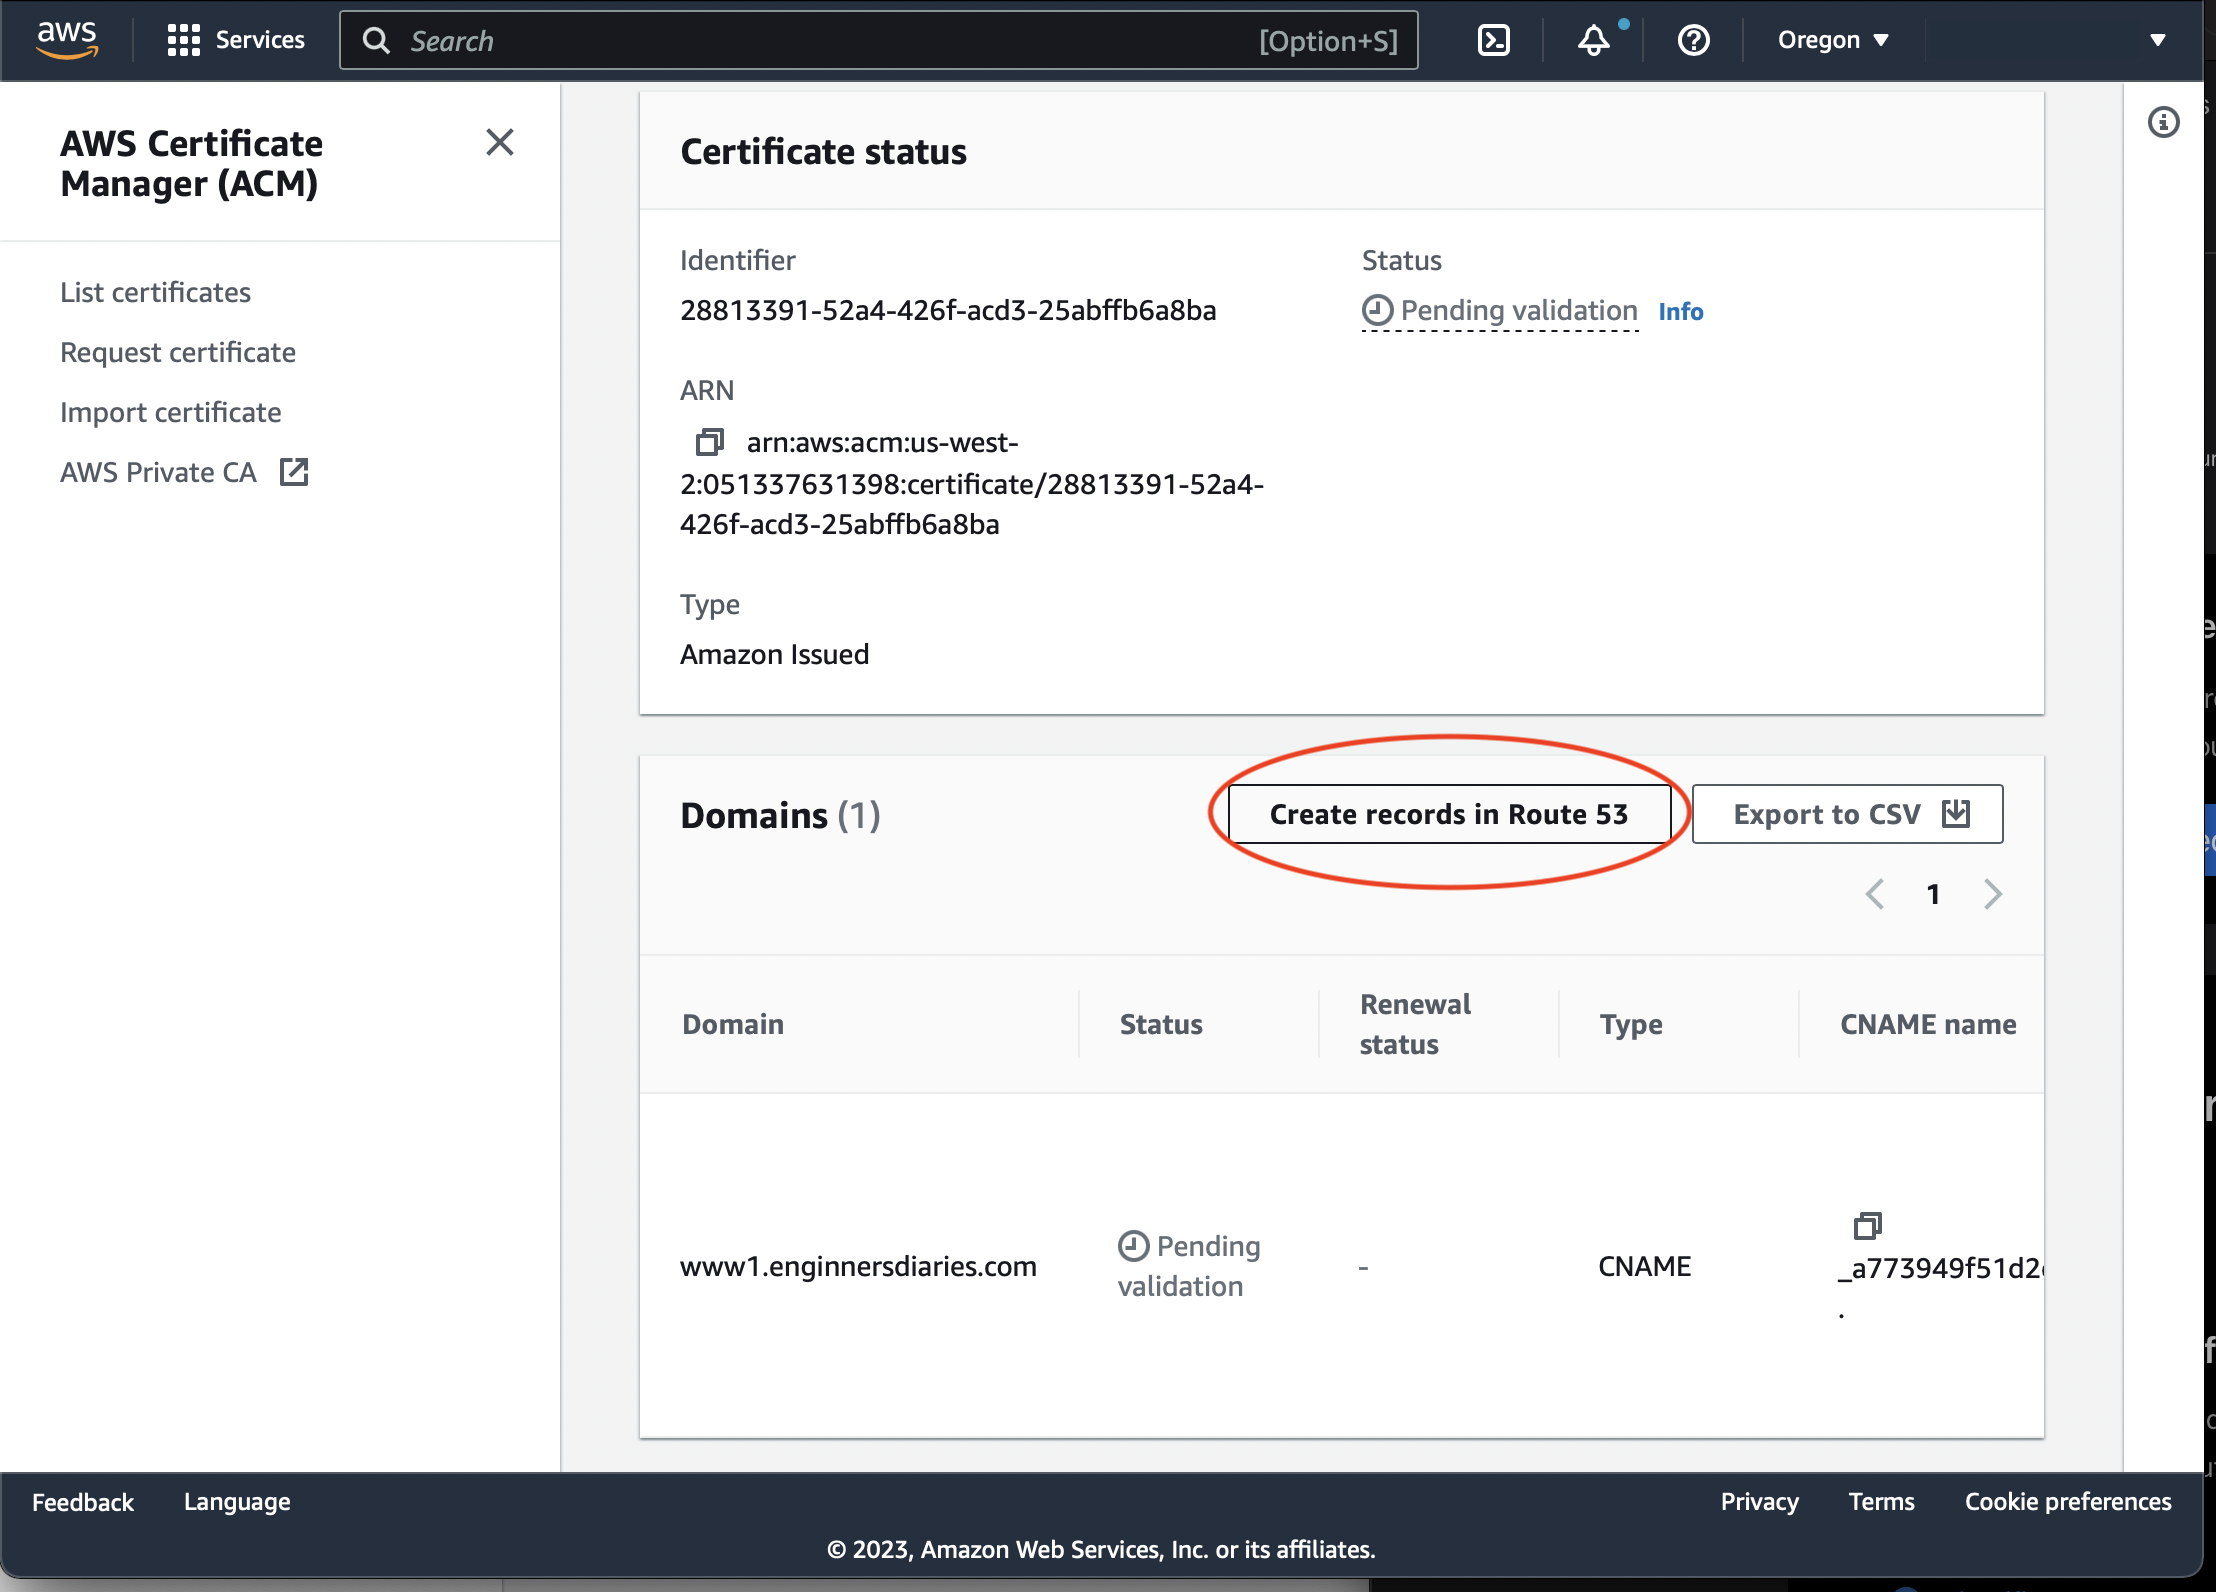
Then wait for the validation to be completed and the certificate status to change from 'Pending Validation' to 'Issued'.
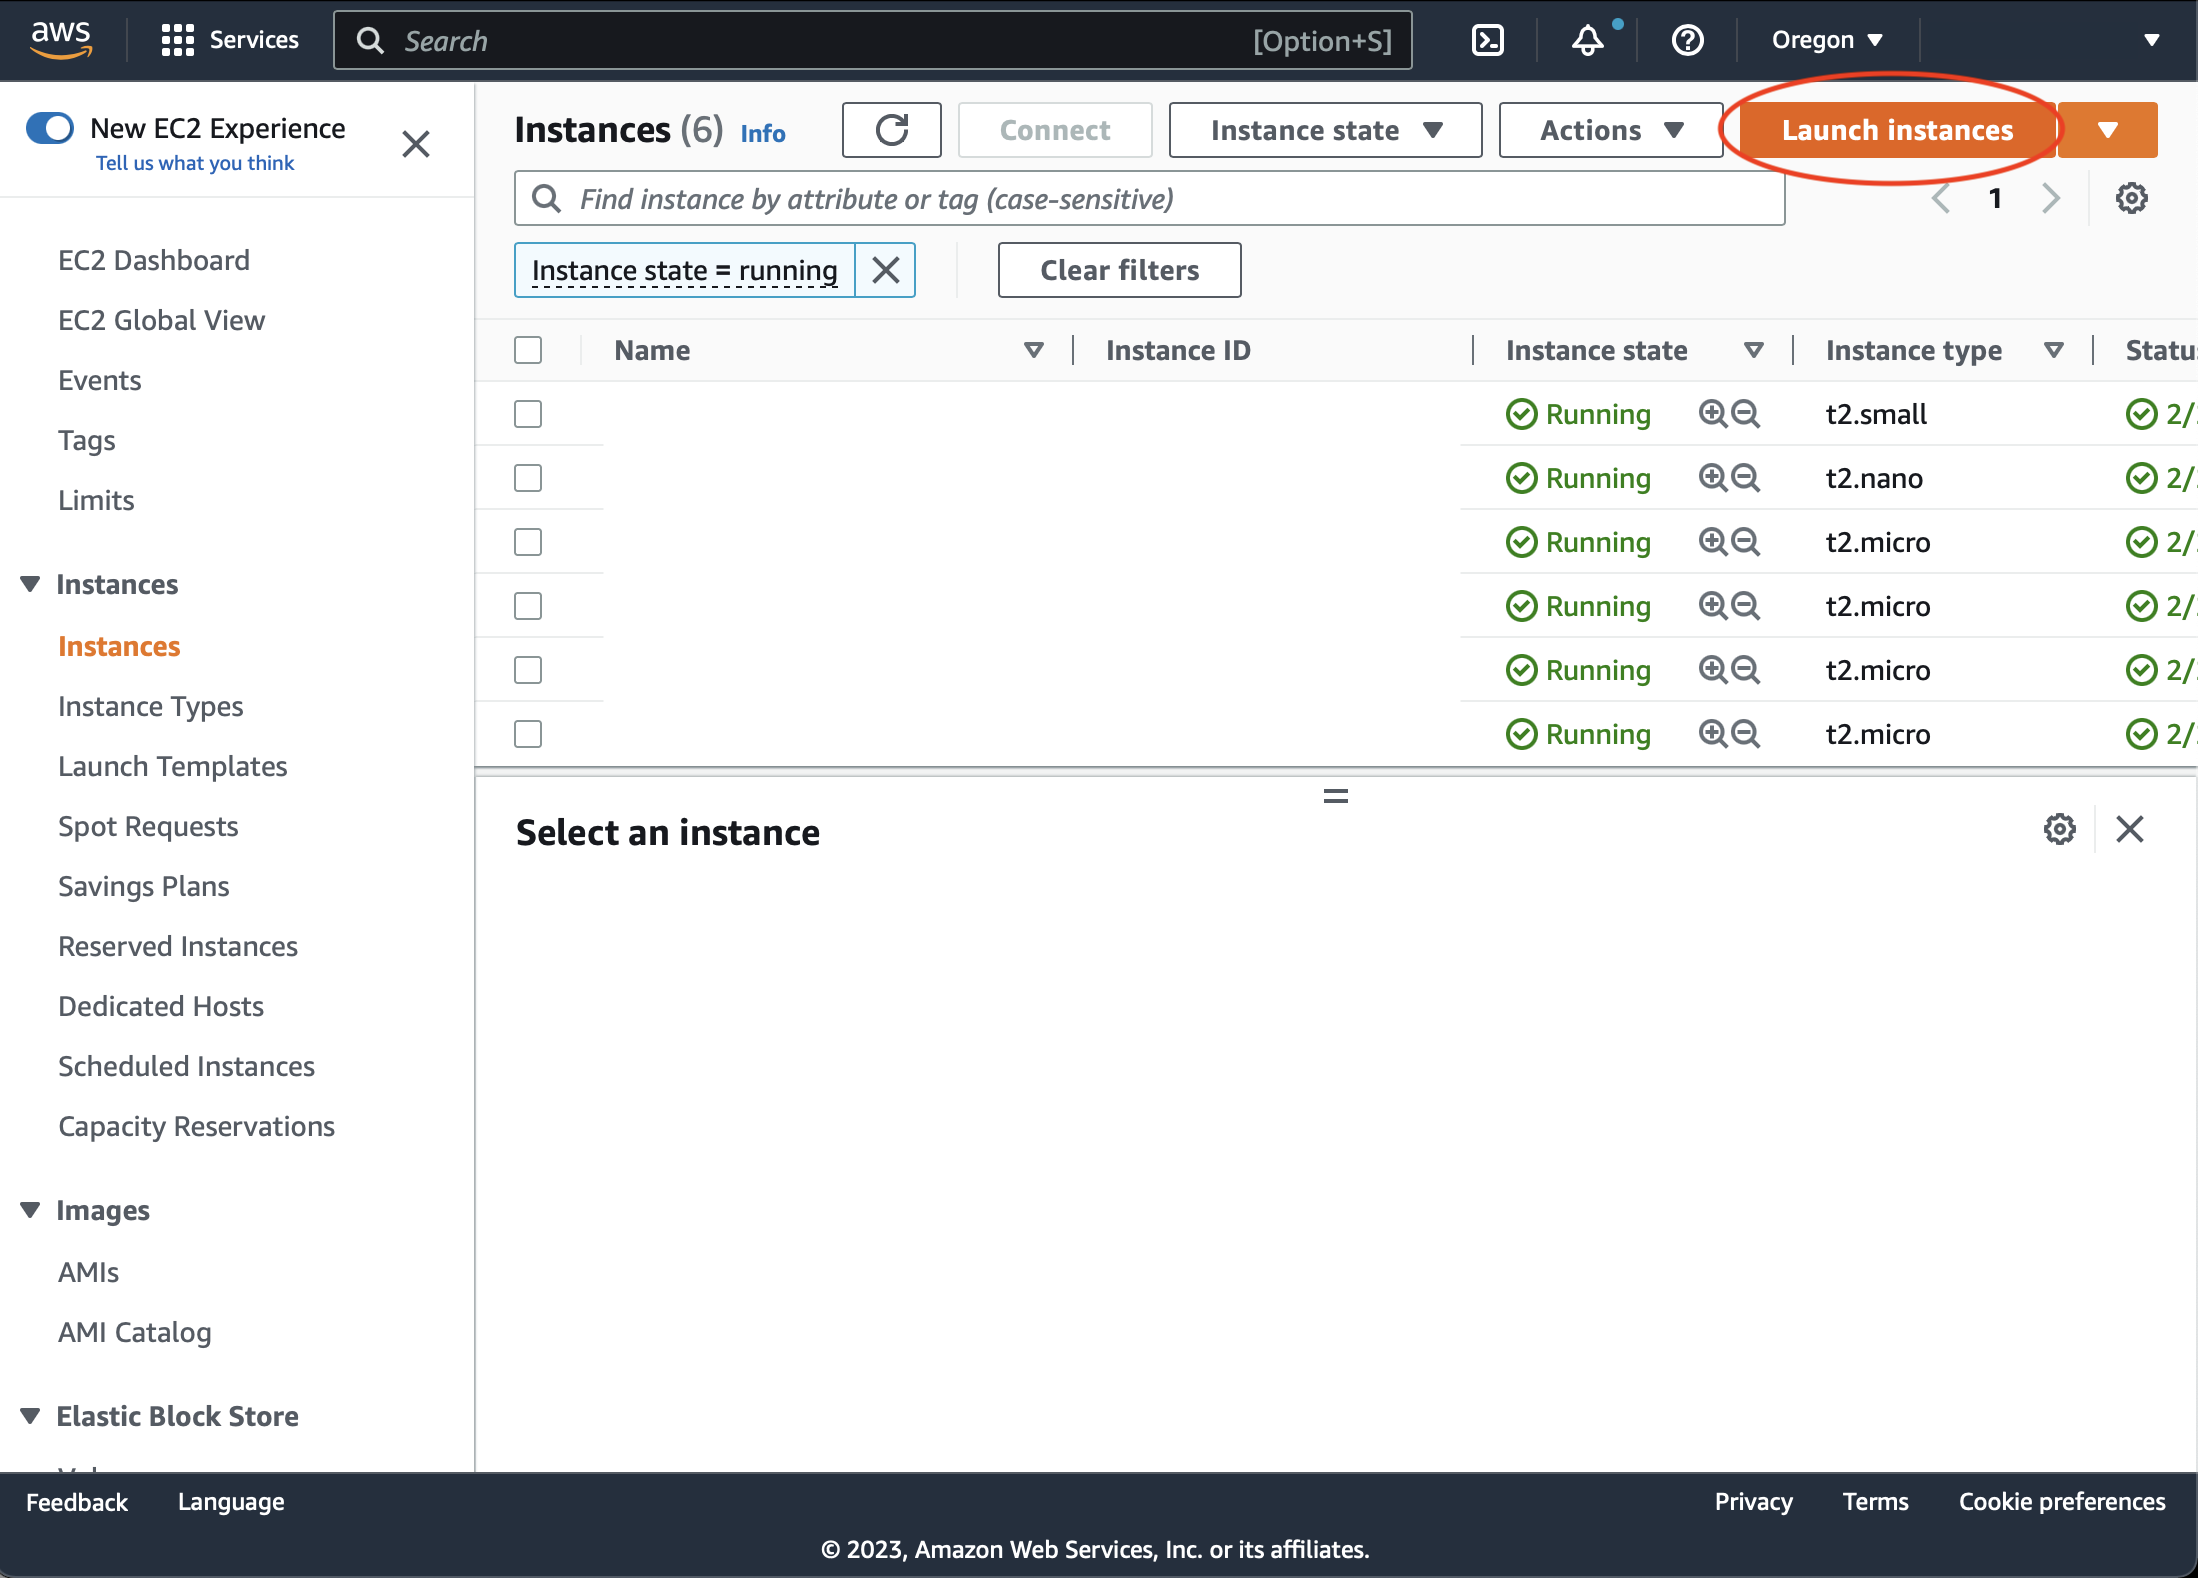
EC2 Instance Launch
Go to EC2 section of AWS console. Press 'Launch Instances' button:
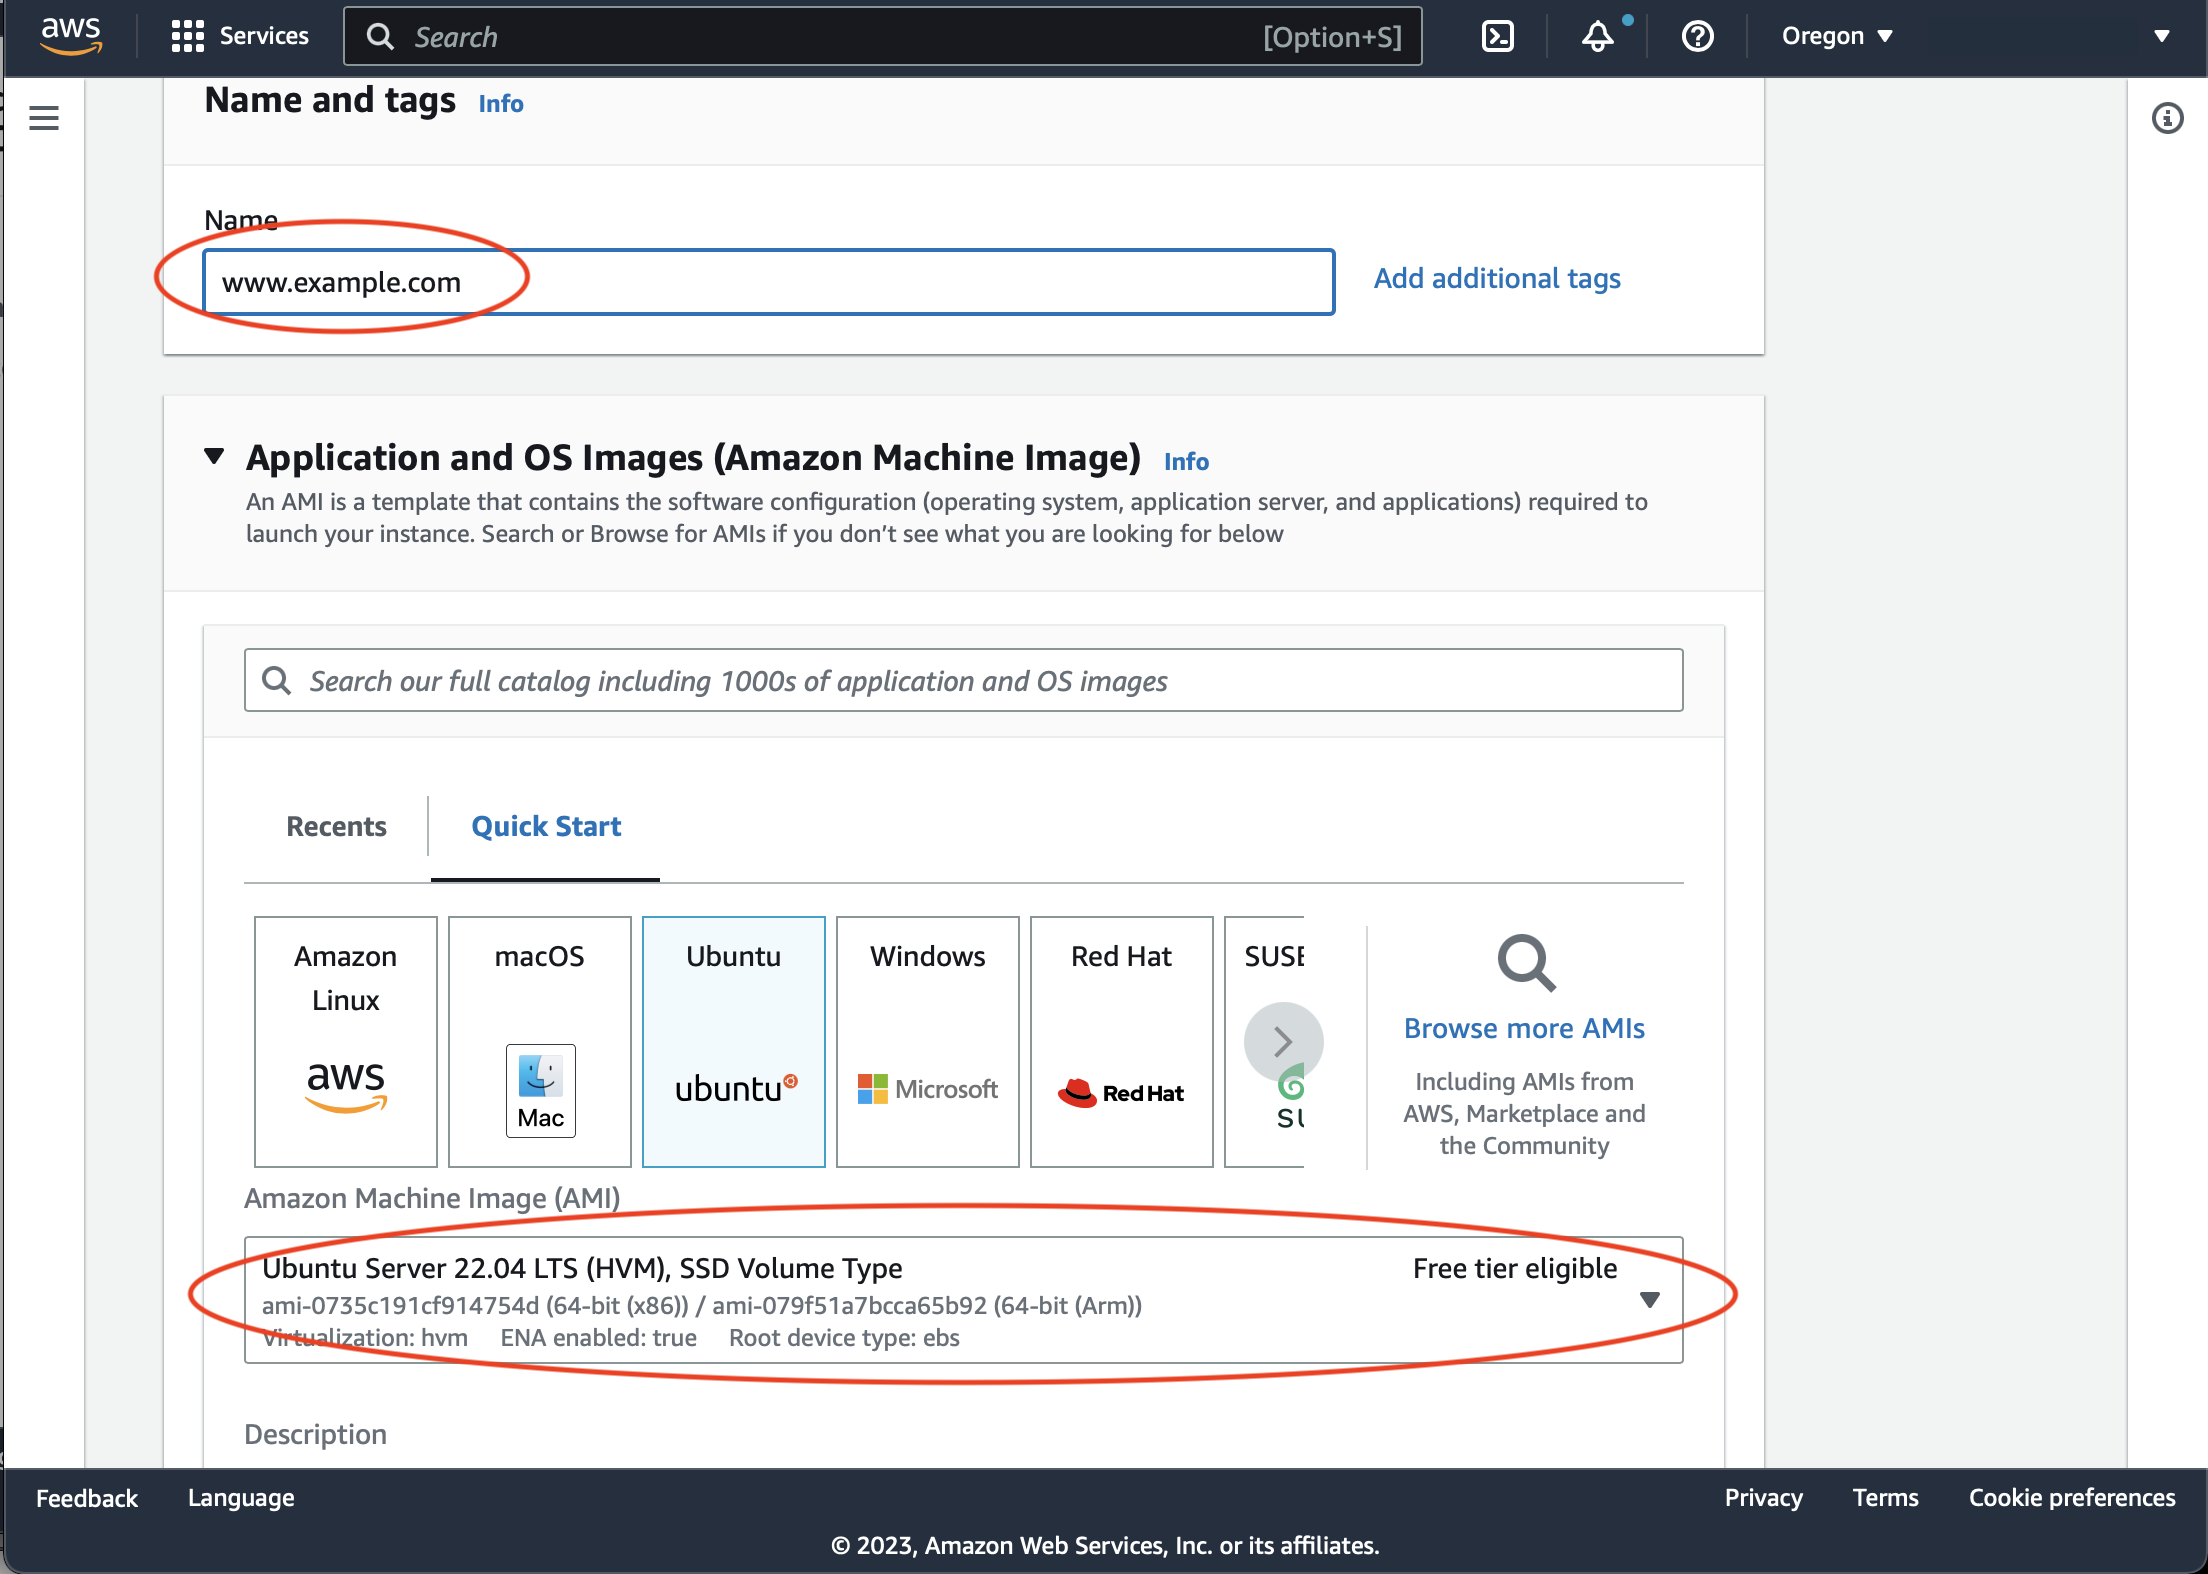
Specify instance name and choose Ubuntu as a target platform. Keep instance type 'micro' if no high loads are anticipated:
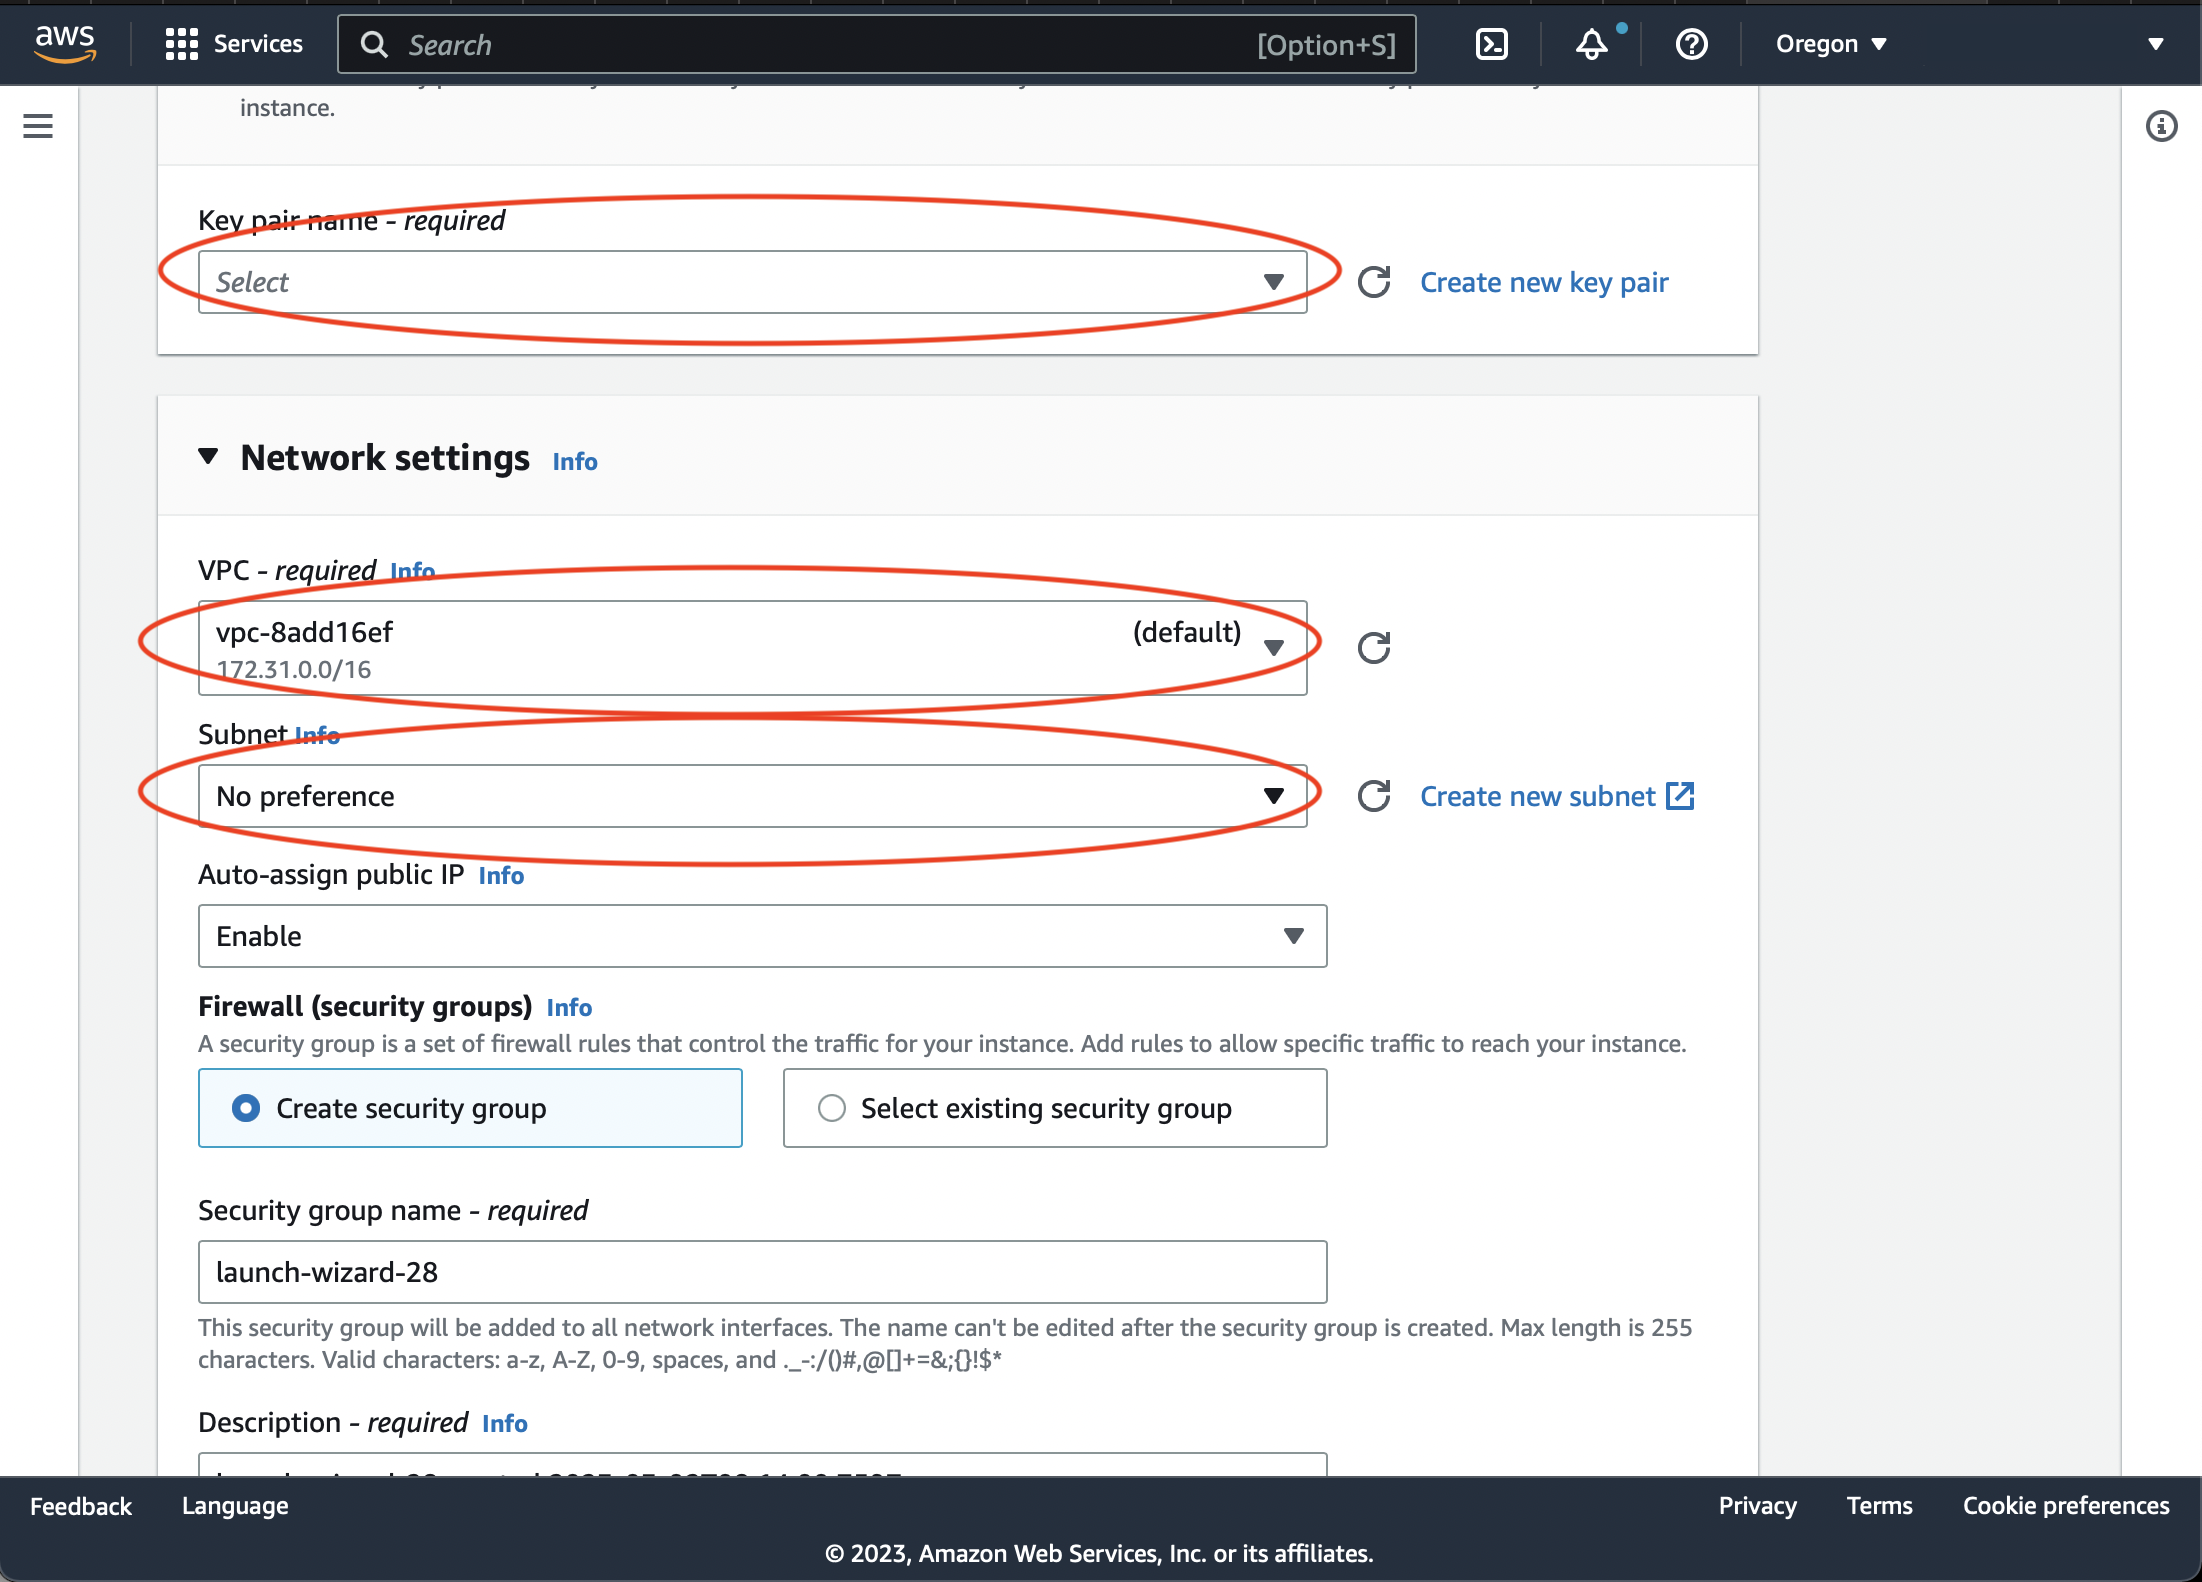
Make sure the access keypair is generated or selected. Choose VPC and subnet which are publicly accessible.
Launch the instance. Wait for it to become available.
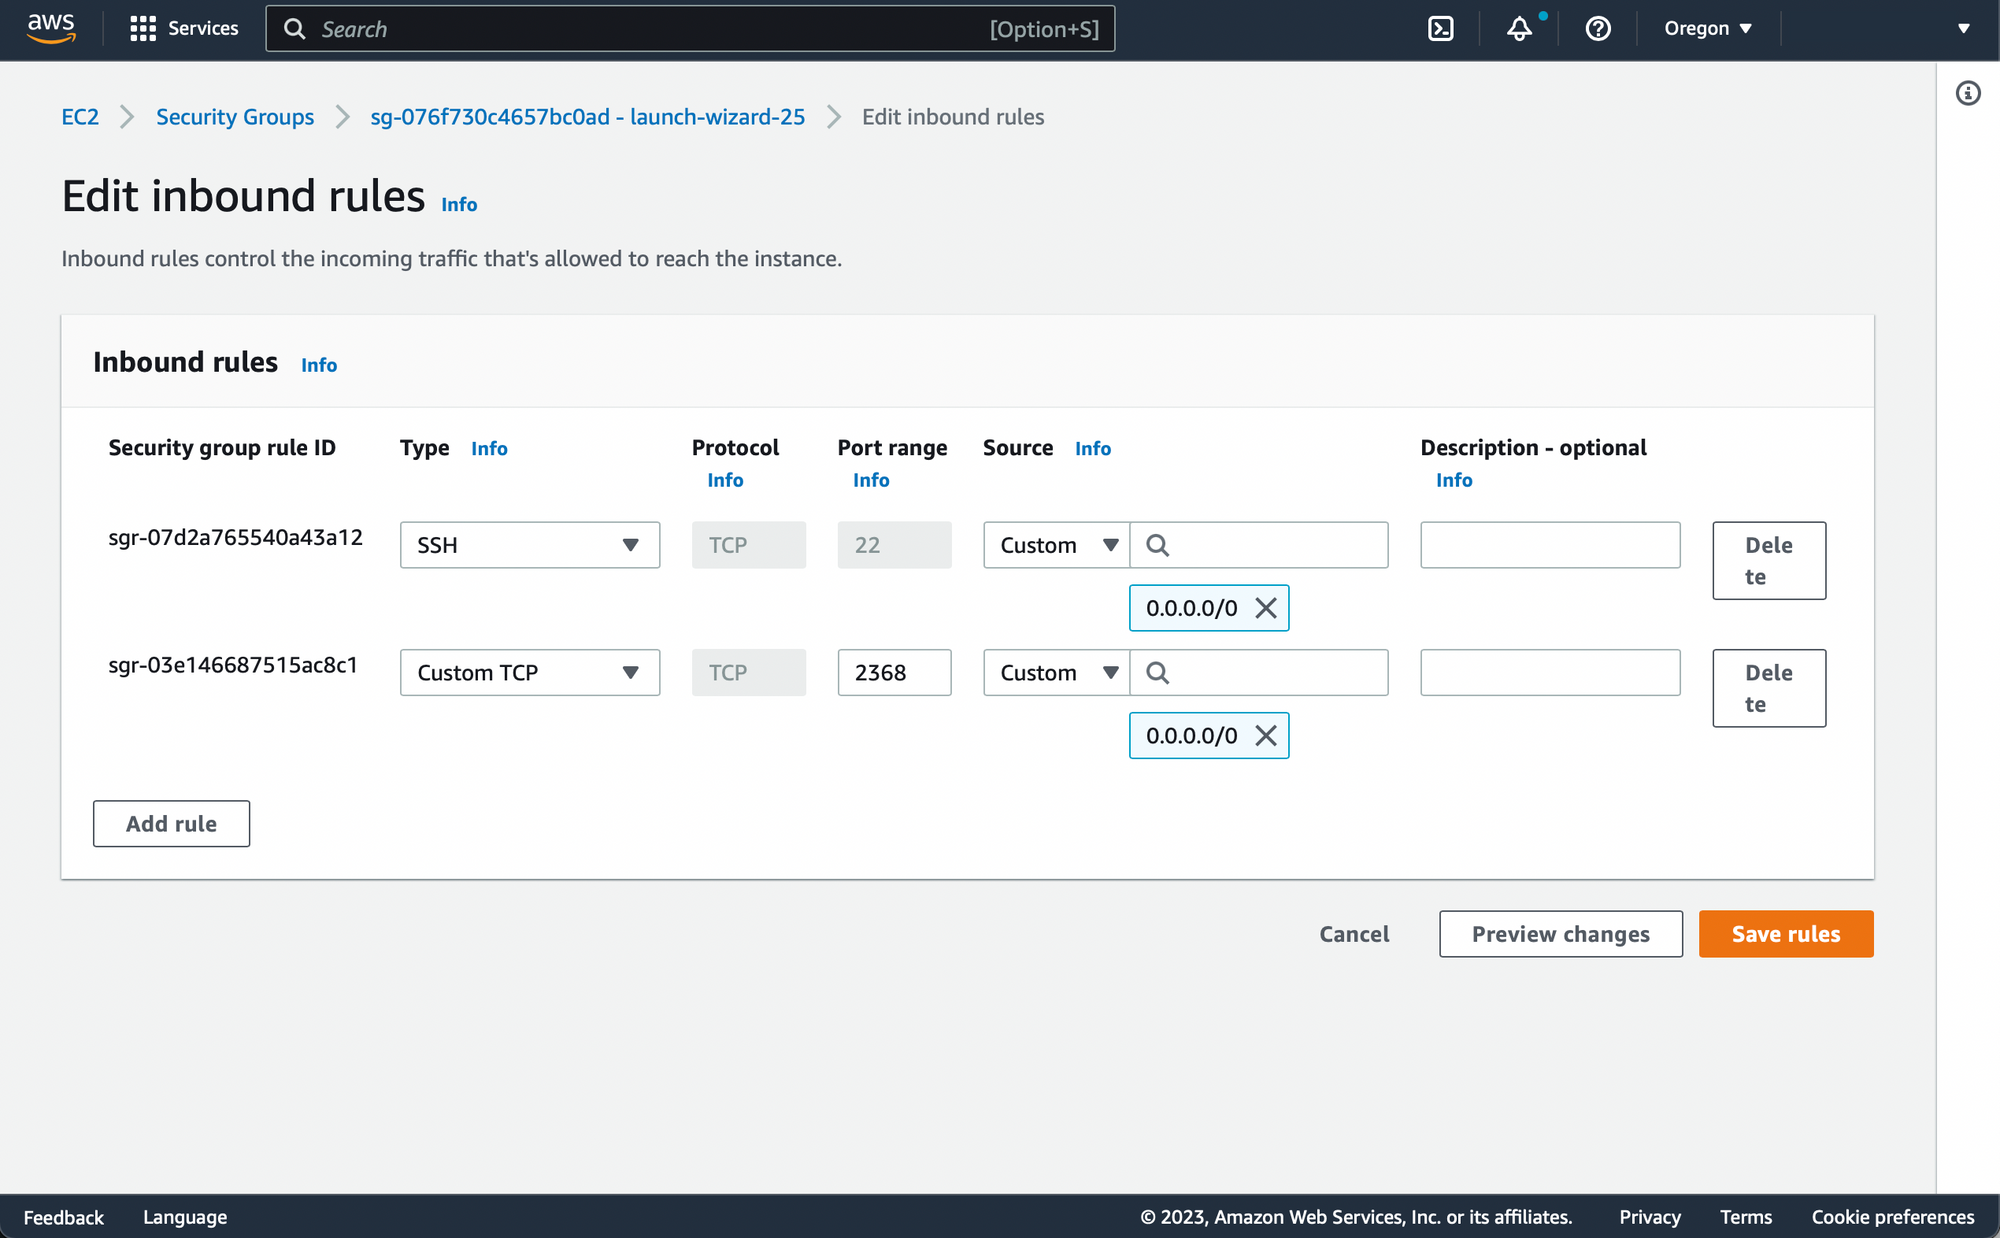
Open the instance security group. Add inbound rule to all traffic for TCP ports 22 and 2368 from anywhere:
ELB Setup
Create Target Group
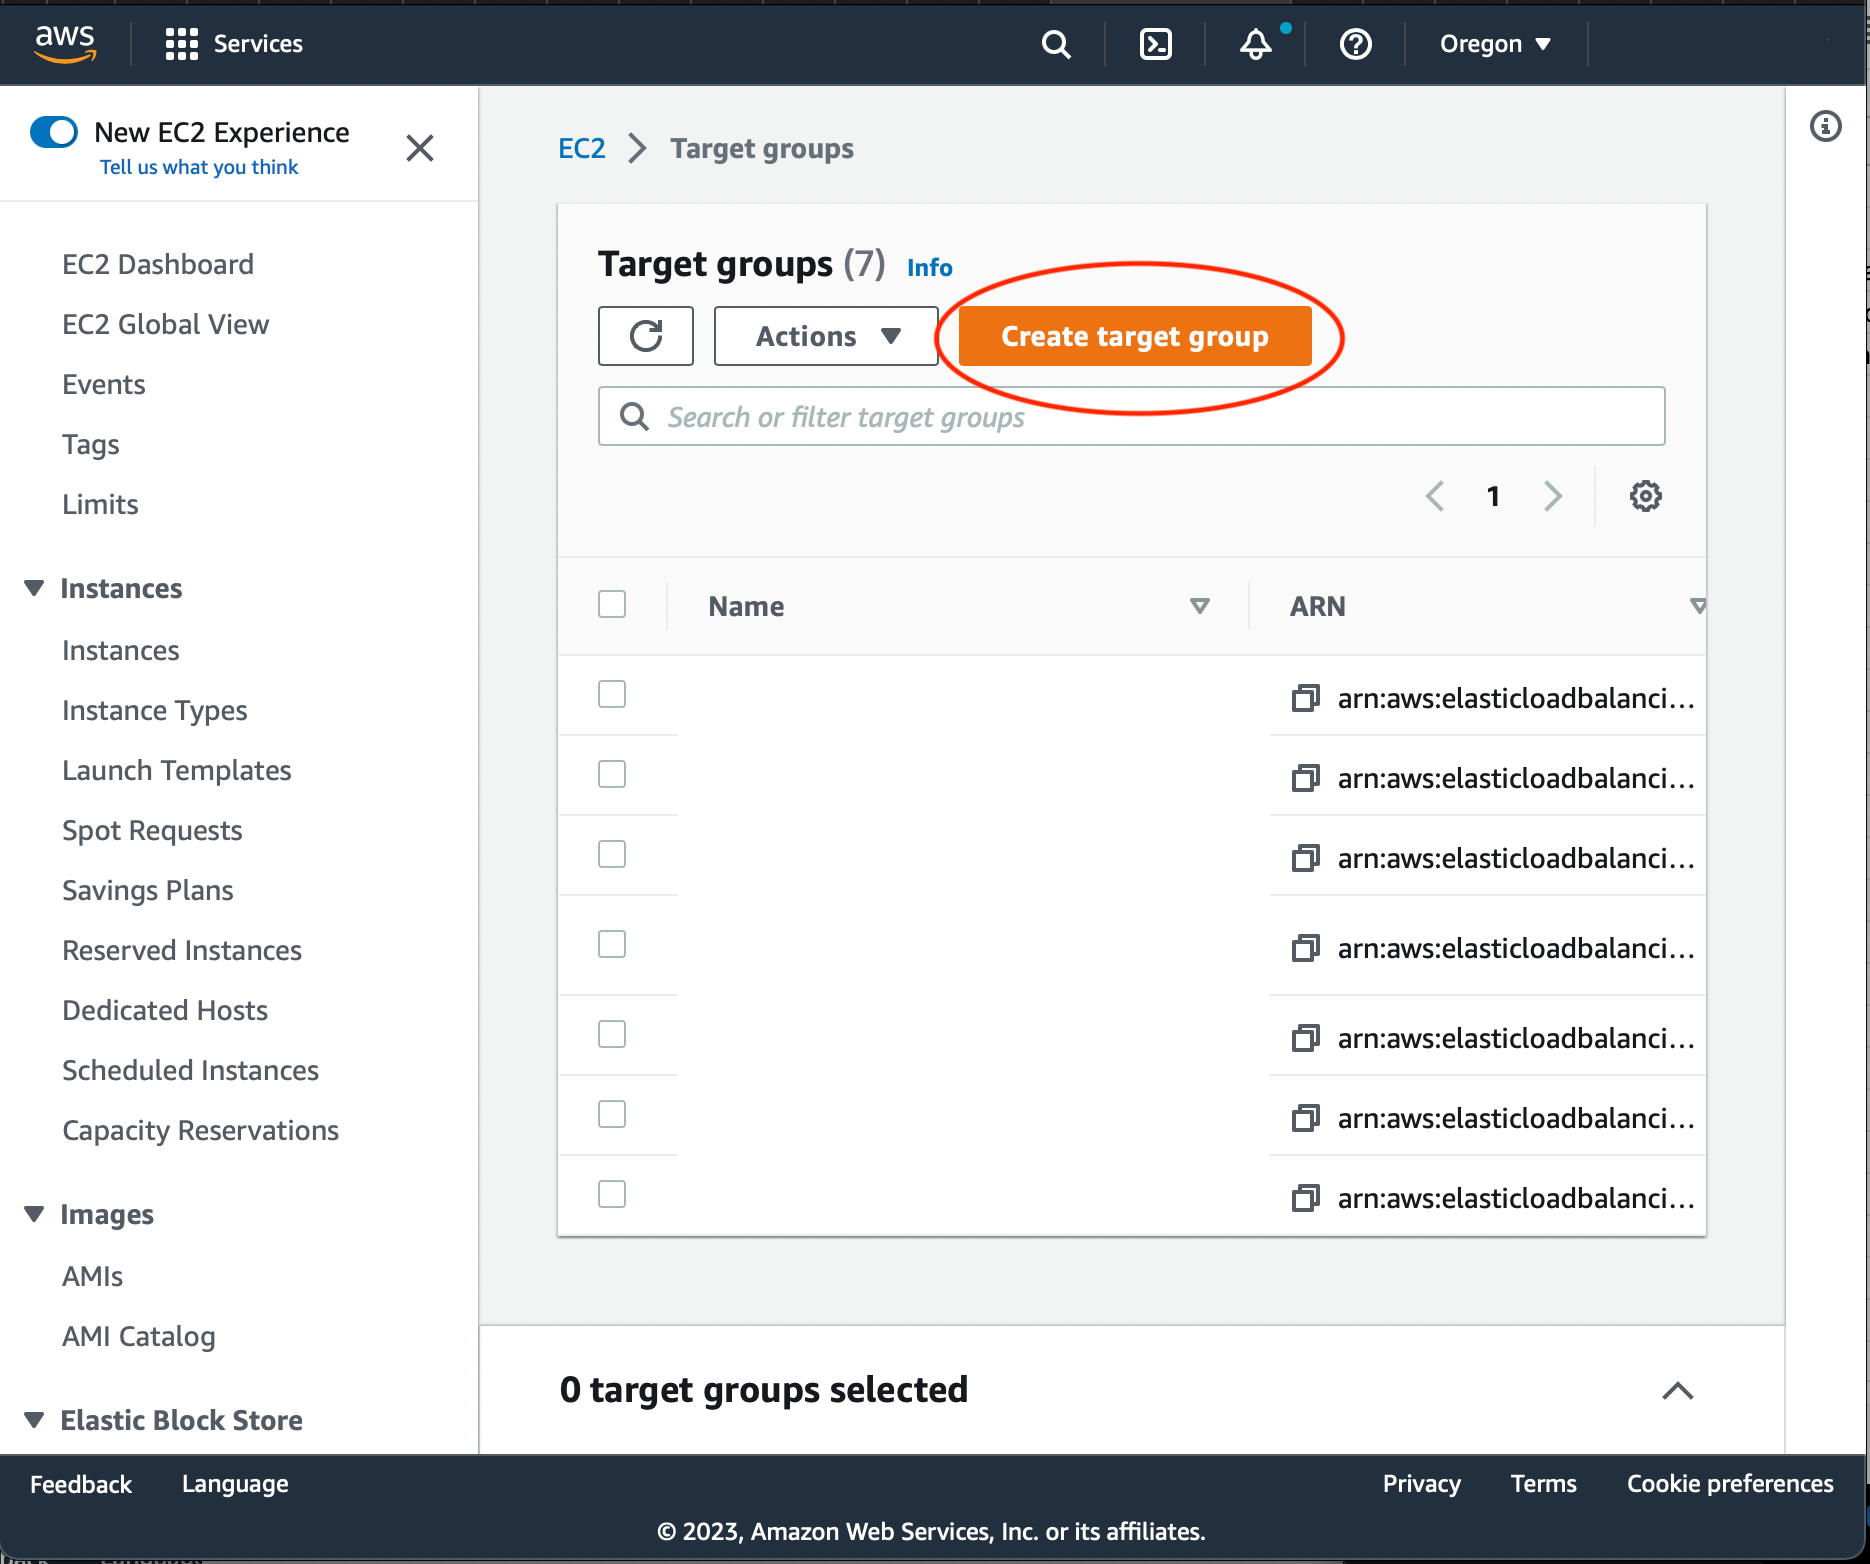
Go to EC2 AWS Console. Choose LoadBalancing-> Target Groups from side menu. Press 'Create Target Group' button.
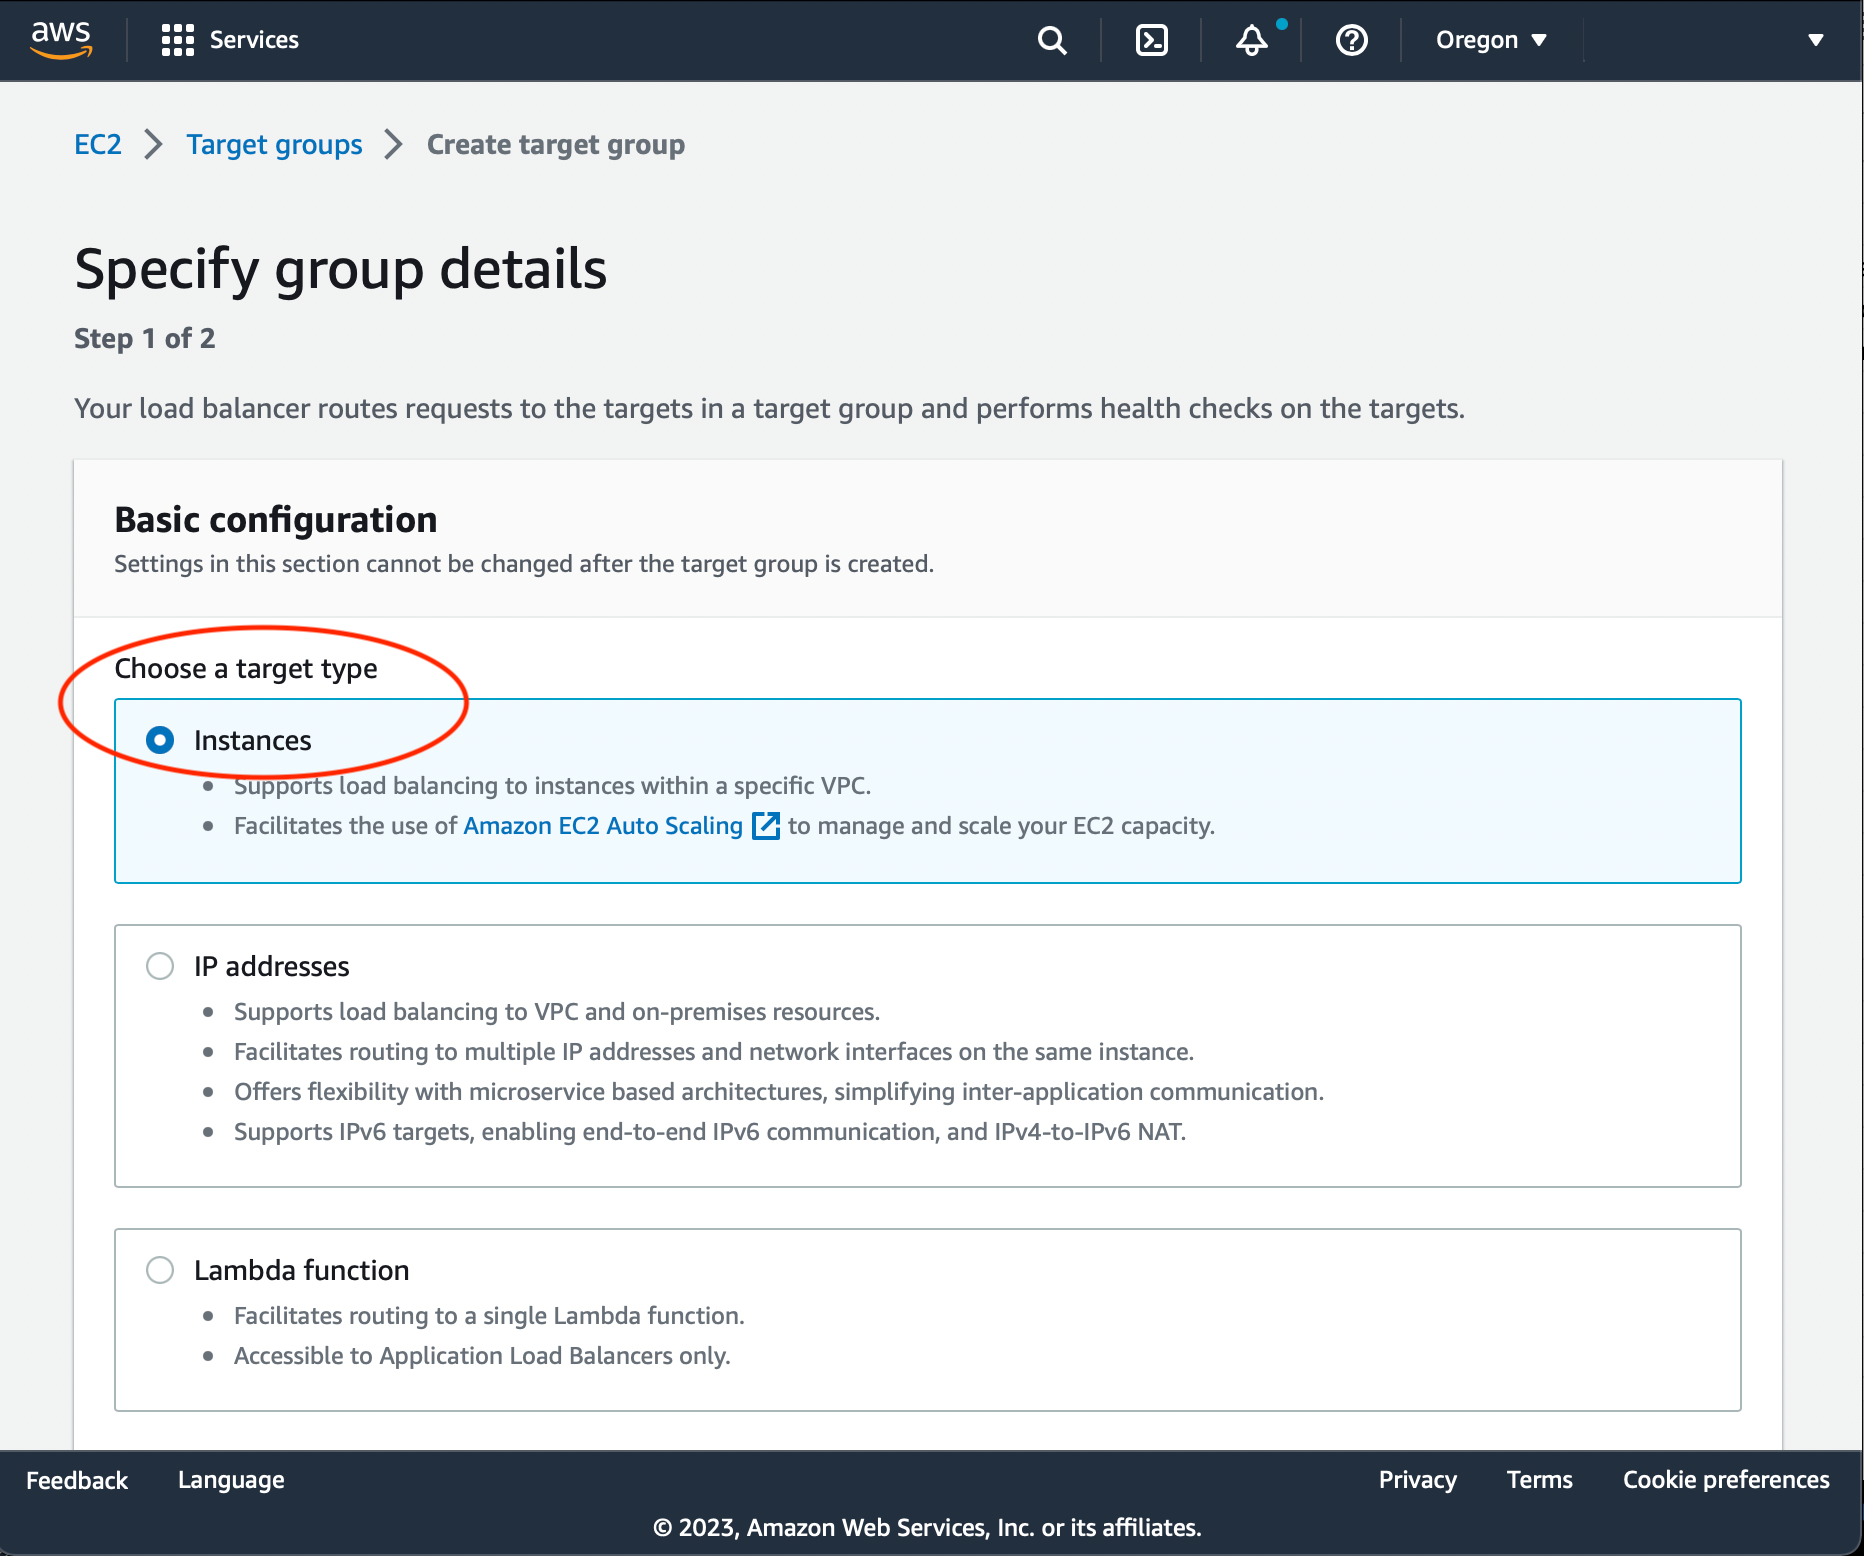
Choose 'Instaces' target type:
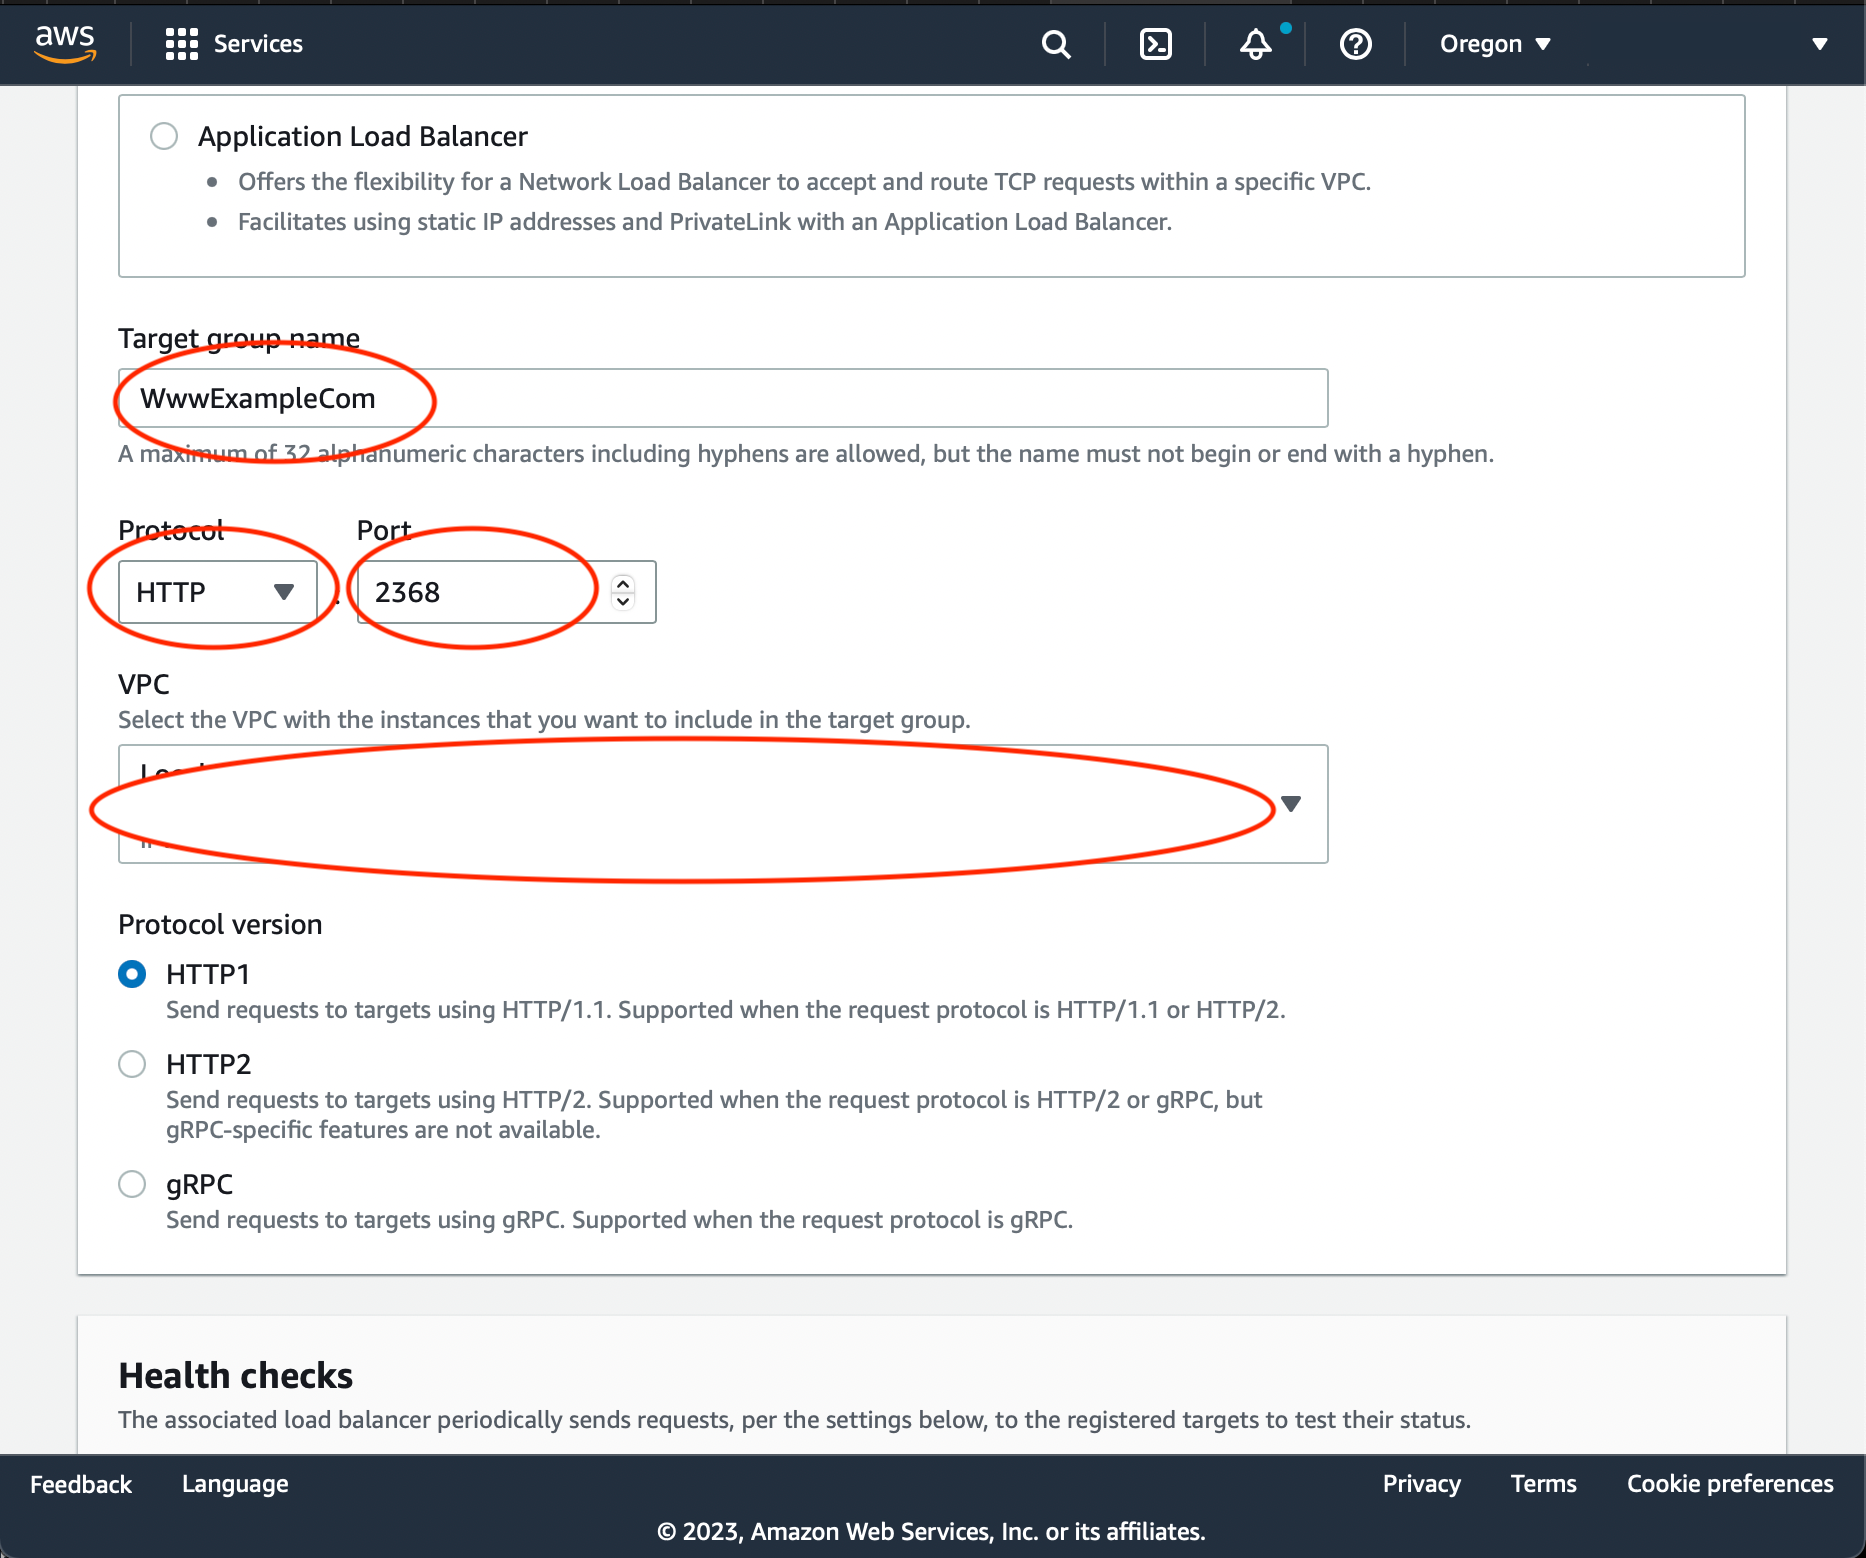
Name the Target group, select HTTP protocol and specify port 2368 that matches the default Ghost port. Select VPC the instance belongs to.
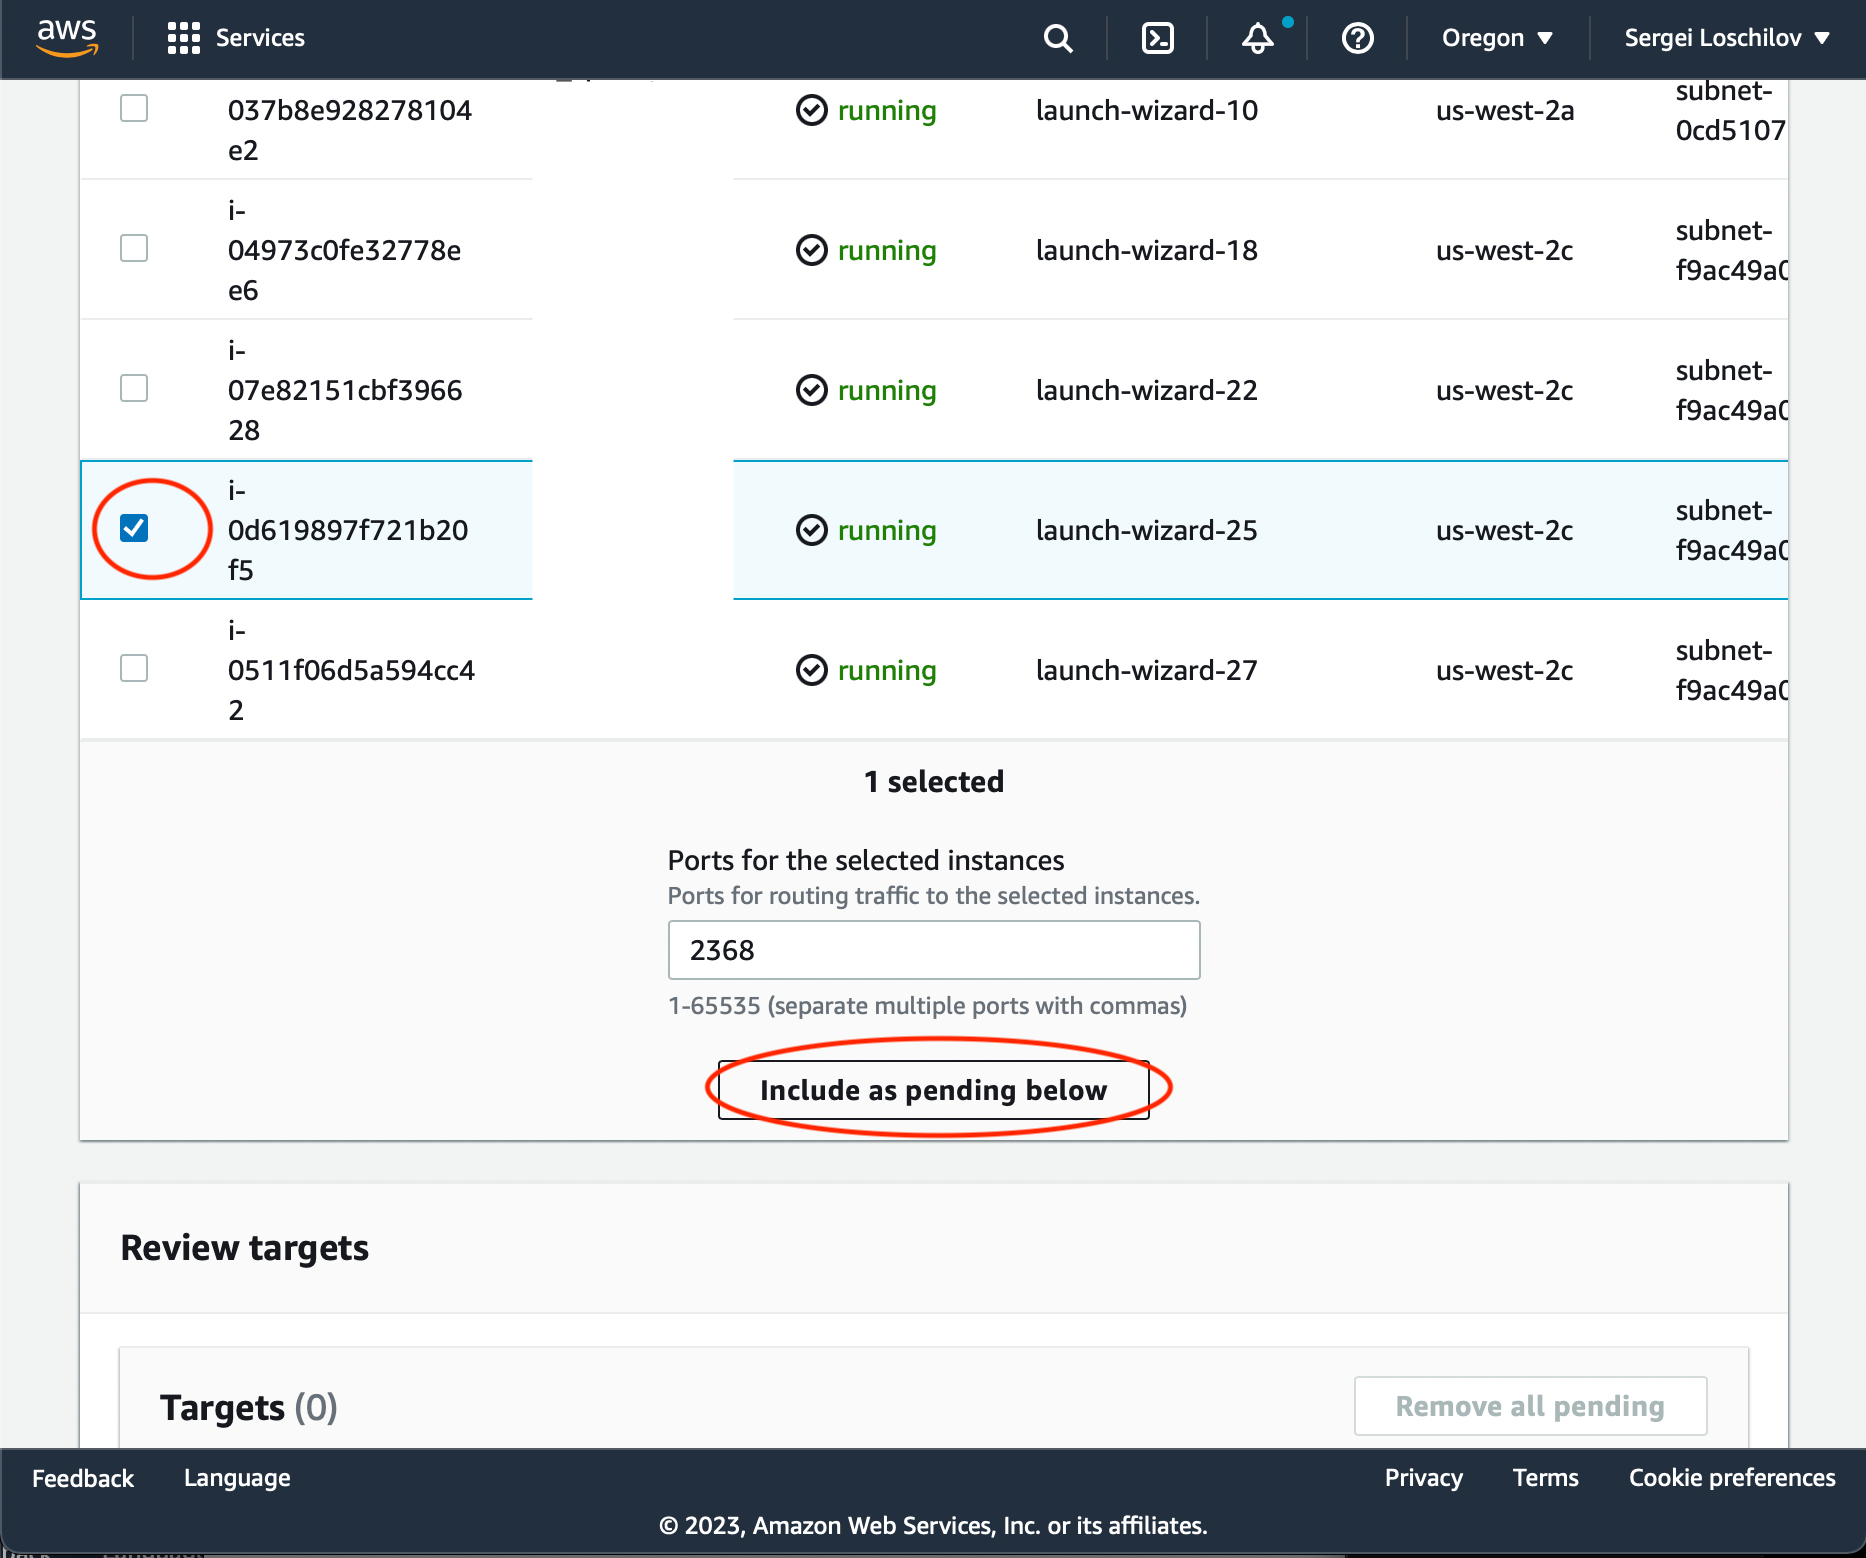
Press 'Next'. On the following screen choose your instance with a Checkbox and press 'Include as pending below'. Then press Create Target Group
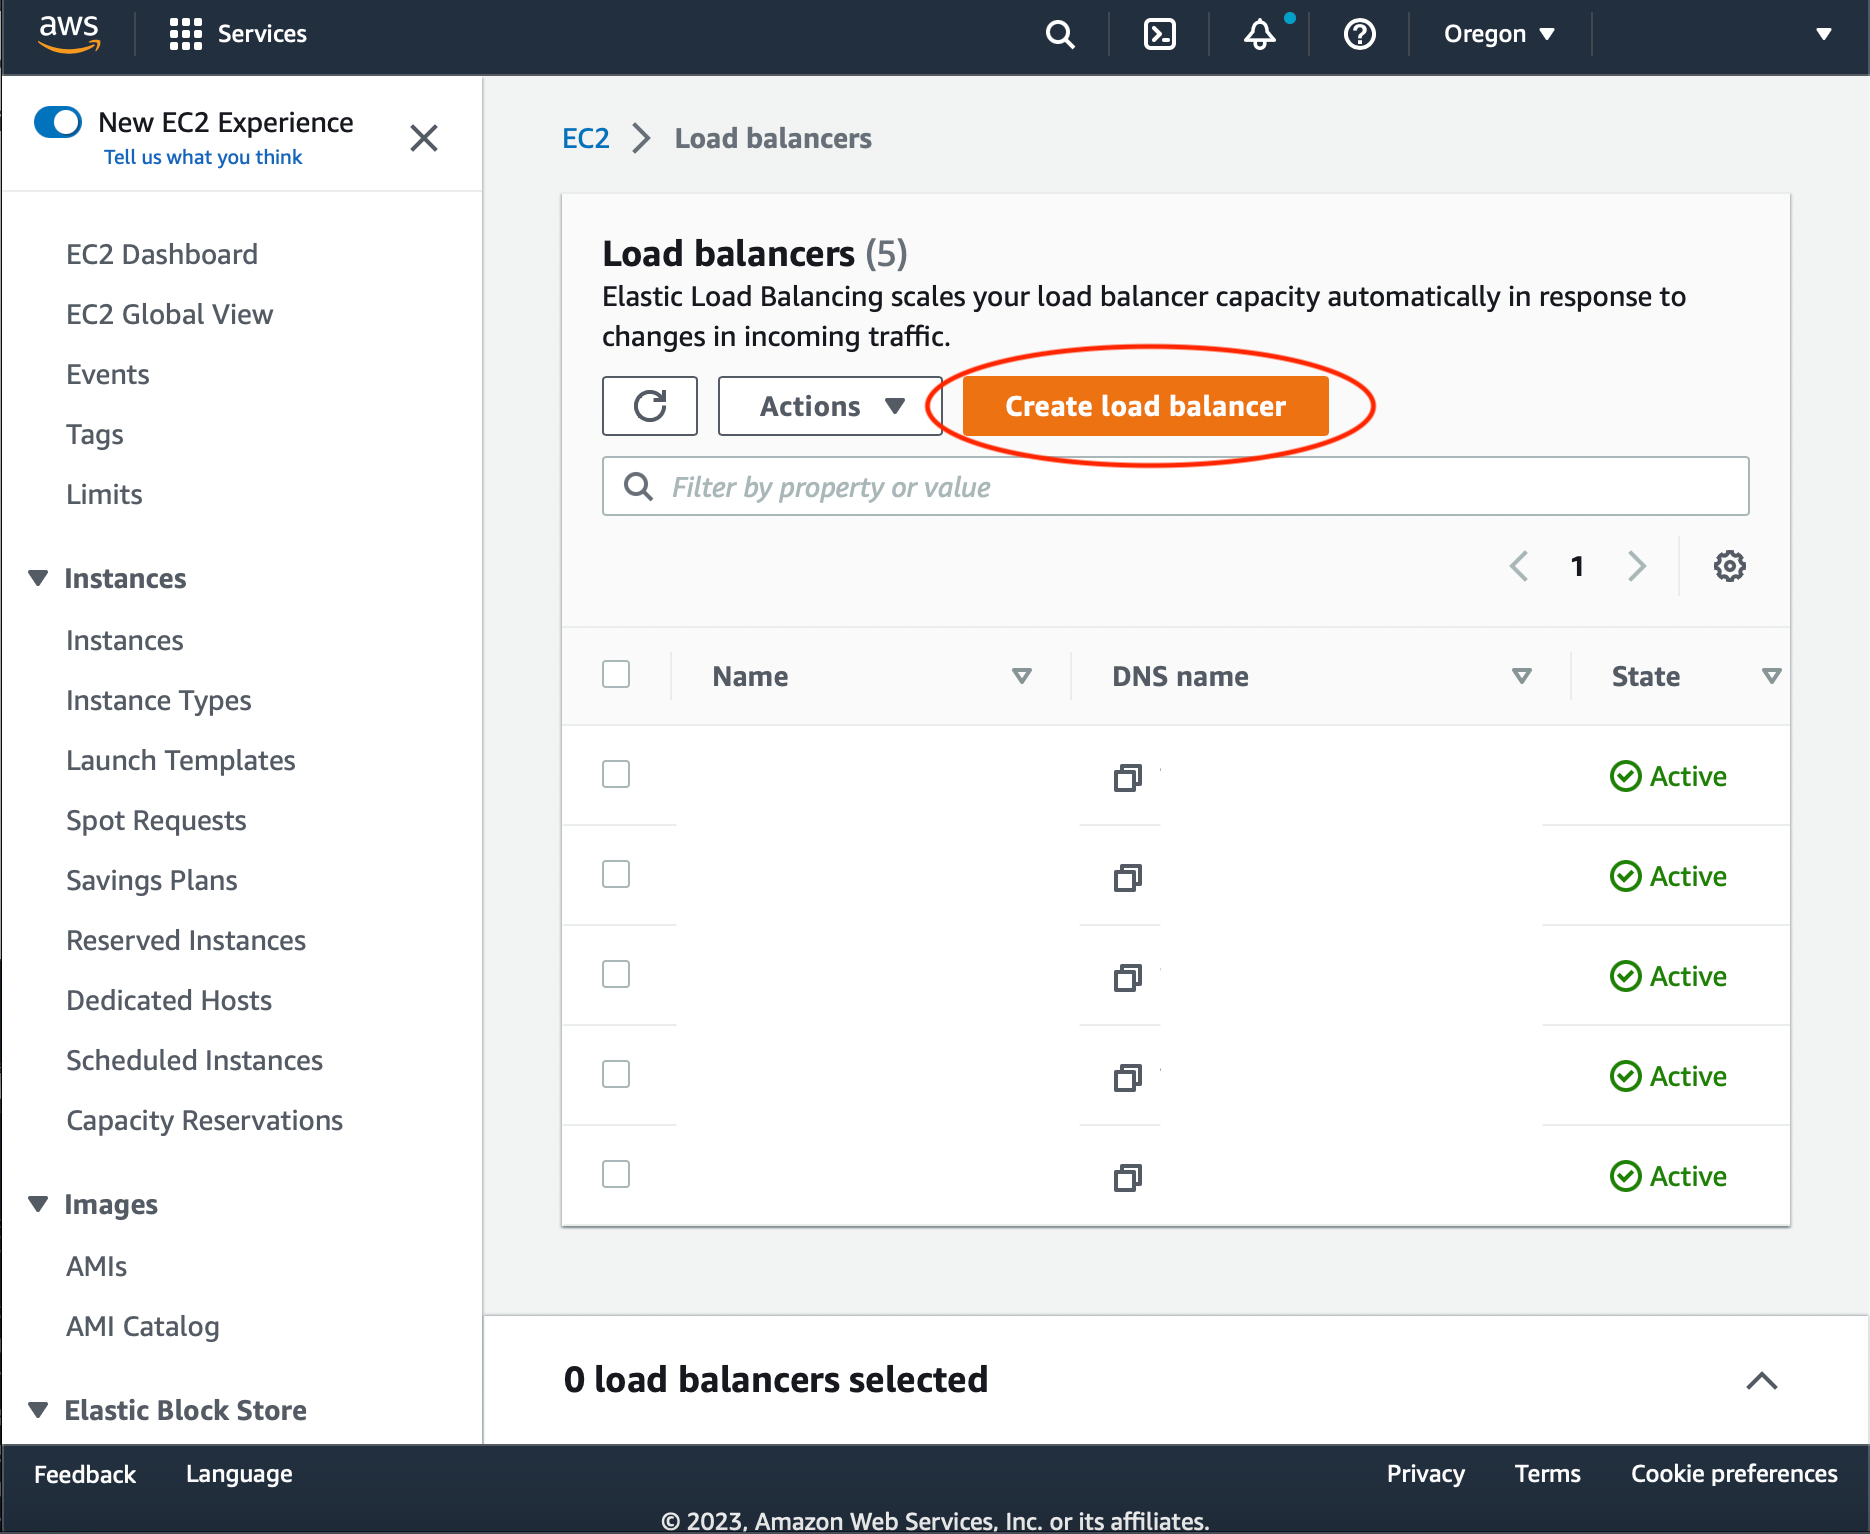
Create Application Load Balancer
Go to EC2 AWS console. Choose 'Load Balancing' -> 'Load Balancers' from the side menu. Press 'Create Load Balancer'
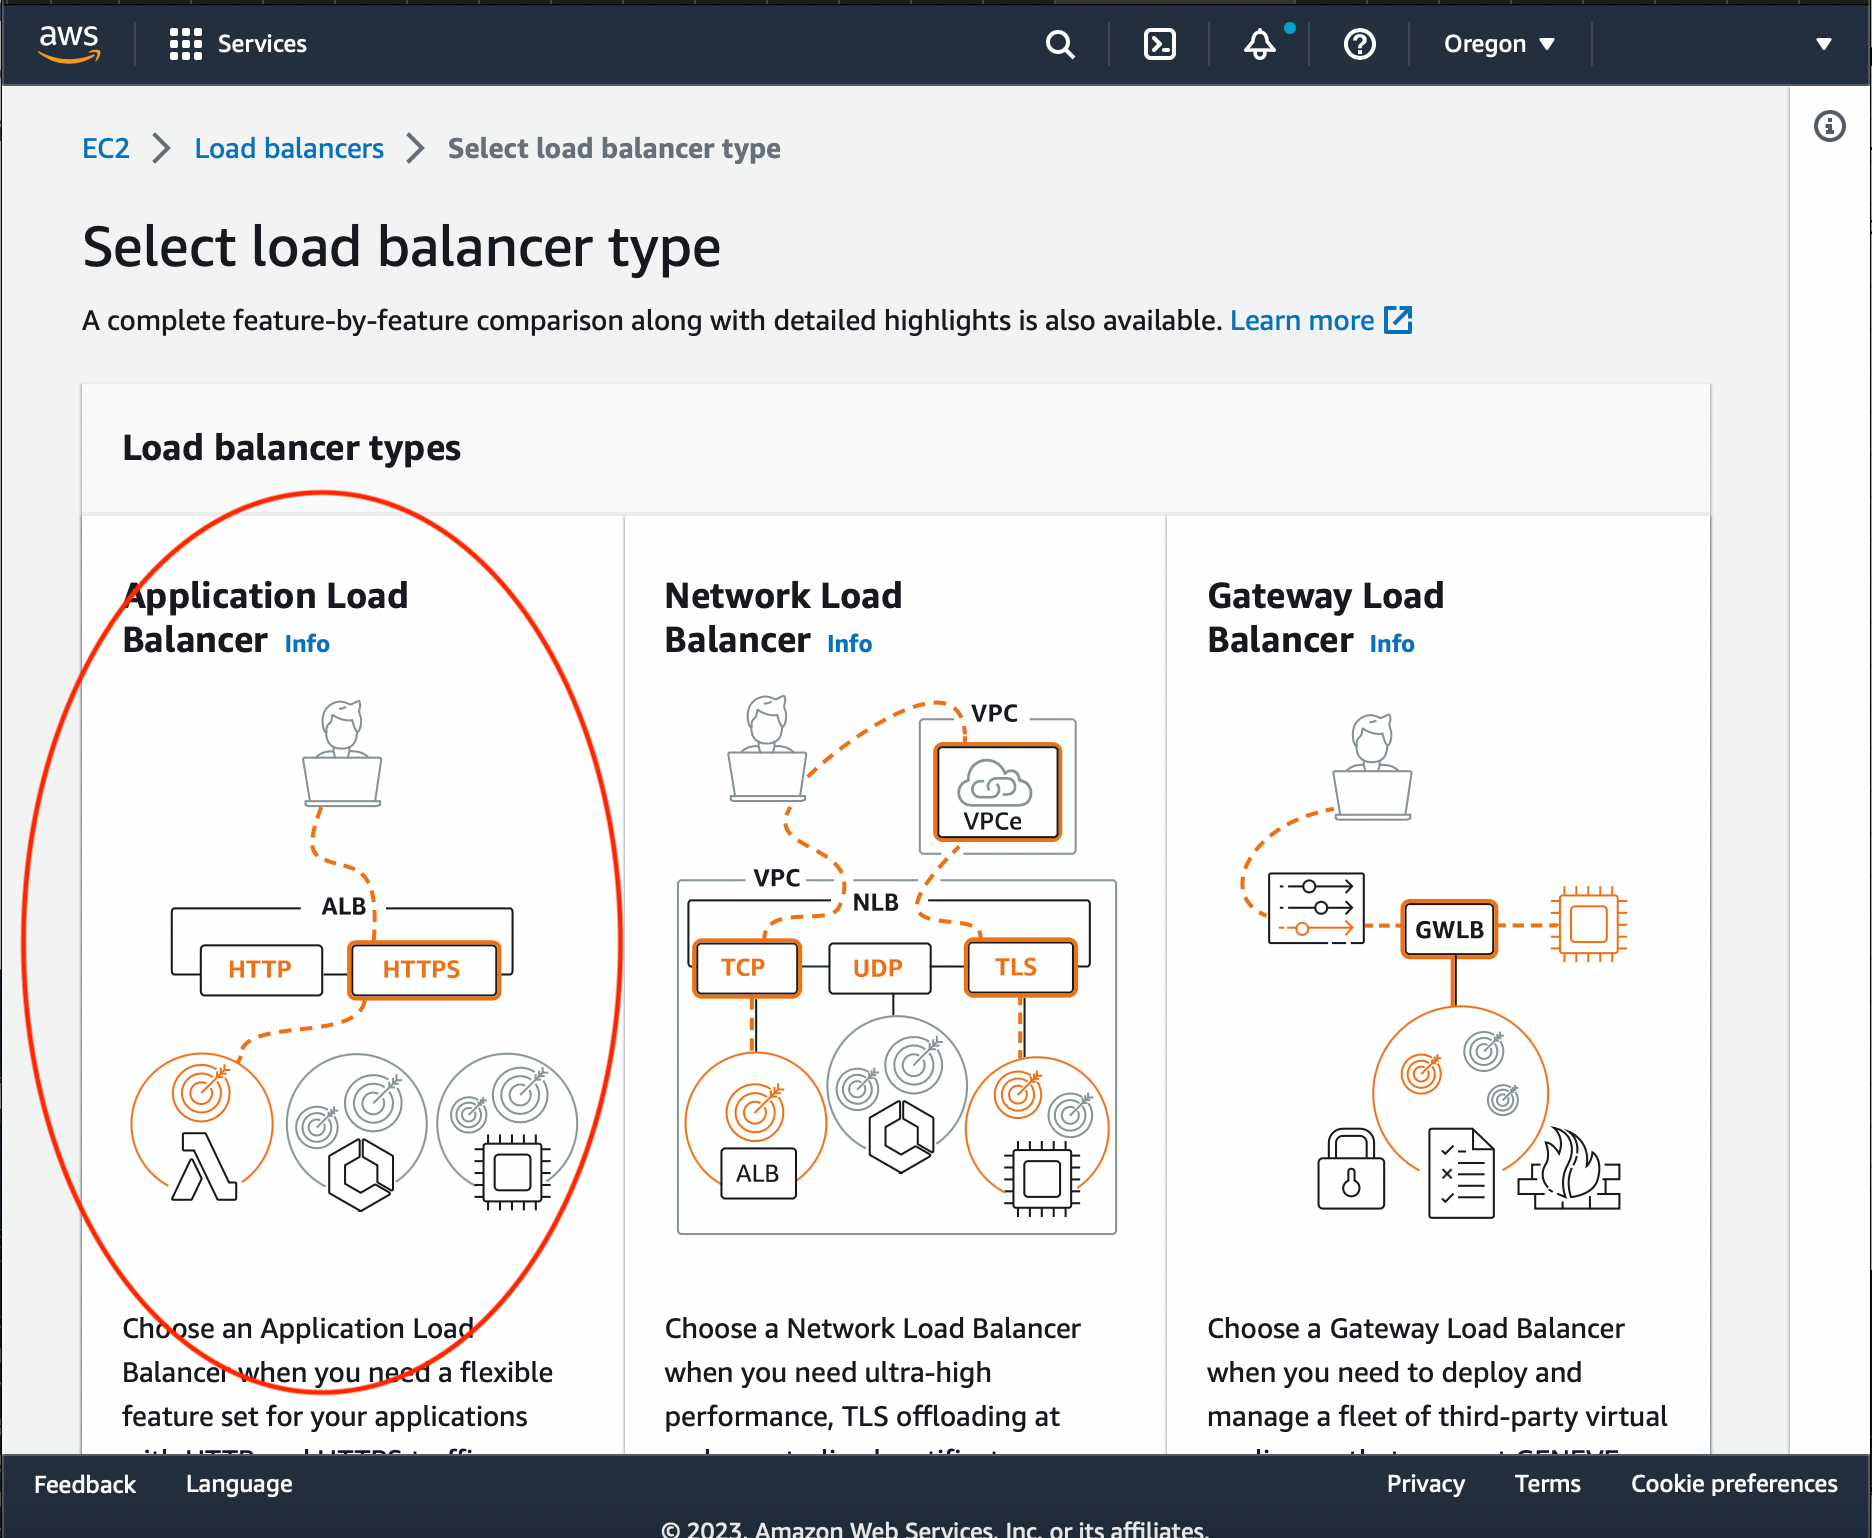
Choose 'Application Load Balancer'.
Name the Load Balancer. Make it to be Internet-facing.
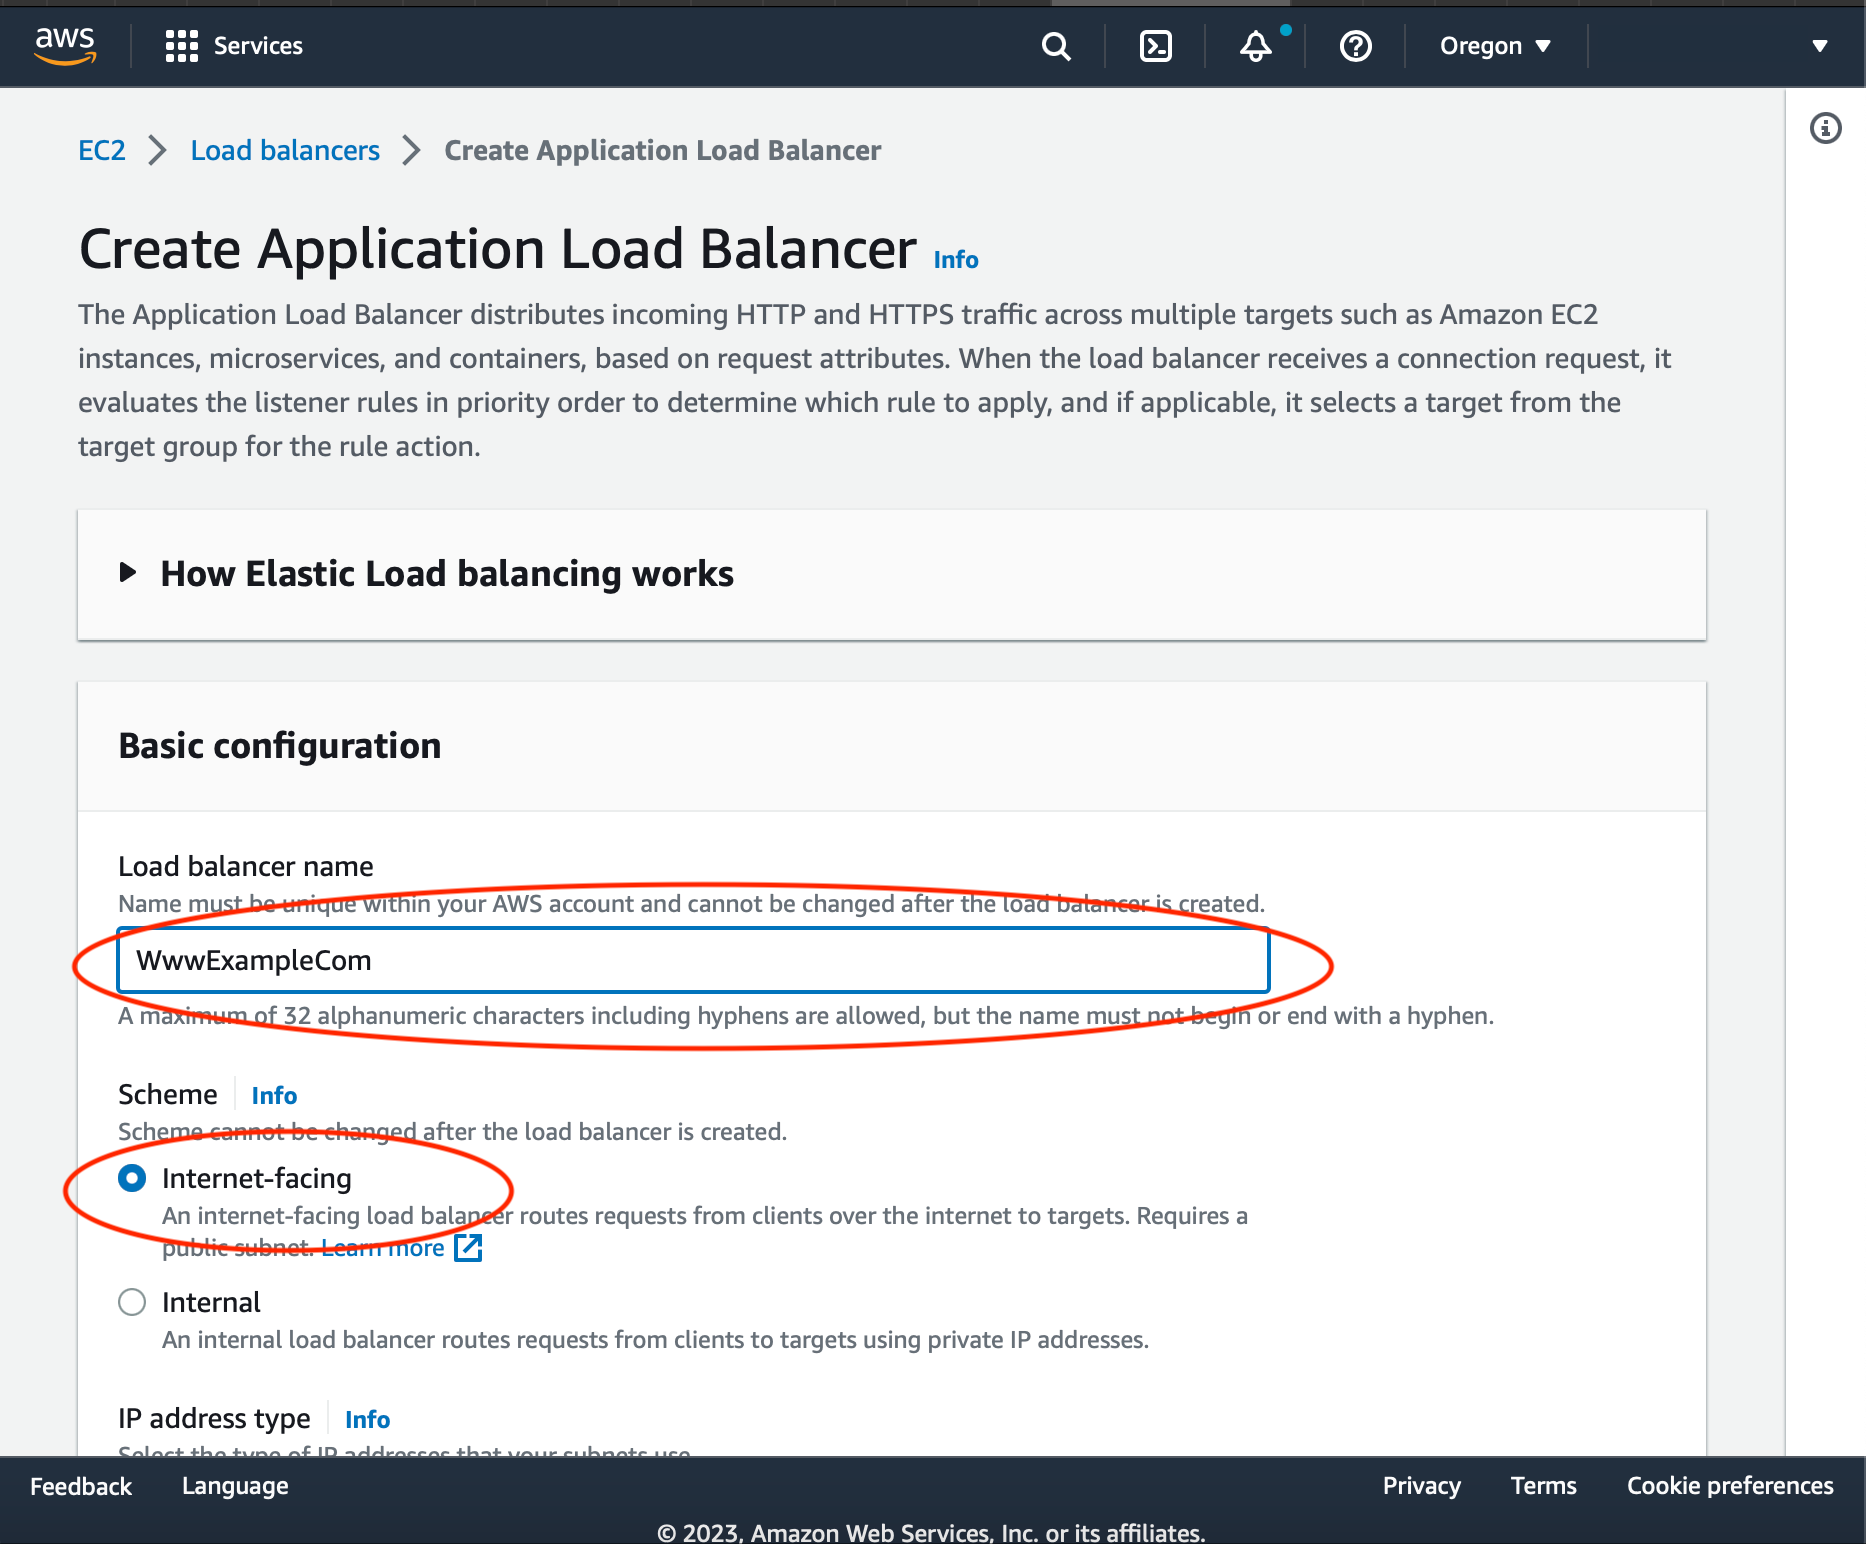
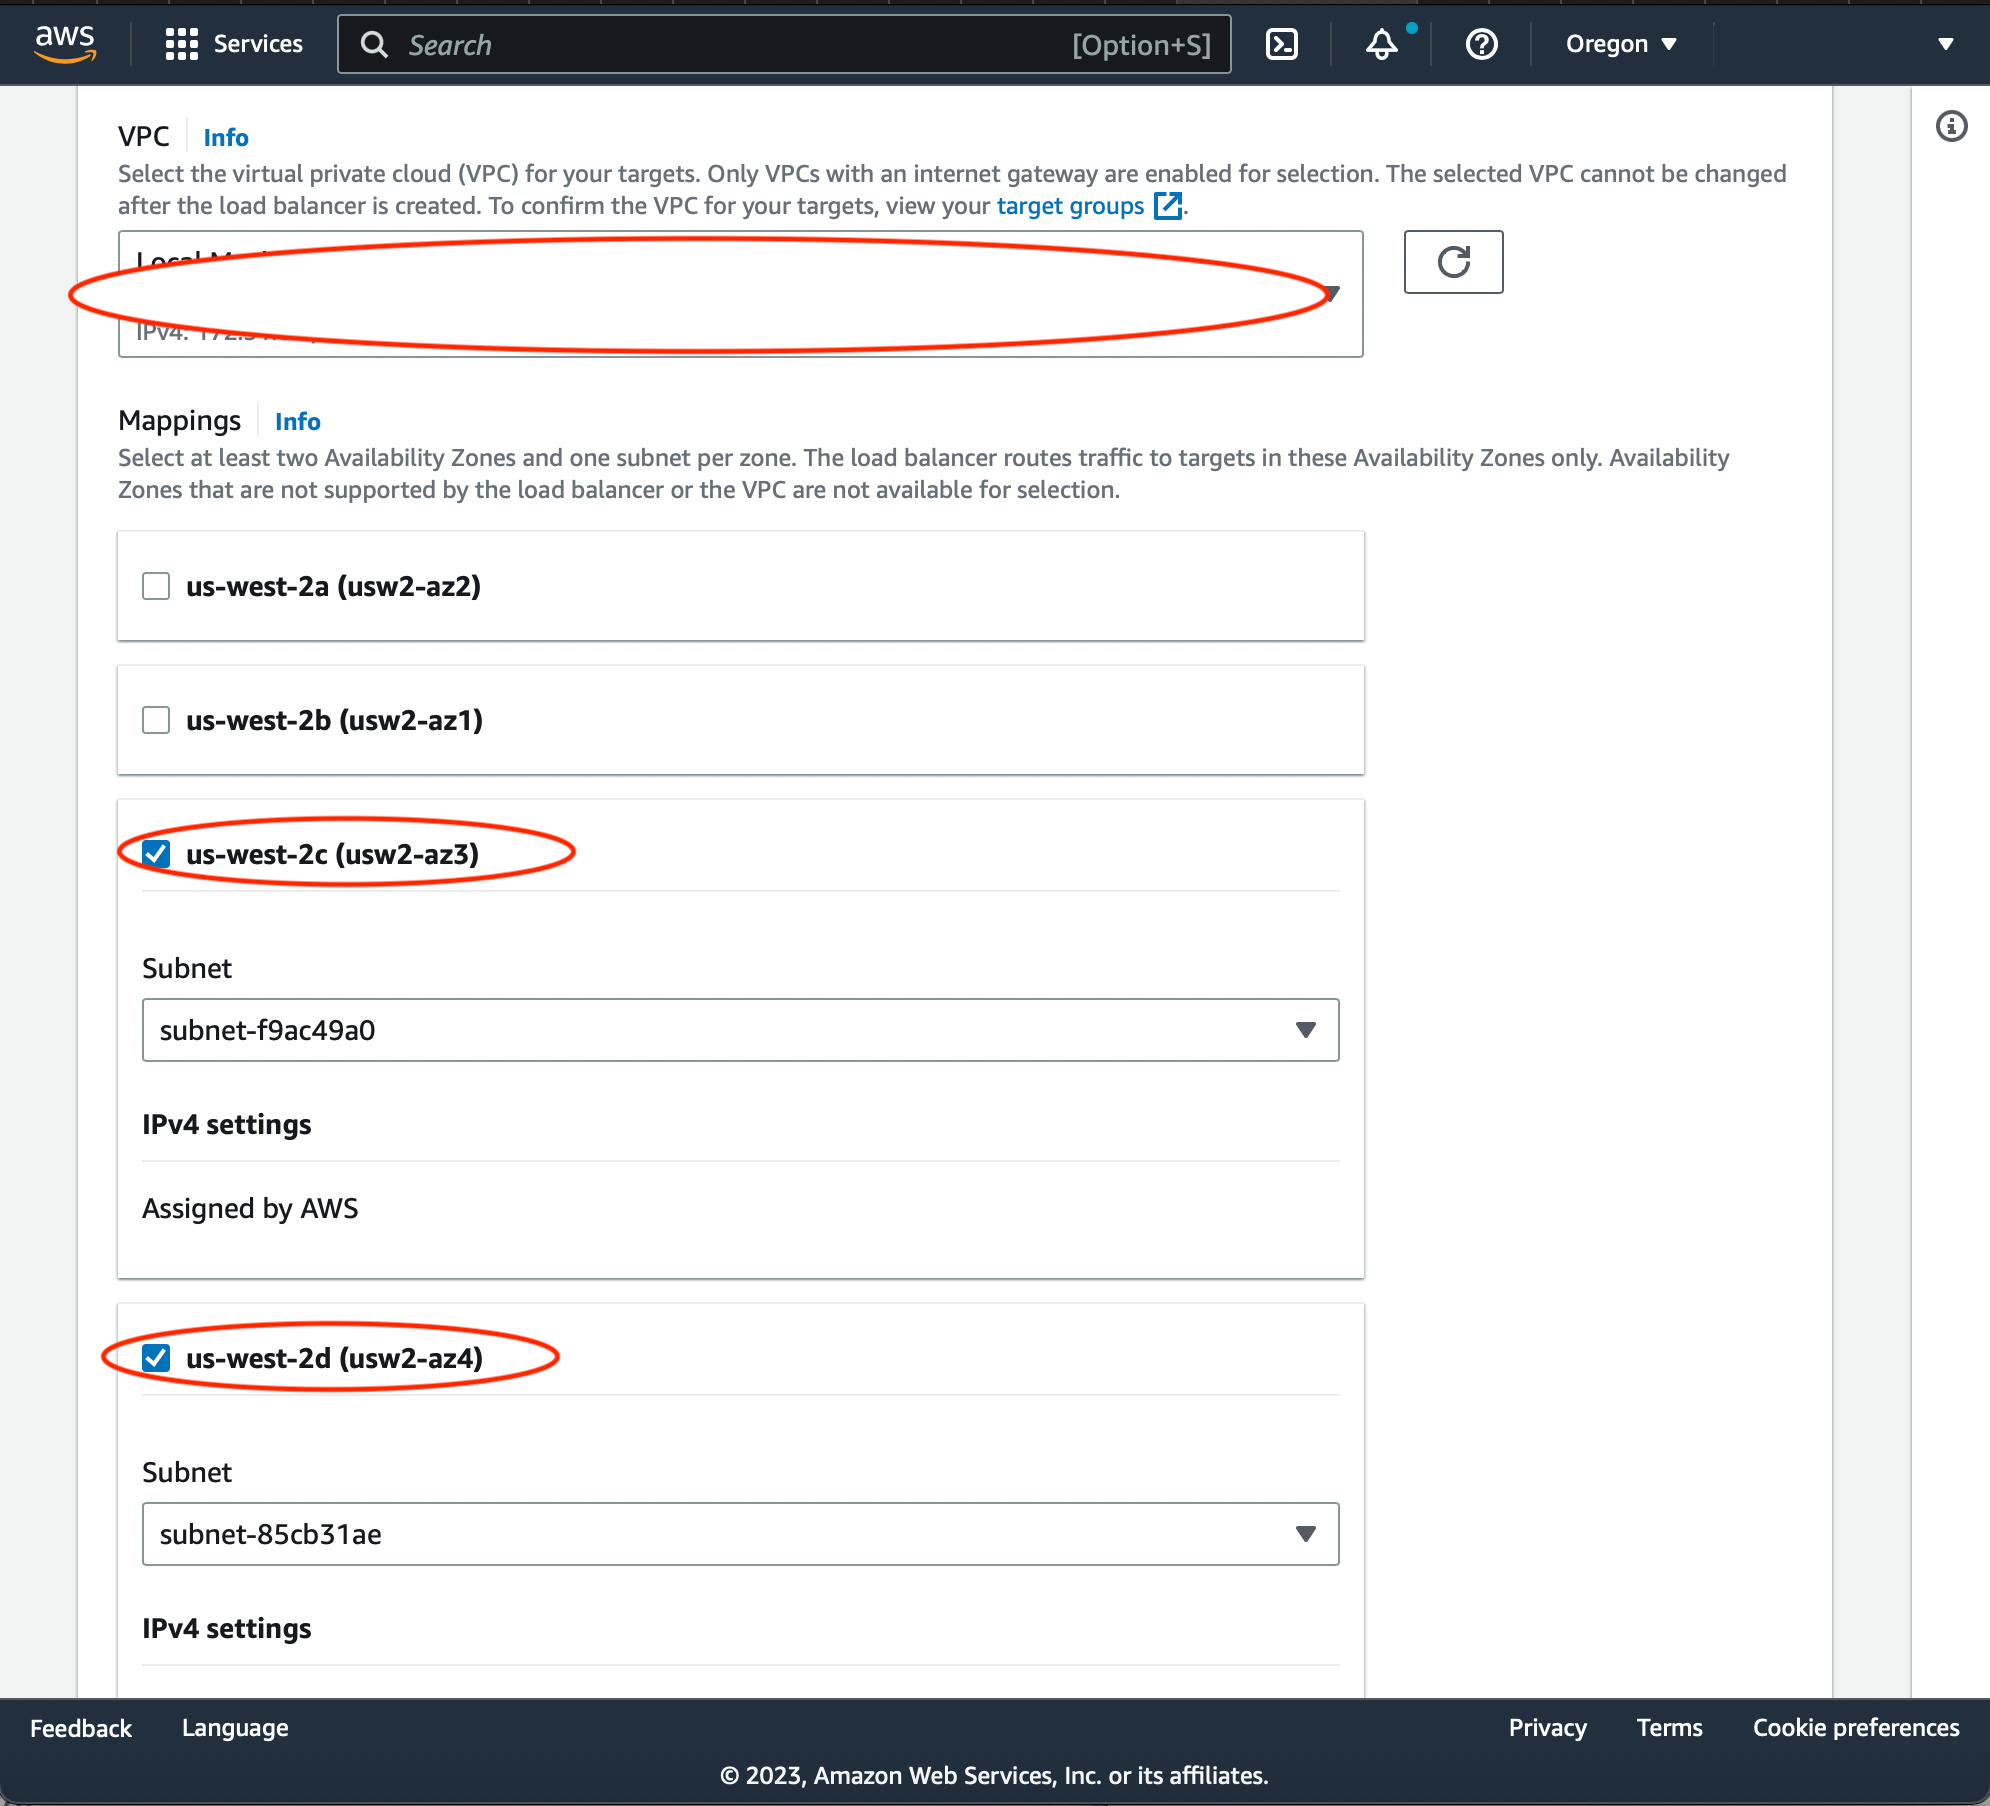
Select VPC and Subnents. VPC and one of the Subnets selected should match the subnet of your EC2 instance.
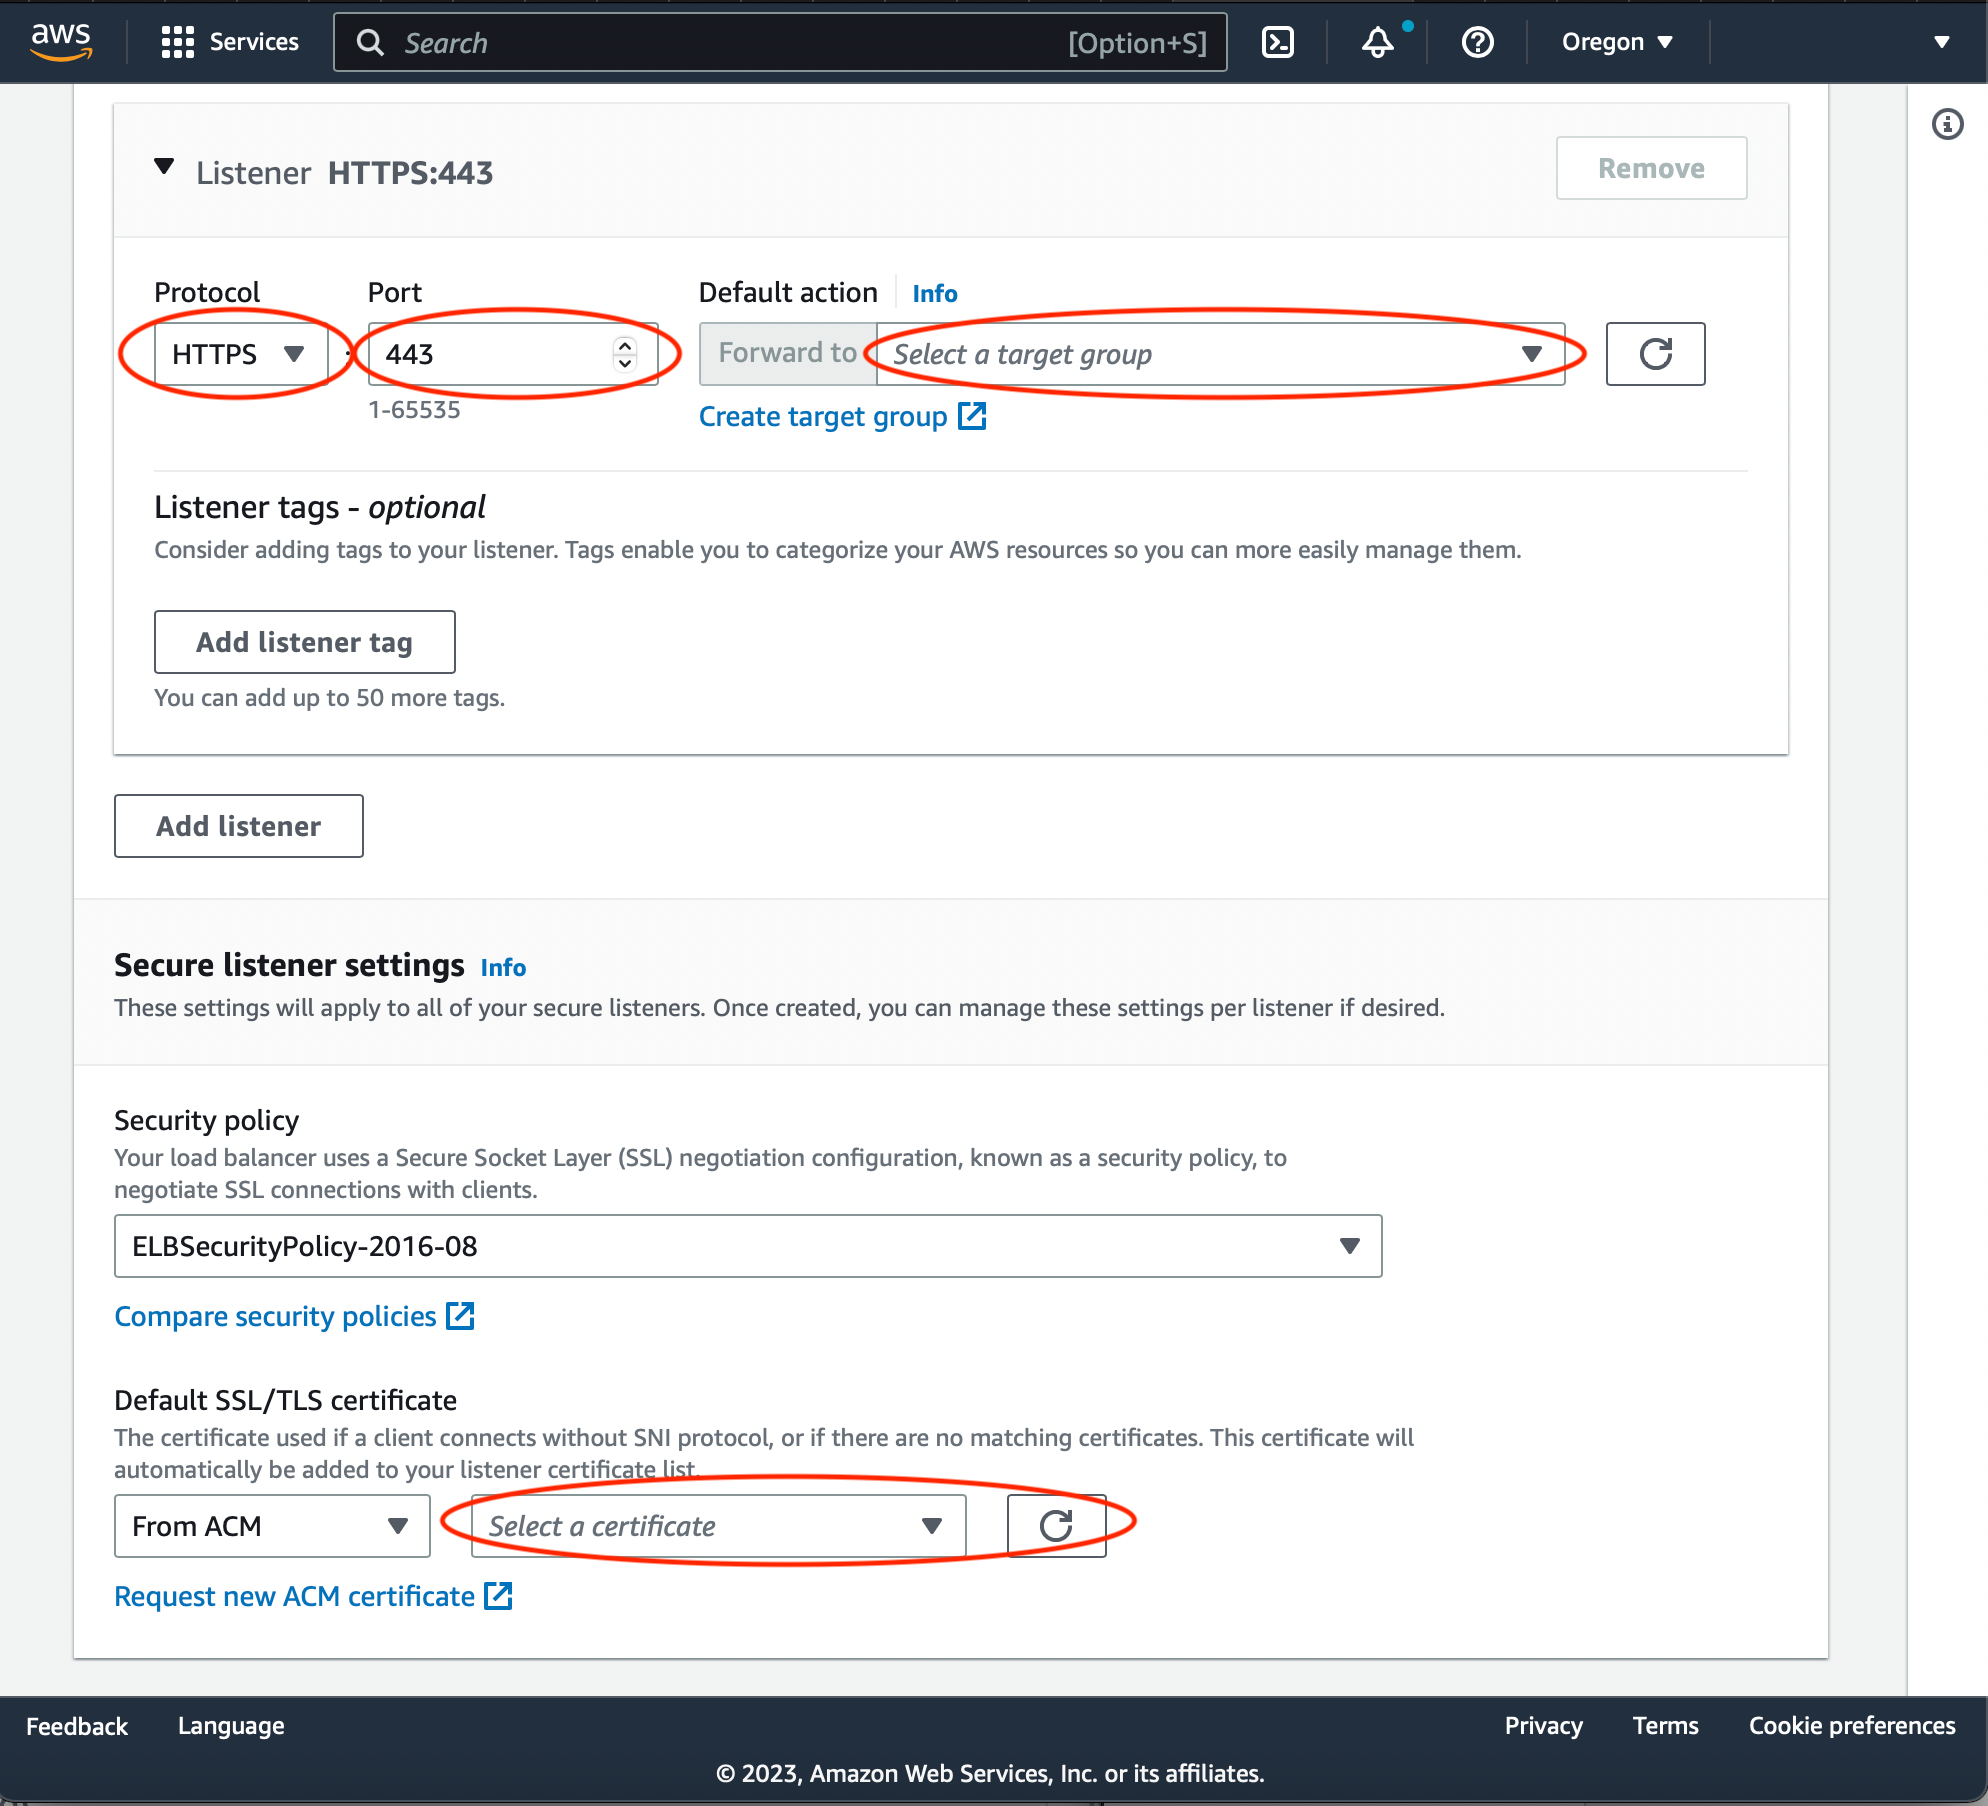
Configure Listener. Choose HTTPS protocol. Port 443. In 'Forward to' section select the target group you have created on a previous step. In Default SSL/TLS certificate section choose 'From ACM' option and select the certificate you have issued in the beginning of this article. Then press 'Create Load Balancer'.
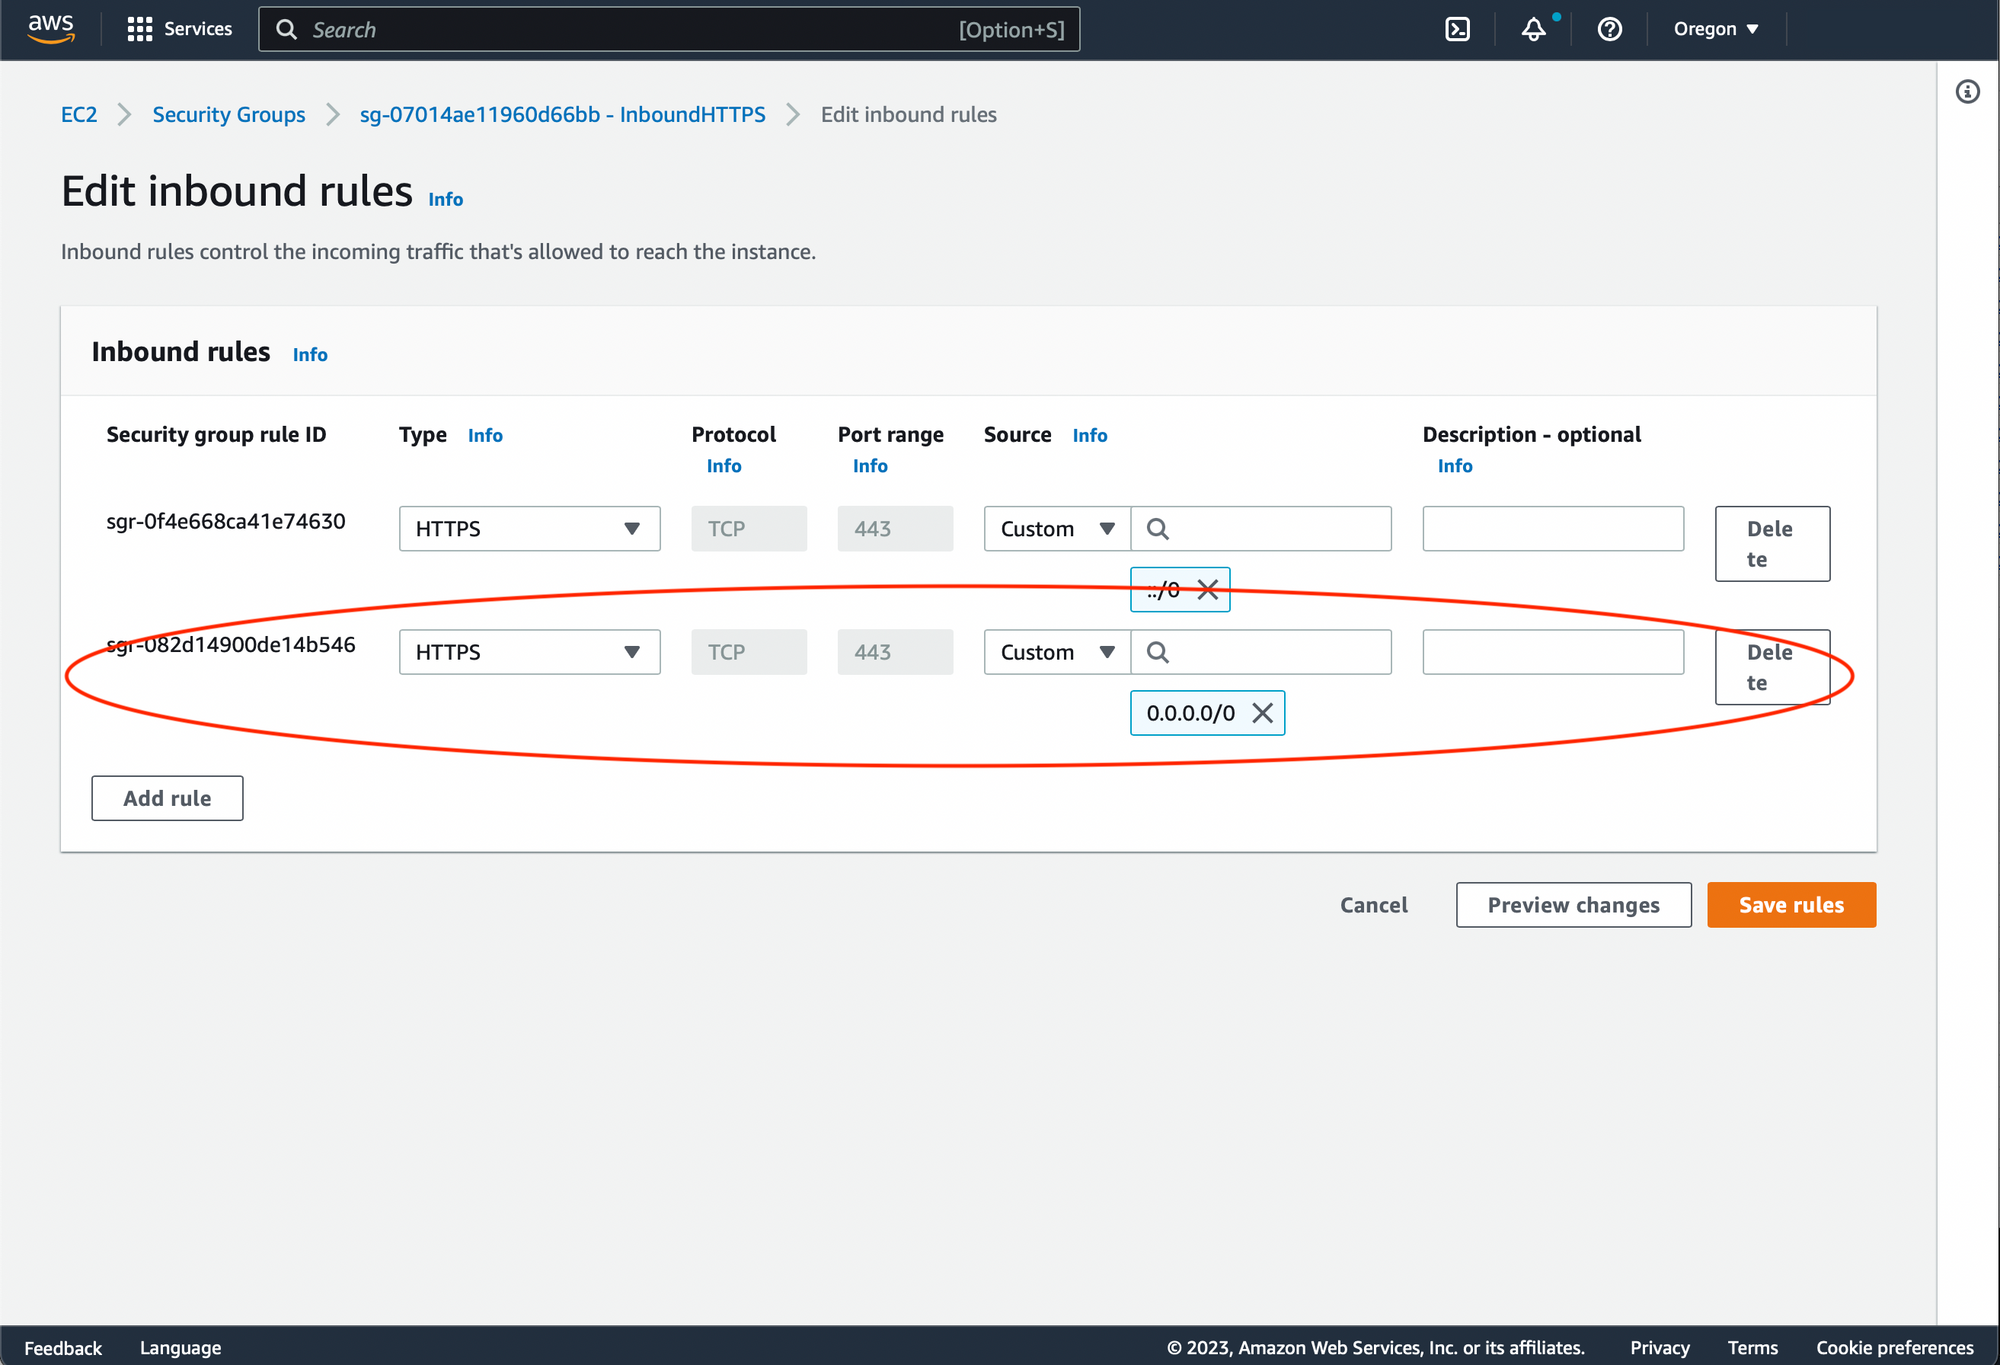
Navigate to the newly created load balancer details. Open 'Security' tab end edit the settings of the load balancer security group. In Inbound rules add 'HTTPS' protocol from all IP addresses:
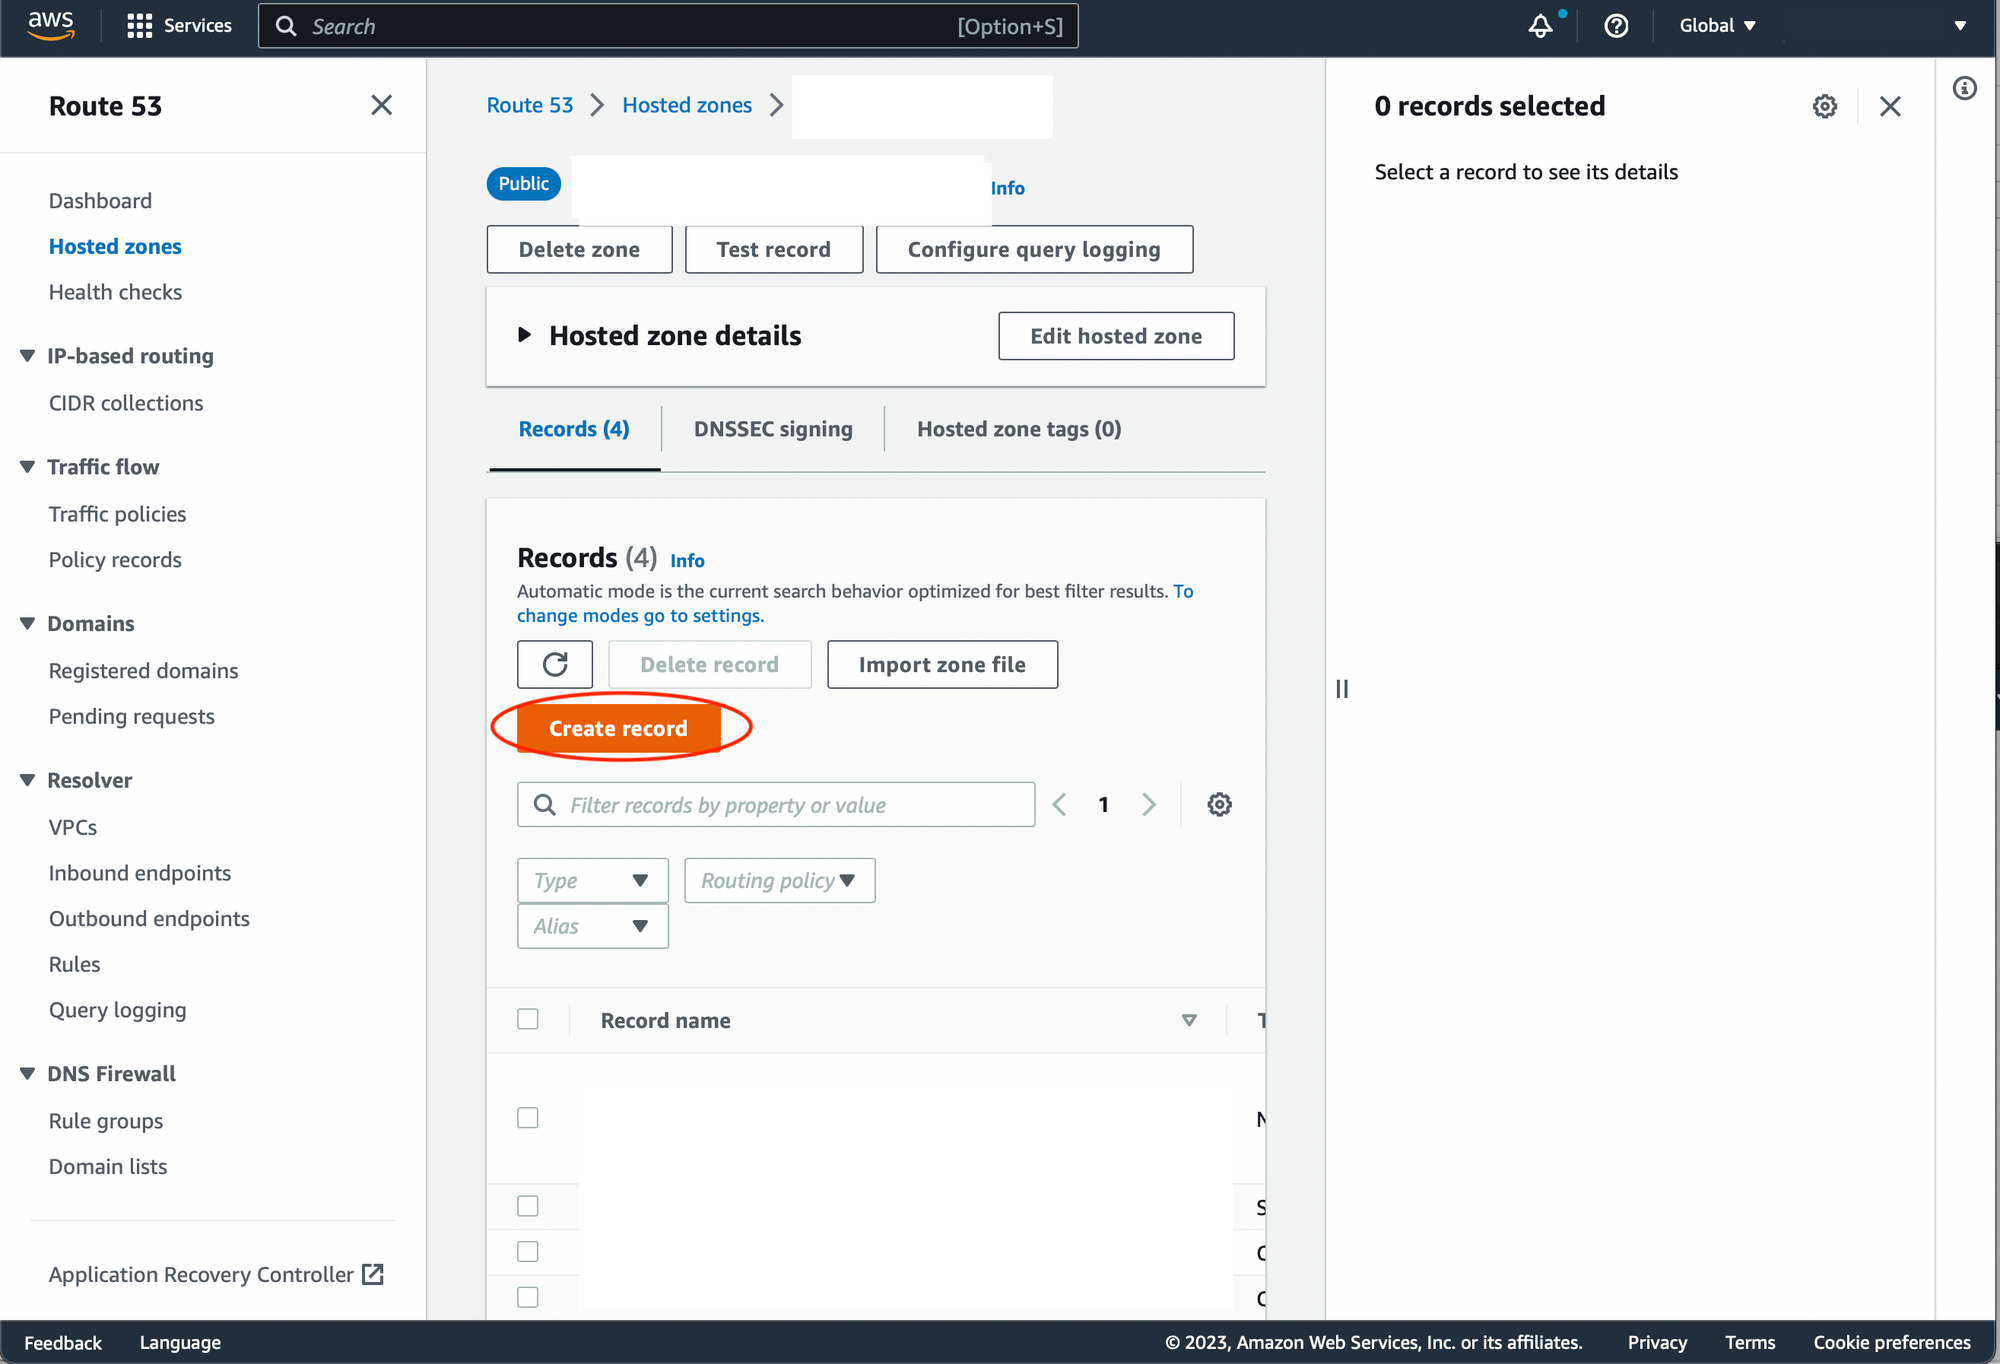
Add DNS Record
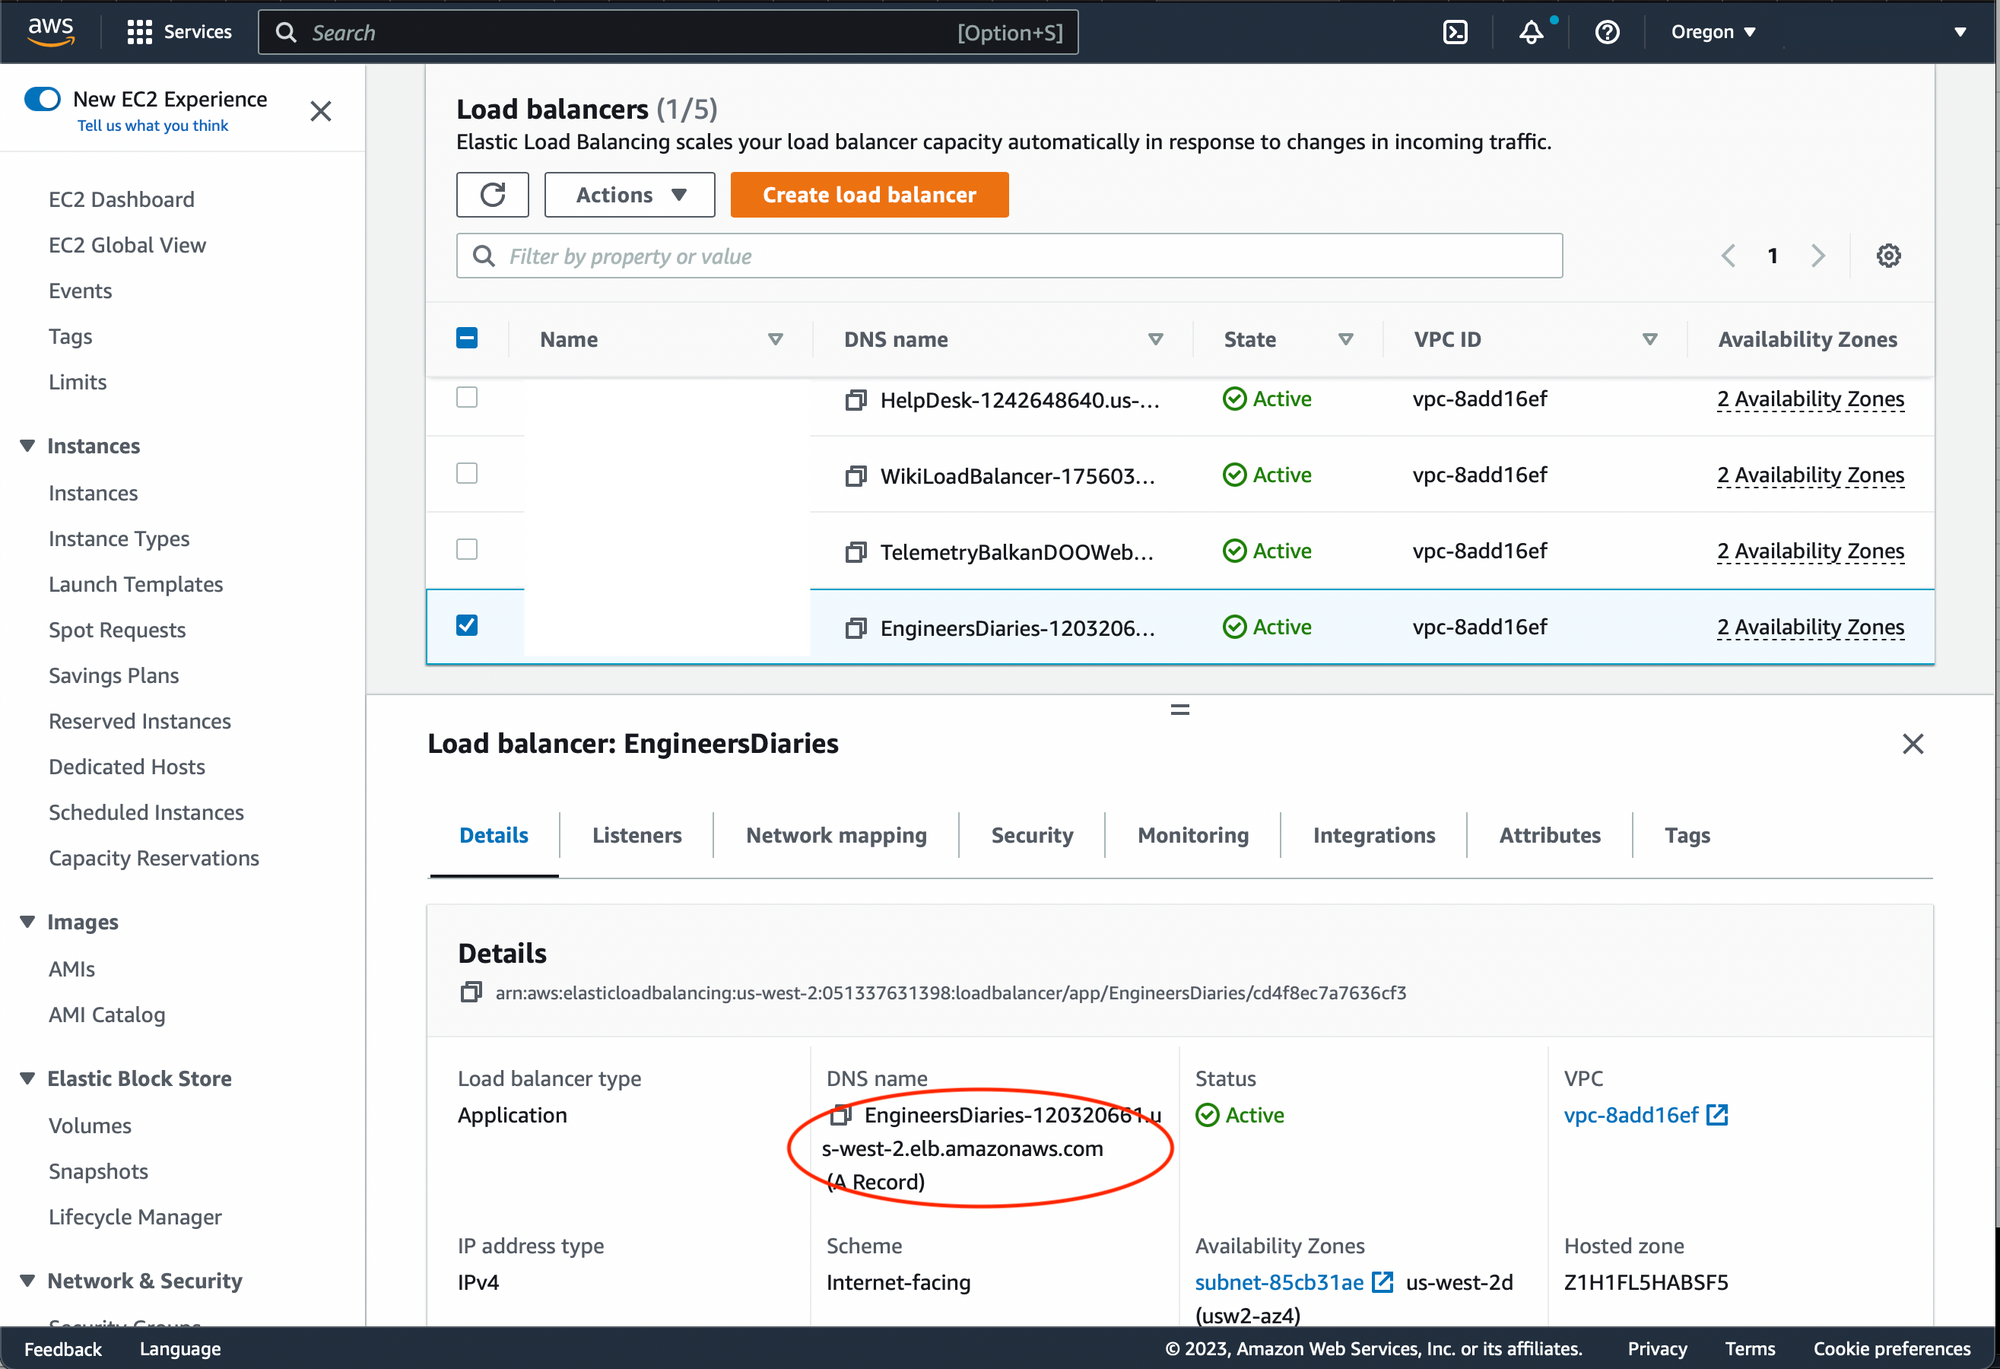
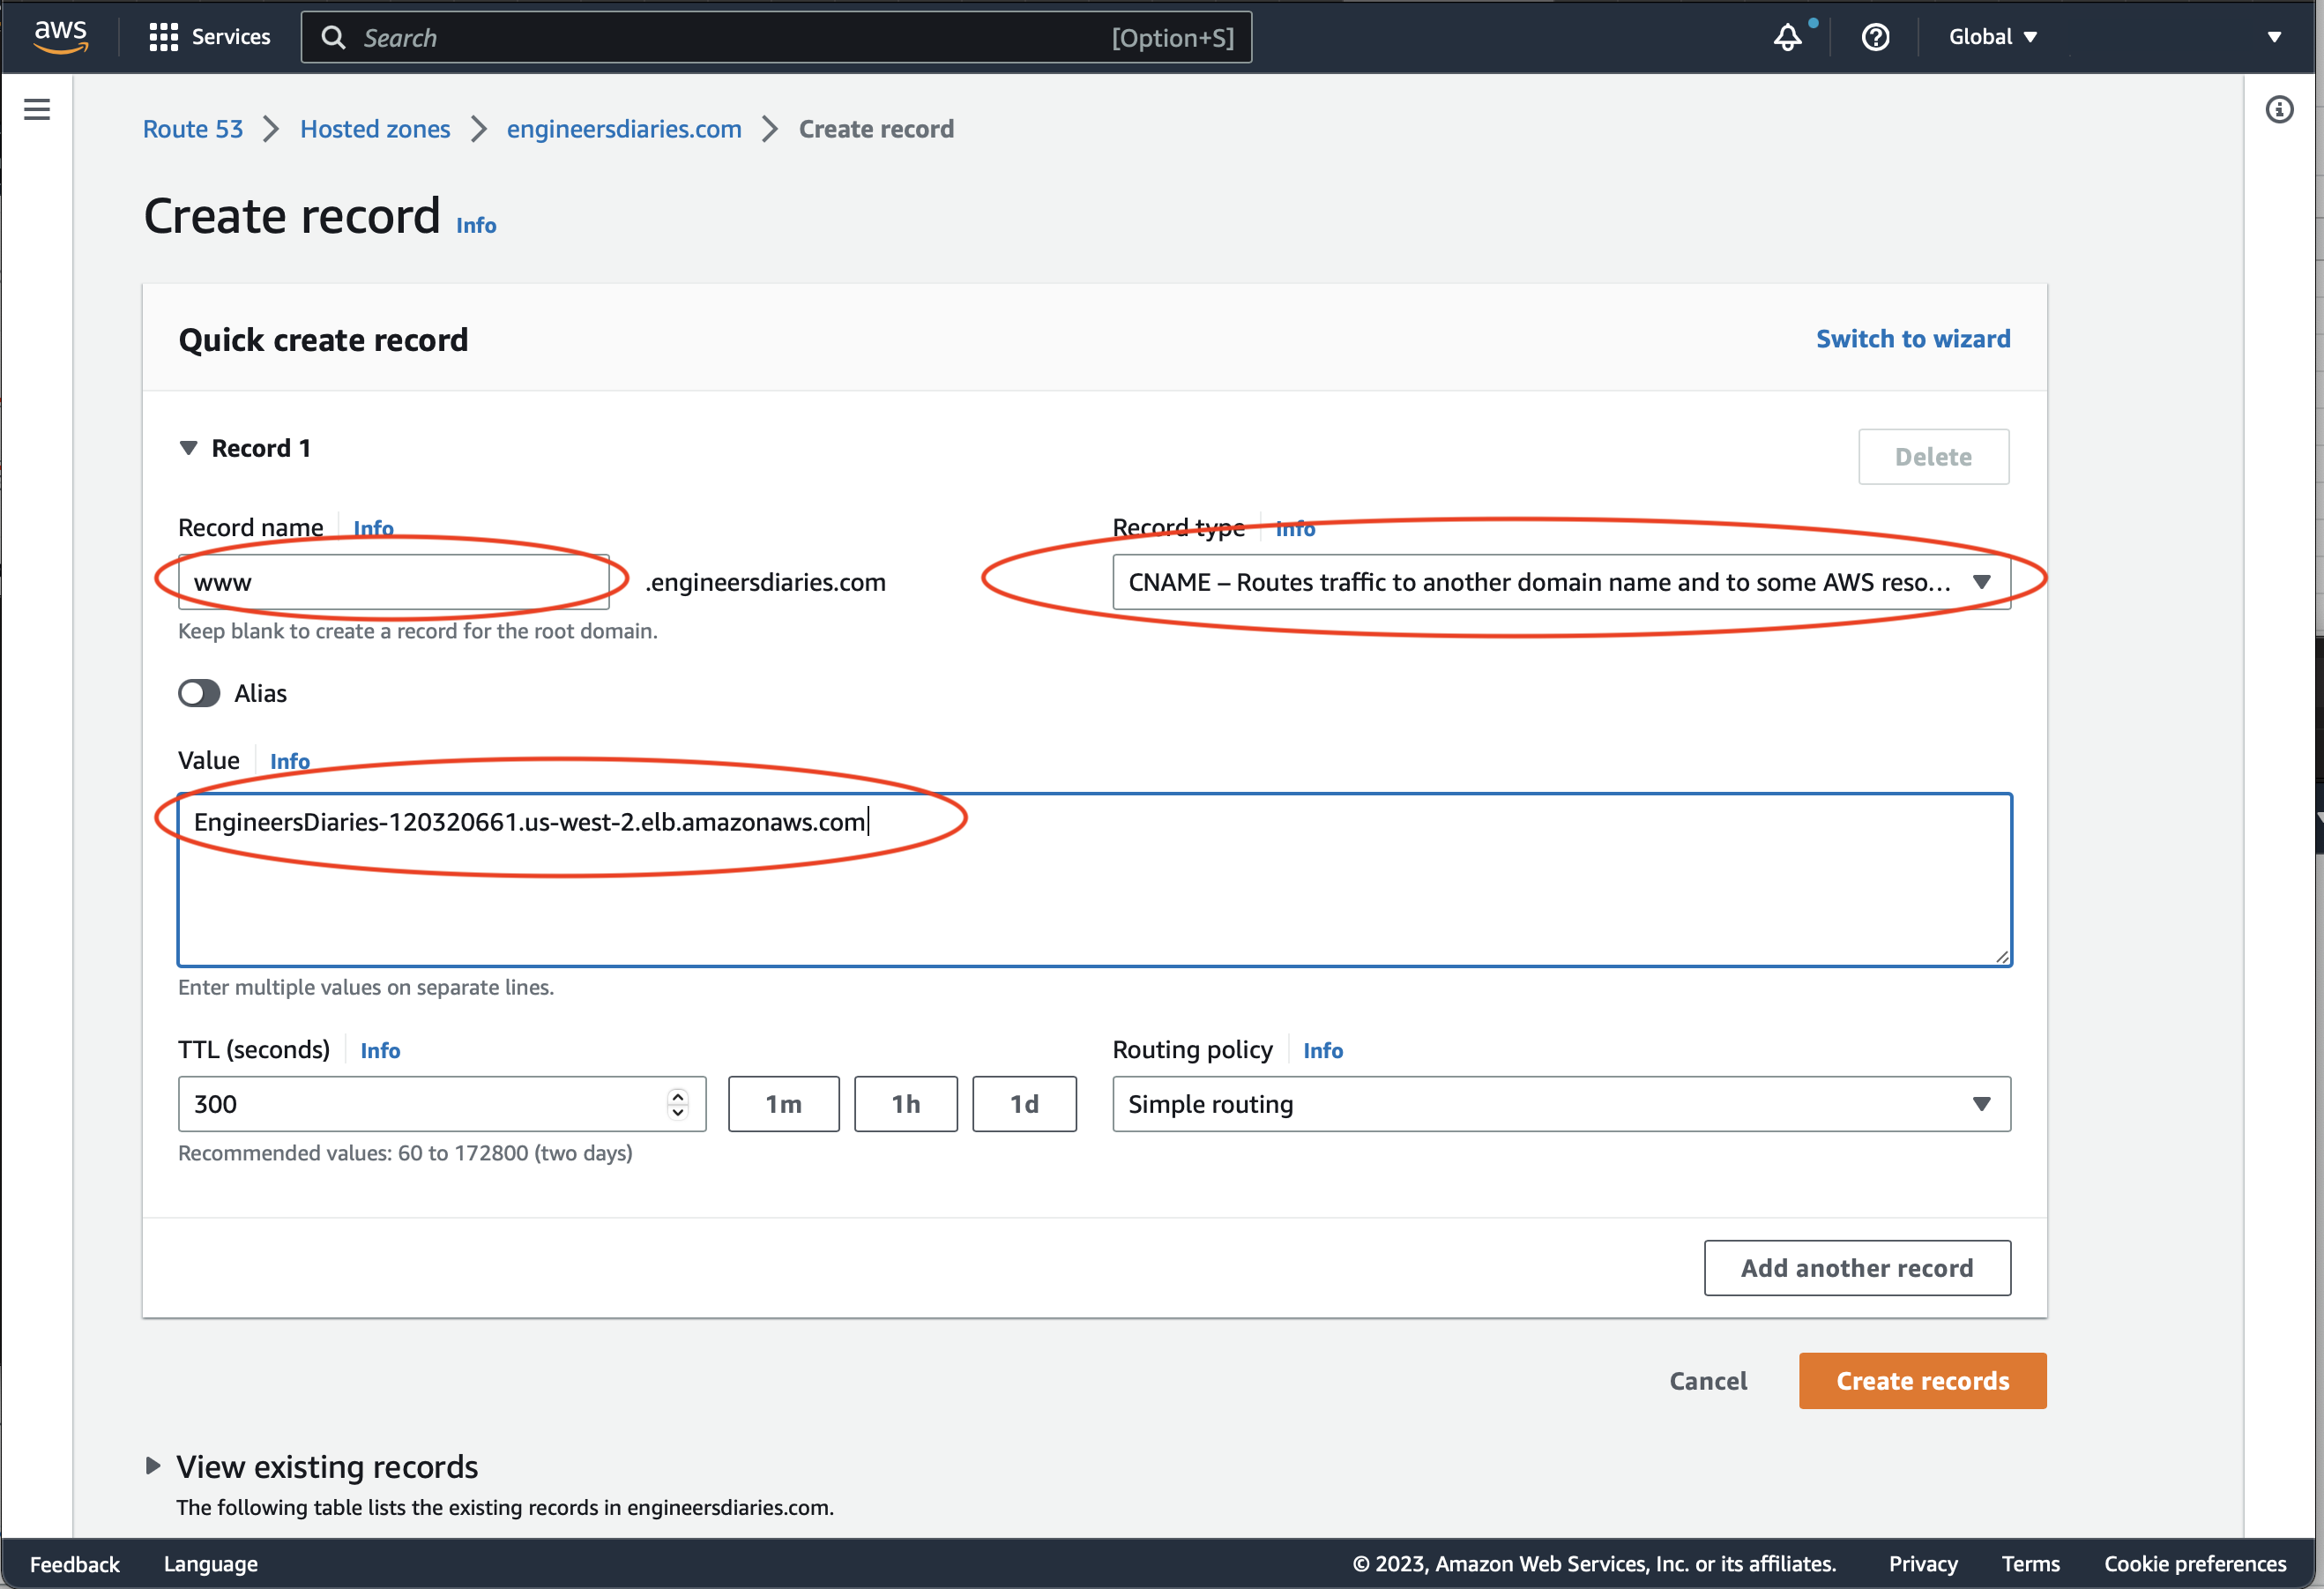
Go to EC2 AWS console. Choose 'Load Balancing' -> 'Load Balancers' from the side menu. Select the just created load balancer and copy the DNS name from the Load Balancer details.
Go to 'Route53' -> 'Hosted Zones'. Open the details of the hosted zone your your domain. Press 'Create record'
Set record name to 'www'. Record type to 'CNAME'. Value - insert the DNS name you copied from the load balancer details. Press 'Create records'.
Setup Ghost
Connect to your EC2 instance:
$ssh -i "<YOUR KEY>.pem" ubuntu@<YOUR EC2 Instance URL>
Install NodeJS 16 (see https://joshtronic.com/2021/05/09/how-to-install-nodejs-16-on-ubuntu-2004-lts/ for more details):
$curl -sL https://deb.nodesource.com/setup_16.x | sudo bash -
$sudo apt-get install -y nodejs
Install Ghost:
$sudo npm install ghost-cli@latest -g
Create directory for your Ghost project:
$mkdir engineersdiaries.com
$cd engineersdiaries.com/
Create the local Ghost installation:
ghost install local
Get the local IP of the EC2 instance:
$ ~/engineersdiaries.com$ ifconfig
eth0: flags=4163<UP,BROADCAST,RUNNING,MULTICAST> mtu 9001
inet 172.31.5.40 netmask 255.255.240.0 broadcast 172.31.15.255
inet6 fe80::8de:37ff:fe8d:c251 prefixlen 64 scopeid 0x20<link>
ether 0a:de:37:8d:c2:51 txqueuelen 1000 (Ethernet)
RX packets 522733 bytes 164400466 (164.4 MB)
RX errors 0 dropped 0 overruns 0 frame 0
TX packets 505137 bytes 78117691 (78.1 MB)
TX errors 0 dropped 0 overruns 0 carrier 0 collisions 0
lo: flags=73<UP,LOOPBACK,RUNNING> mtu 65536
inet 127.0.0.1 netmask 255.0.0.0
inet6 ::1 prefixlen 128 scopeid 0x10<host>
loop txqueuelen 1000 (Local Loopback)
RX packets 786 bytes 89952 (89.9 KB)
RX errors 0 dropped 0 overruns 0 frame 0
TX packets 786 bytes 89952 (89.9 KB)
TX errors 0 dropped 0 overruns 0 carrier 0 collisions 0
Edit the configuration file for Ghost project. URL should match your host URL and Host should be set the the local IP address of the EC2 instance.
$ vi config.development.json
{
"url": "https://www.engineersdiaries.com/",
"server": {
"port": 2368,
"host": "172.31.5.40"
},
"database": {
"client": "sqlite3",
"connection": {
"filename": "/home/ubuntu/engineersdiaries.com/content/data/ghost-local.db"
}
},
"mail": {
"transport": "Direct"
},
"logging": {
"transports": [
"file",
"stdout"
]
},
"process": "local",
"paths": {
"contentPath": "/home/ubuntu/engineersdiaries.com/content"
}
}
Save the file. And restart the Ghost.
ghost restart
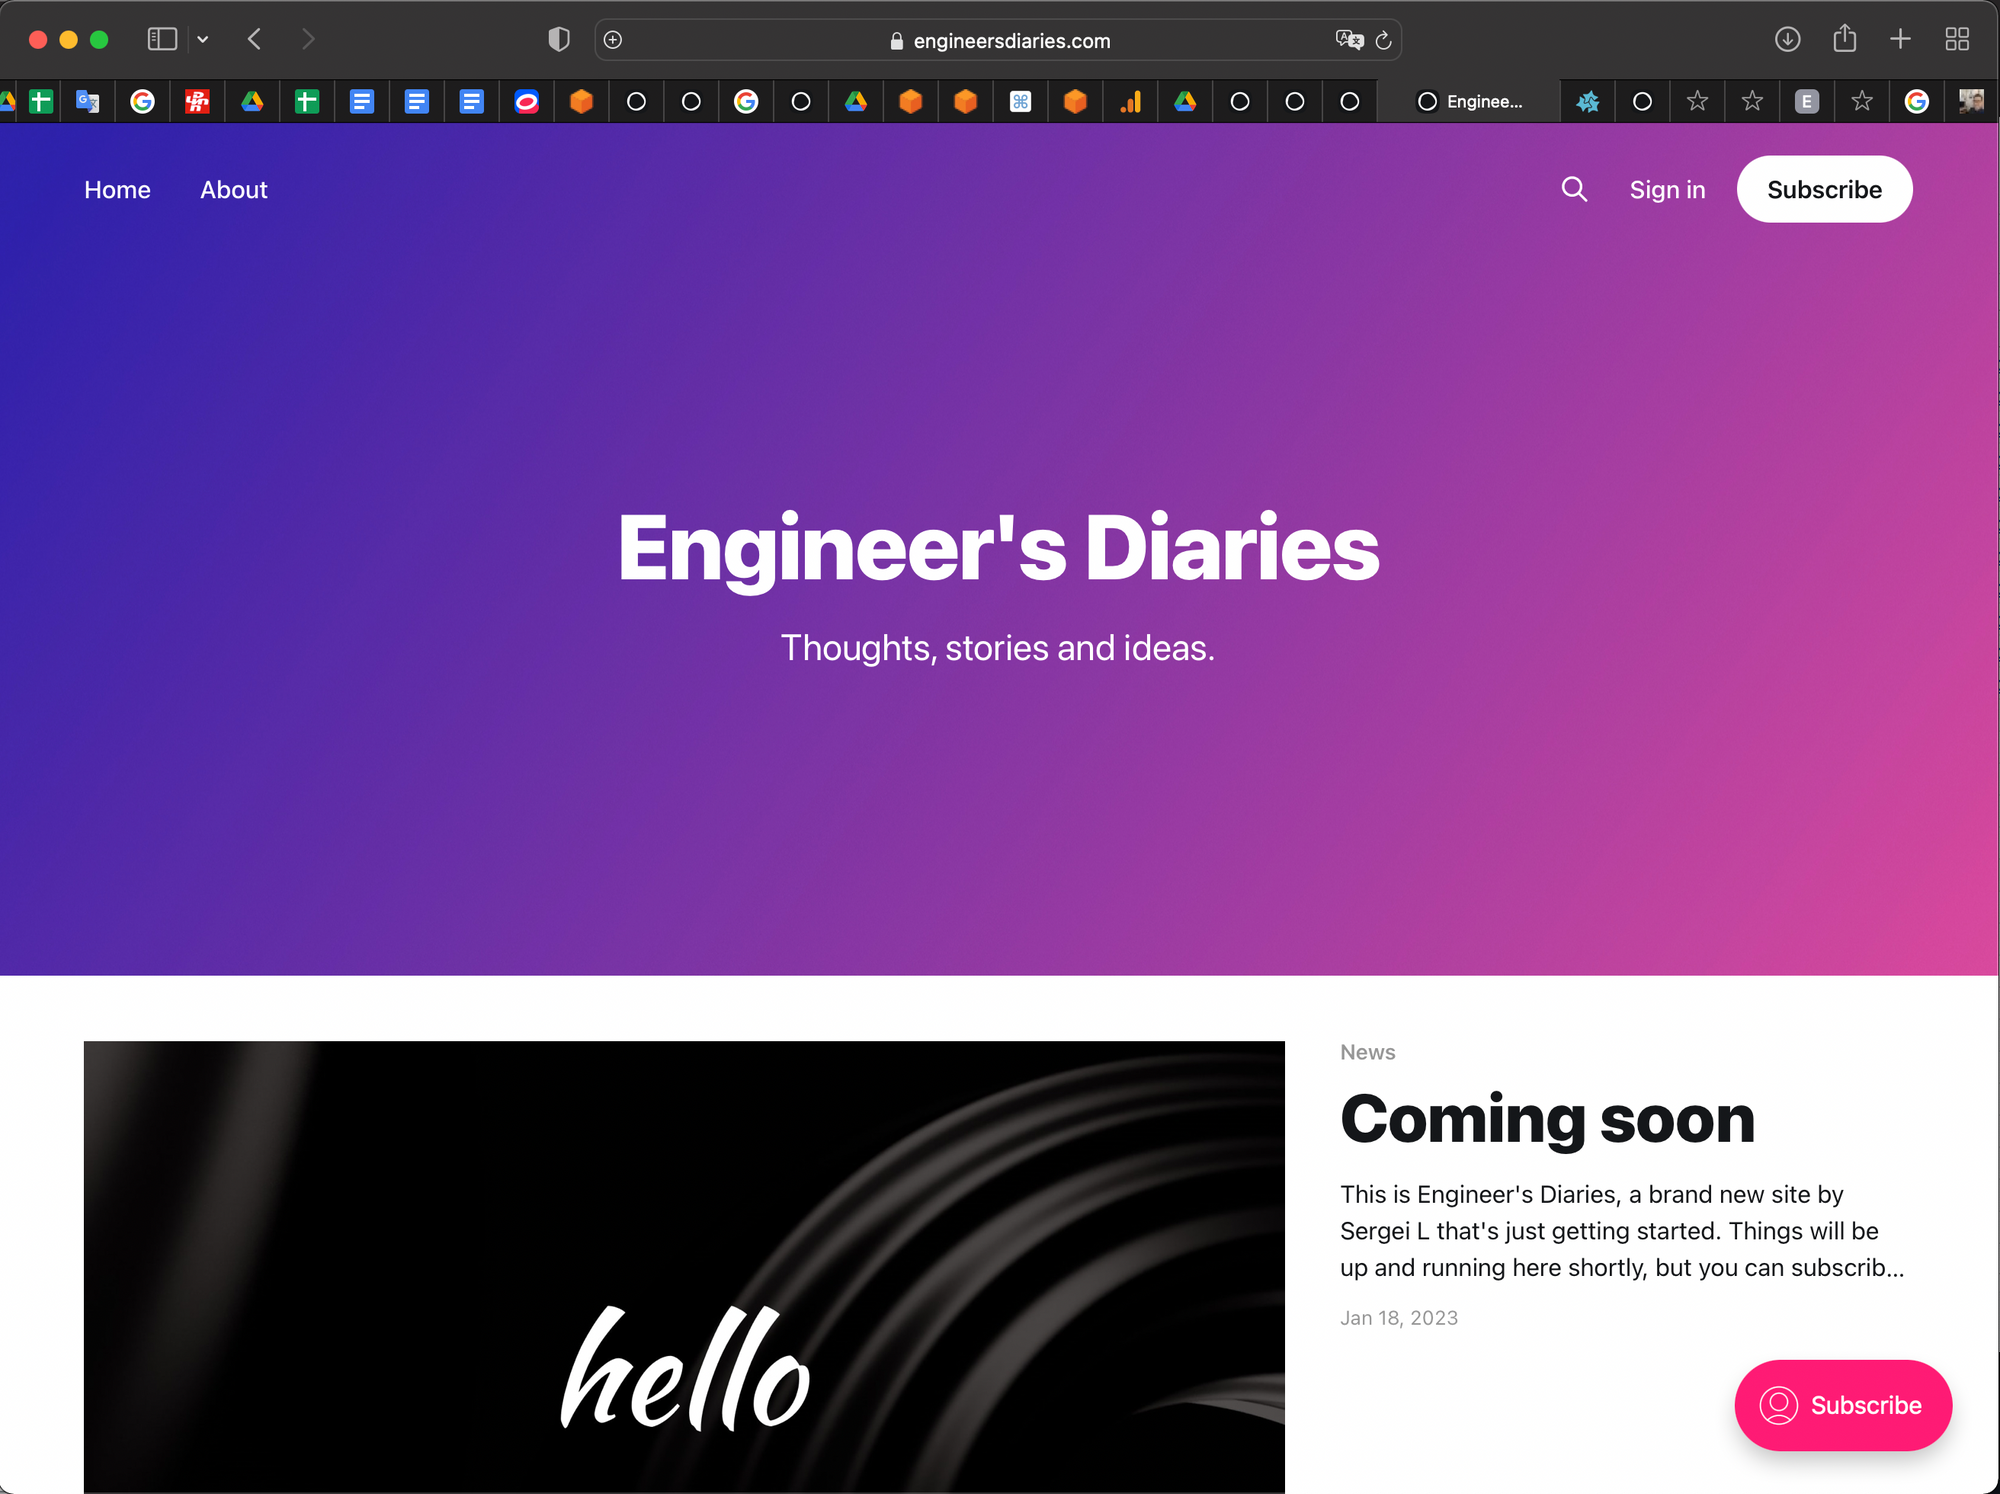
Final Test
Navigate the the URL corresponding to the record that was created in Route 53. E.g. 'www.engineersdiaries.com'. Make sure the site is loading:
you can now navigate to /ghost subroute (e.g. www.engineersdiaries.com/ghost) in order to create your admin account and start posting content on your ghost website.
Conclusions
In the scope of this article we have demonstrated how quickly can the secure website launched by relying on AWS means for organising the HTTPs connection.
Pros
- Minimal support efforts are needed in order to maintain the infrastructure. AWS will take care about the renewal of domain name and TLS certificate.
- No separate database server is required that reduce the run cost and configurational efforts
- The entire site content is stored in a single folder and can be backed up by just copying the entire folder to S3 or pushing it periodically to git repository.
Cons
- The website performace is limited as in local configuration Ghost relies on NodeJS HTTP and uses SQLite DB
- The horizontal scaling is not possible, as the entire content is localted on a single EC2 instance.
Next steps
Organise Backups
The very first step to organise backup is to e.g. impement CRON script that will upload the entire site content to S3 or push it to Git repository.
Move DB to RDS
This will not just improve the performance, but also will allow the horizontal scaling by putting muliple EC2 instances behind load balancer with each of them taking the data from the centralised DB server.
Handle High Loads
- Setup Apache in front of Ghost in order to increate the performance of a signle instance
- Horizontally scale the application by launching multiple EC2 instances behind the load balancer
- Configure ELB auto-scaling group in order to adopt the instances count depending on load.